Drag And Drop in SwiftUI

In this post, we’ll explore how to use Drag & Drop building blocks to create a fun and educational game! Learn how to make players sort trash into the correct bins, just like in the video below:

The goal is to drag and drop items into the correct bins. Newspapers will disappear from the list when placed in the recycling bin, while plastic and glass will be rejected.

The Data

Let’s start with the defition of the data of the element that we want drag:

struct ImageItem: Identifiable {
    var id = UUID()
    var name: String
    var image: String
}

@Observable
class Images  {
    var items: Array<ImageItem> = Array<ImageItem>()
 
    init() {
        items = [
            ImageItem(name: "newspaper", image: "newspaper"),
            ImageItem(name: "plastic", image: "plastic"),
            ImageItem(name: "glass", image: "glass")
        ]
    }
}

We define a struct that includes the name of the element, the image of the element, and a unique ID. After that, we define a class (which is defined as Observable, and is valid starting from iOS 17) that contains the list of elements we want to drag. It’s marked as observable because we need to monitor changes within it.

Visualization

The graphic visualization of the ImageItem is this:

struct ImageUIView: View {
    var imageItem: ImageItem
 
    var body: some View {
        VStack{
            Image(imageItem.image)
                .resizable()
                .frame(width: 150, height: 150)
        }
        .cornerRadius(8)
    }
}

The graphical visualization of the ImageItem is straightforward: it’s a simple image with a fixed size. Additionally, I’ve incorporated a VStack for those who wish to add a text description for the image.

Actions

Now take a look to the main part:

sstruct ContentView: View {
    @State private var images = Images()
    @State private var draggingItem: ImageItem?
    
    var body: some View {
        HStack {
            VStack {
                ForEach(images.items, id: \.id) { imageItem in
                    ImageUIView(imageItem: imageItem)
                        .onDrag({
                            draggingItem = imageItem
                            return NSItemProvider() })
                }
            }
            .frame(width: 150)
            .frame(maxHeight: 150)
            .padding(.leading)

            Spacer()
            
            VStack {
                Image(systemName: "trash")
                .resizable()
                .frame(width: 280, height: 220)
                .background(Color.gray.opacity(0.25))
                .border(.yellow, width: 1)
                .padding(.trailing)
                .onDrop(of: [.text], delegate: DropViewDelegate(items:$images.items, draggedItem: $draggingItem))
            }
        }
    }
}

We define the variables for the images specified in the previously defined class, along with a draggingItem, an optional variable that holds the element we are currently dragging. When we invoke the onDrag method, draggingItem gets set, and the closure returns an NSItemProvider(). This is described in the Apple documentation as follows: “An item provider for conveying data or a file between processes during drag-and-drop or copy-and-paste activities, or from a host app to an app extension”.

In the onDrop method, we specify the types that we want to consider, in this case, text, along with a delegate. This involves using the list of items and the draggingItem as follows:

struct DropViewDelegate: DropDelegate {
    @Binding var items: [ImageItem]
    @Binding var draggedItem: ImageItem?
    
    func performDrop(info: DropInfo) -> Bool {
        items.remove(at: 0)
        return true
    }
    
    func validateDrop(info: DropInfo) -> Bool {
        if let draggedItem = draggedItem, draggedItem.name == "newspaper" {
            return true
        }
        return false
    }
}

The first function to be called is validateDrop. In this instance, it checks the name of the image, so the drop action is validated/accepted based on the value of the name.

If the validation is successful, the drop action is performed by executing the code within performDrop. In this example (to keep it brief), we remove the first element of the list, which is the newspaper. In a real-world scenario, we could apply a filter to the items.

Enjoy creating your game.

Note: English is not my native language, sorry for any errors. I use AI only to generate the banner of the post, the content is human.

Tap Gesture and List in SwiftUI

In this post, we’ll explore how to utilize tap gestures within a list. Our objective is:

Therefore, we have a list of options (or whatever you prefer) that we can enable or disable.

We will define an Option type:

struct Option: Identifiable {
    let id = UUID()
    var name: String
    var enabled: Bool
}

In the view, we declare a list that iterates over a list of options, retrieving both the index and the element for each iteration. For each individual element, we display the name. If the enable option is set to true, we also display an image of a checkmark. When the user taps on a row, the status of the property is toggled.

struct ContentView: View {
    @State var options = [Option(name: "Option1", enabled: false),
                   Option(name: "Option2", enabled: false),
                   Option(name: "Option3", enabled: false)]
    
    var body: some View {
        List(Array(options.enumerated()), id: \.offset) { index, option in
            HStack() {
                Text(option.name)
                Spacer()
                if option.enabled {
                    Image(systemName: "chevron.down")
                        .foregroundColor(.gray)
                }
            }.contentShape(Rectangle())
            .onTapGesture {
                options[index].enabled = !options[index].enabled
            }
        }
    }
}

Note that we add a contentShape to cover the entire width of the list, and it’s on this shape that the onTap gesture is applied. The options are declared as a @State because we need to change the ‘enabled’ value, and these changes must be propagated to the UI.

Note: English is not my native language, sorry for any errors. I use ChatGPT only to generate the banner of the post, the content is human.

Drag gesture with SwiftUI

In this post, we’ll learn how to use a drag gesture to check the scrolling direction of a list. The goal is to hide the tab bar and change the appearance of a floating button based on whether the list is scrolling up or down, similar to the behavior of the Gmail app. (Check the code from previous post floating-button-in-swiftui).

First step: Define the two different styles for the Floating Button:

struct FullFB: View {
    var body: some View {
        Label("write", systemImage: "pencil")
        .font(.title.weight(.semibold))
        .padding()
        .background(.pink)
        .foregroundStyle(.white)
        .clipShape(RoundedRectangle(cornerSize: CGSize(width: 40, height: 40)))
        .shadow(radius: 4, x: 0, y: 4)
    }
}

struct SmallFB: View {
    var body: some View {
        Image(systemName: "pencil")
        .font(.title.weight(.semibold))
        .padding()
        .background(.pink)
        .foregroundStyle(.white)
        .clipShape(Circle())
        .shadow(radius: 4, x: 0, y: 4)
    }
}

The code should be self-explanatory: the first style is a rounded rectangle button featuring both text and an icon, while the second style is a circular button with only an icon.

Now take a look to the list:

List(initList(), id:\.self) { mail in
                        HStack {
                            Text(mail)
                            Spacer()
                        }
                    }
                    .gesture(
                        DragGesture().onChanged { value in
                            if value.translation.height > 0{
                                tabbarVisibility = .visible
                            } else {
                                tabbarVisibility = .hidden
                            }
                        }
                    ).toolbar(tabbarVisibility, for: .tabBar)

We display a list of text, but we also attach a gesture to the list. When the DragGesture changes its value, we check the translation. If it’s greater than zero, the list is scrolling up, and we set the tab bar visibility to visible. In any other case, it’s set to hidden.

The complete code is:

struct ContentView: View {
    @State var tabbarVisibility: Visibility = .visible
    var body: some View {
        TabView {
            NavigationStack {
                ZStack {
                    List(initList(), id:\.self) { mail in
                        HStack {
                            Text(mail)
                            Spacer()
                        }
                    }
                    .gesture(
                        DragGesture().onChanged { value in
                            if value.translation.height > 0{
                                tabbarVisibility = .visible
                            } else {
                                tabbarVisibility = .hidden
                            }
                        }
                    ).toolbar(tabbarVisibility, for: .tabBar)
                    .padding()
                    
                    VStack {
                        Spacer()
                        HStack {
                            Spacer()
                            NavigationLink { EmptyView()} label: {
                                if tabbarVisibility == .visible {
                                    FullFB()
                                } else {
                                    SmallFB()
                                }
                                                            
                            }.padding()
                        }
                    }.padding()
                }
            }.tabItem {
                Label("Emails", systemImage: "envelope")
            }
            Text("Second tab")
            .tabItem {
                Label("Video", systemImage: "video")
            }
        }
        
    }
    func initList() -> [String] {
        var emails = [String]()
        for i in 1000000...1000100 {
            emails.append("Email " + String(i))
        }
        return emails
    }
}

The tabbarvisibility is also used to determine which type of floating button to display.

Towards coding and beyond… If you’d like to stay updated with the latest content from my blog, consider subscribing to my weekly newsletter.

Note: English is not my native language, sorry for any errors. I use ChatGPT only to generate the banner of the post, the content is human.

Floating button in SwiftUI

The Apple User Interface Guidelines don’t mention floating buttons, and there is no native component for them. However, some applications, such as Twitter and the Gmail client, do use them.

In this post, we’ll explore how to create a floating button, taking the Gmail app client as our example.

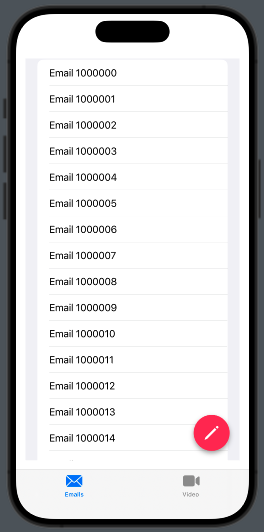
We aim to create this:

Therefore, we need to create a TabView. Inside the first tab, we’ll use a ZStack that contains both a list and a button.

struct ContentView: View {
    var body: some View {
        TabView {
            NavigationStack {
                ZStack {
                    List(initList(), id:\.self) { mail in
                        Text(mail)
                    }
                    VStack {
                        Spacer()
                        HStack {
                            Spacer()
                            NavigationLink { EmptyView()} label:{
                                Image(systemName: "pencil")
                                    .font(.title.weight(.semibold))
                                    .padding()
                                    .background(.pink)
                                    .foregroundStyle(.white)
                                    .clipShape(Circle())
                                    .shadow(radius: 4, x: 0, y: 4)
                            }.padding()          
                        }
                    }.padding()
                }
            }.tabItem {
                Label("Emails", systemImage: "envelope")
            }
            Text("Second tab")
                .tabItem {
                    Label("Video", systemImage: "video")
                }
        }
    }
    func initList() -> [String] {
        var emails = [String]()
        for i in 1000000...1000100 {
            emails.append("Email " + String(i))
        }
        return emails
    }
}

The list is initialized with the initList utility function. Within the ZStack, we display the list of emails and a navigation link represented by a button. The button is placed within a VStack accompanied by a Spacer, pushing it to the bottom. Additionally, it is nested inside an HStack with another Spacer, positioning it on the right side.

Tapping on the button we move on an EmptyView.

Feel free to experiment with the code—it’s the best way to learn and discover new possibilities. Dive in and have fun!

If you’d like to stay updated with the latest content from my blog, consider subscribing to my weekly newsletter.

Assets in XCode 15

This post is designed to demonstrate how to use assets in Xcode 15. It serves as a quick recap for experienced developers and a helpful introduction for beginners. In this post, we’ll cover how to:

  1. Add an image to the assets and use it in the code.
  2. Add a custom color.
  3. Set the Accent color.
  4. Add an icon.

Image in the assets

Start copying this image in the assets:

Now we see the preview of the image on the right panel, along with two empty rectangles labeled 2x and 3x. What do these numbers mean? On iOS, we don’t consider the pixel size but rather use points (this concept was introduced in 2010 with the iPhone 4). For 1x, one point is equivalent to one pixel, for 2x, one point corresponds to a 2 x 2 pixel square, and for 3x, one point corresponds to a 3 x 3 pixel square. This approach results in a logical resolution (Android uses Density-independent pixels, which is a concept similar to this).

If images for 2x or 3x resolutions are not provided, the 1x image will be used even on devices with higher resolutions. Let’s look at an example to understand this better:

iPhone 11 Pro
Logical Resolution = 375 x 812 pixels
Scale Factor = x3
Screen Resolution = 1125 x 2436 pixels

The advantage of this approach is that we work with a logical resolution, and we don’t need to worry about what happens on different screen sizes because the images are scaled automatically. Of course, if we want to achieve a better look and feel, it’s advisable to have 2x or 3x versions for devices with high resolutions.

How to use this image in the code?

struct ContentView: View {
    var body: some View {
        VStack {
            Image(.postAssetHeader)
        }
        .padding()
    }
}

Note that we refer to the image with a dot and the name in camel case notation. This is a new feature in Xcode 15, where we don’t use the name as a string, and names in snake case are automatically transformed into camel case.

Custom Color

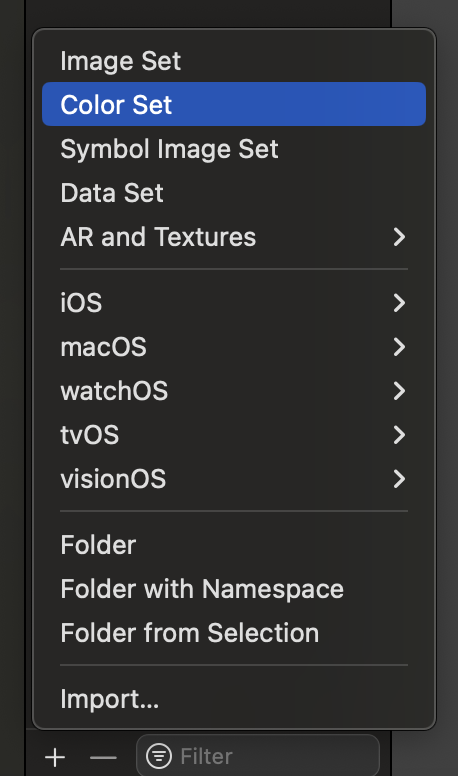
Now let’s see how to create a custom color. Start by clicking on the plus sign and selecting Color Set.

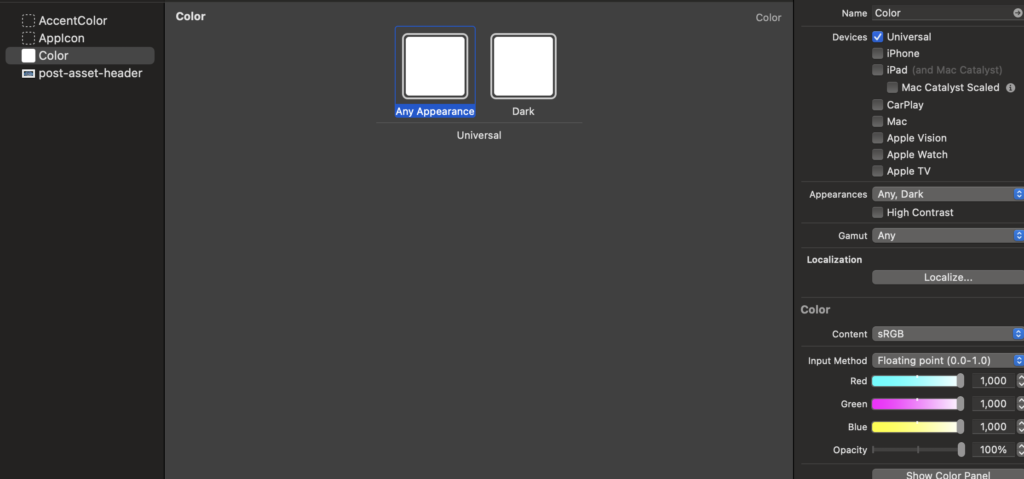
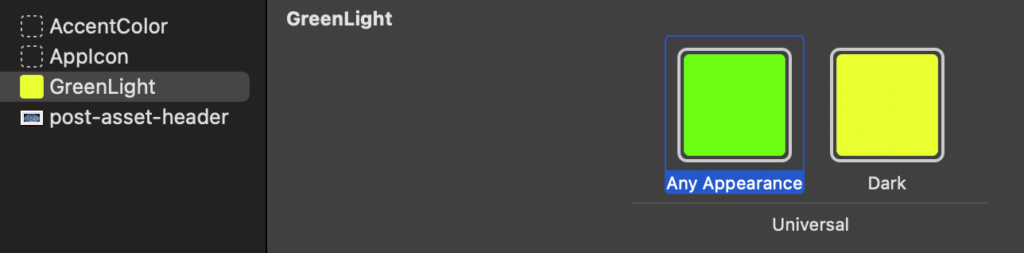
Afterward, define the color in the right panel:

So, you can also change the name of the color to GreenLight. You should also specify the color for dark mode (it can be the same as the default; it’s your choice).

In the code:

struct ContentView: View {
    var body: some View {
        VStack {
            Text("Hello world")
                .foregroundStyle(.greenLight)
        }
        .padding()
    }
}

Note that like for the image the name is dot plus the name in camel case format.

Accent Color

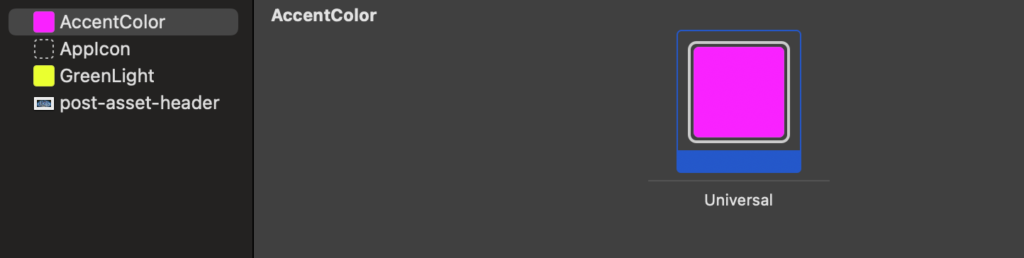
The accent color is the color applied to views and controls (such as button text, tab item text, and more). You can set it as a custom color using the options in the right panel:

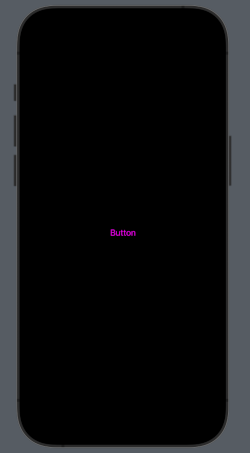
n the code, you don’t need to set anything; now, every text of controls will use it automatically.

struct ContentView: View {
    var body: some View {
        VStack {
            Button("Button") {
              // your action
            }
        }
        .padding()
    }
}

To have:

App icon

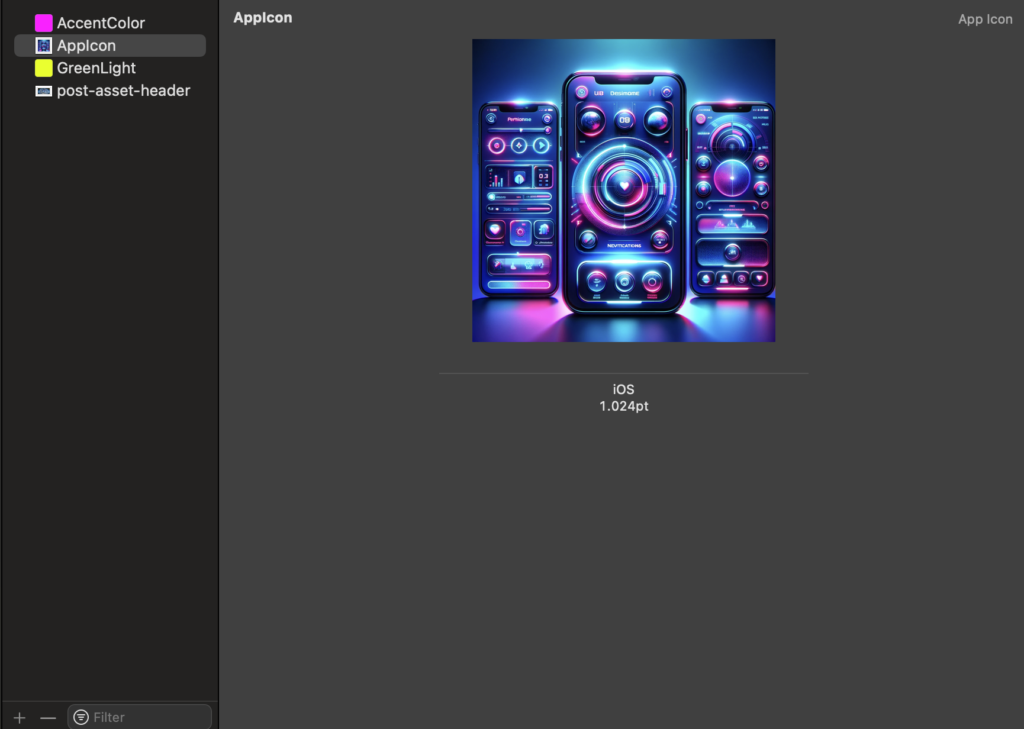
Now, creating the app icon is simple. You no longer need to create different images for different resolutions; just drag and drop one image, 1024×1024 in size, onto the rectangle. Use the image big-icon.jpg:

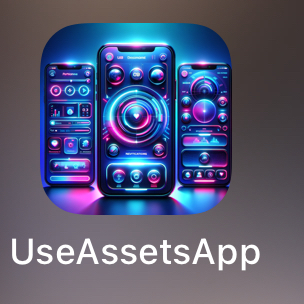
Now, run the application, and your app will have this nice icon on your phone:

That’all.