New canvas layout and settings
In XCode 14 we have some changes that can help the developers. The main things are in the canvas (UI preview).
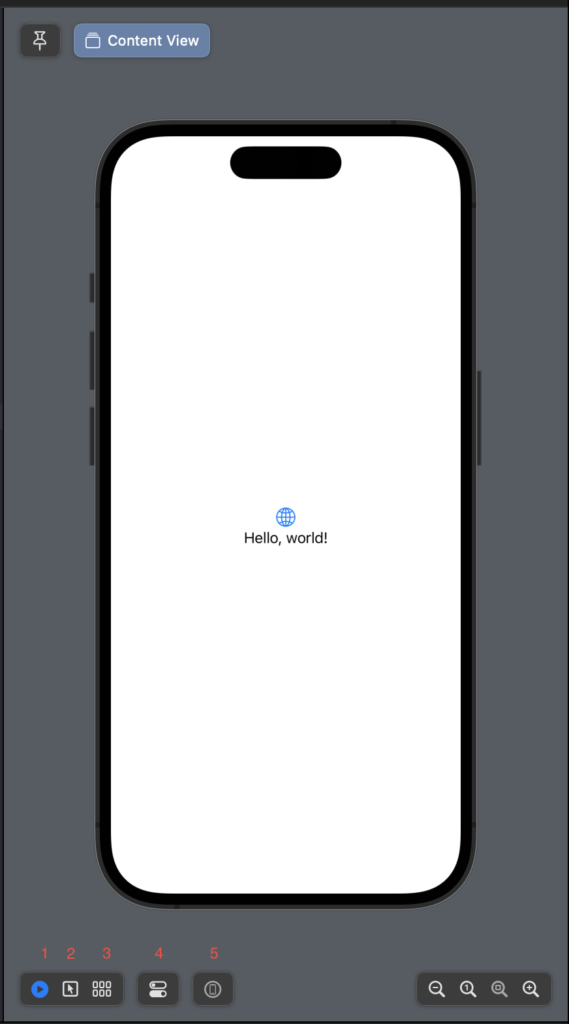
The button1 only changed the position, it’s to run the preview.
Clicking the button2 it’s possible to select the single element on the canvas.
With the button3, see:
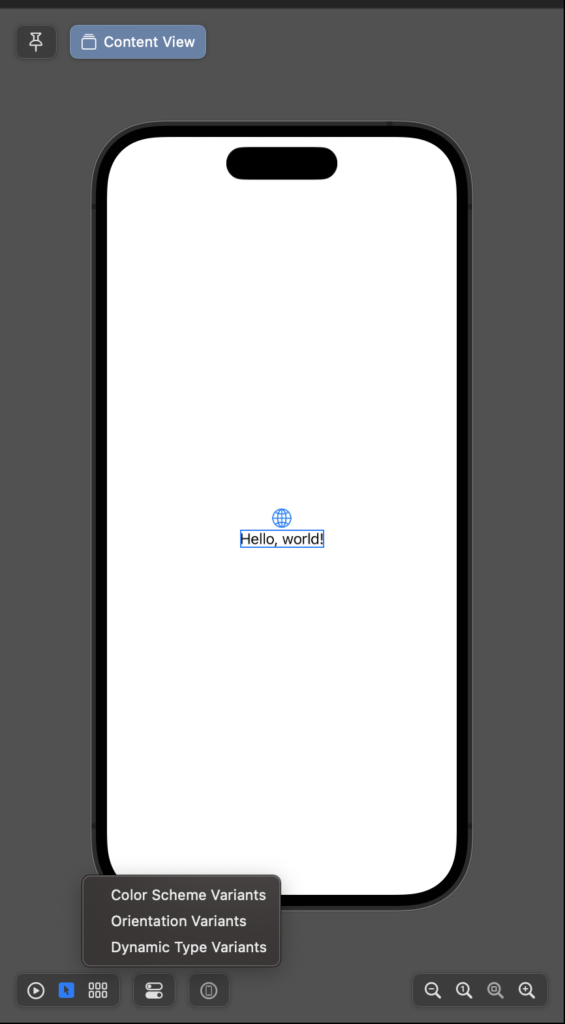
So, with this context menu is possible to see the view with the different colour schema (light/dark) in the different orientations and sizes.
Clicking the button4 it’s set the property of the device in the canvas (colour schema, orientation and size).
Last but not least, with button5 the preview is executed on the real device connected to the computer.
The pin button
Often happen that the views are complex and composed of different elements. In that case, you can like see the complete view and change a property of a single component and see in real-time what happens in the complete view, now it’s possible without switching between the whole view and the single component, using the pin button.
Let’s create a new project, we want to add only a custom button defined in a different view file:
struct CustomButtonView: View {
    var body: some View {
        Button(action: {}) {
            Text("Click Me!")
                .fontWeight(.heavy)
                .padding(50)
                .foregroundColor(.white)
                .background(.red)
                .clipShape(Circle())

        }
    }
}
So in the ContentView we have the:
struct ContentView: View {
    var body: some View {
        VStack {
            Image(systemName: "globe")
                .imageScale(.large)
                .foregroundColor(.accentColor)
            Text("Hello, world!")
            CustomButtonView()
        }
        .padding()
    }
}
Now we want to change the button’s colour but see in real-time what happens in the ContentView. Select the ContentView and click the pin button (purple box):
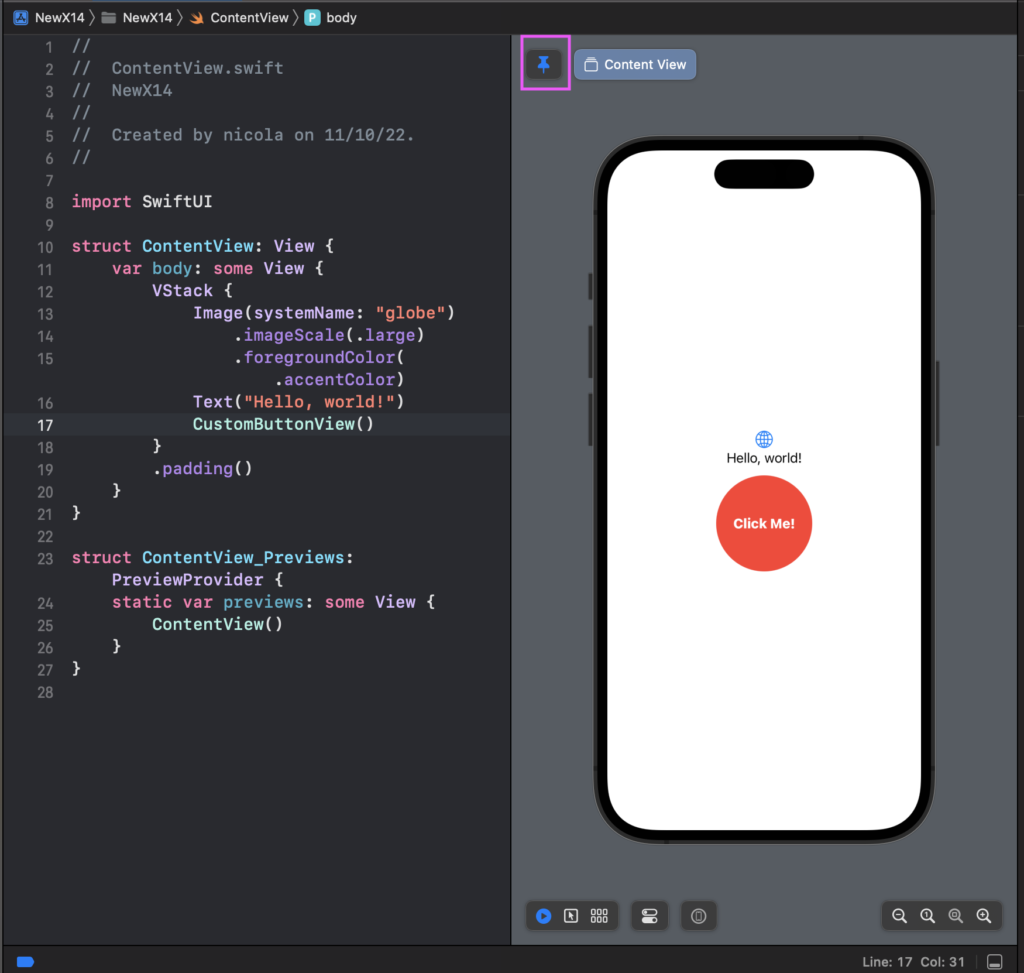
Now select the CustomButtonView in the files project list, so we see the code of the custom button in the preview but we see the “pinned” view, the ContentView.
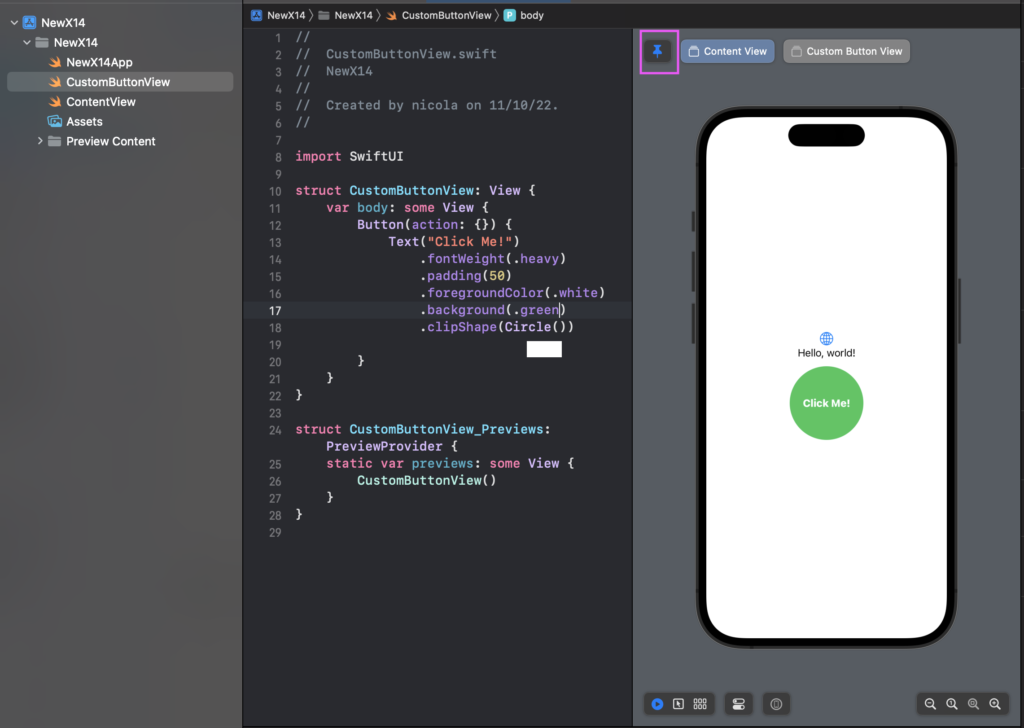
We can change the colour and see what happens in the ContentView. (If you want, you can get the code from https://github.com/niqt/NewX14
AnyLayout
With the last release of SwiftUI is now possible to swap automatically from the different Layout, Horizontal and Vertical. Now we have HStackLayout and VStackLayout can be used to choose the layout following the orientation.
struct ContentView: View {
    @Environment(\.horizontalSizeClass) var horizontalSizeClass

    var body: some View {
        var layout = (horizontalSizeClass == .regular) ? AnyLayout(HStackLayout()) : AnyLayout(VStackLayout())
        layout {
                Image(systemName: "globe")
                    .imageScale(.large)
                    .foregroundColor(.accentColor)
                Image(systemName: "car")
                    .imageScale(.large)
                    .foregroundColor(.accentColor)
                Image(systemName: "pencil")
                    .imageScale(.large)
                    .foregroundColor(.accentColor)

        }


    }
}
With the horizontalSizeClass we can know the orientation of the device and select the layout that we want.
The image speaks more than one thousand words:
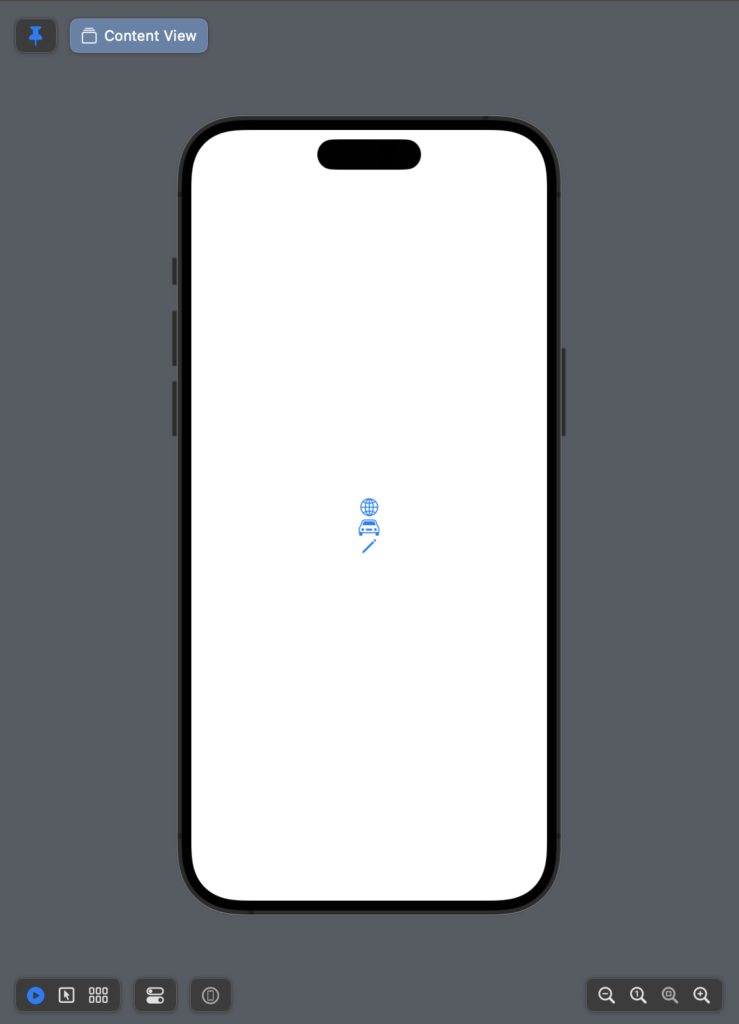
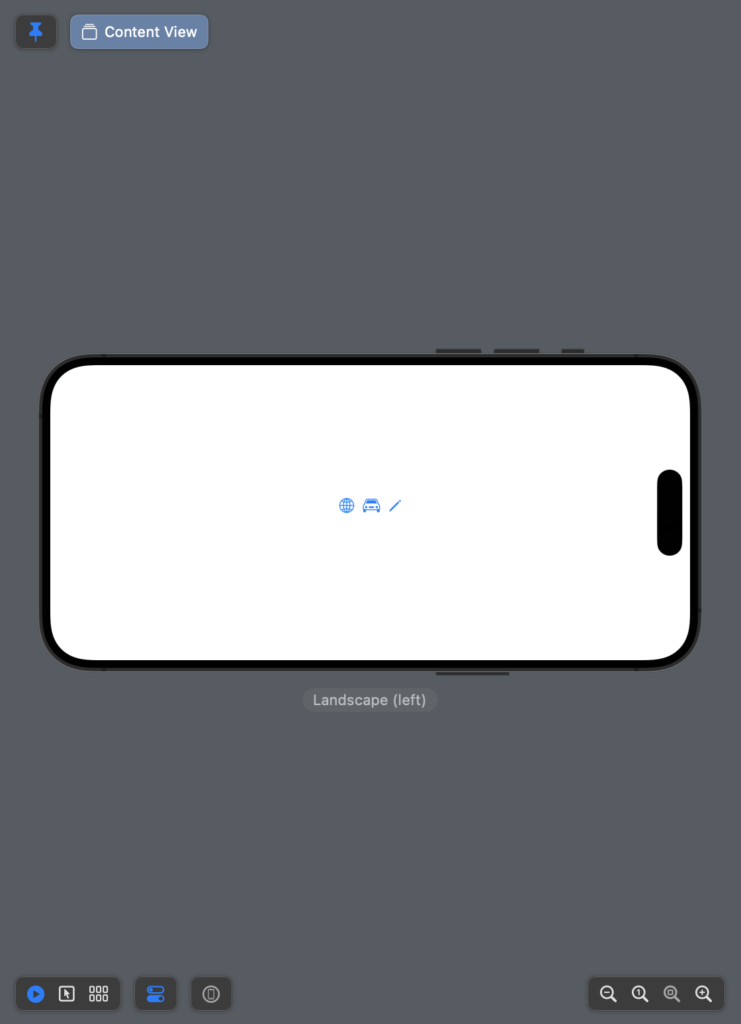
Thus, use VStackLayout and HStackLayout when you need to change the layout dynamically in other cases use HStack and VStack.
Note: English is not my native language, so I’m sorry for some errors. I appreciate it if you correct me.





1 comment
Thanks.