In this post, I’m writing a new version of the old posts about a chat GUI built with SwiftUI. I’ve removed the deprecated APIs and used the new ones released with iOS 18.
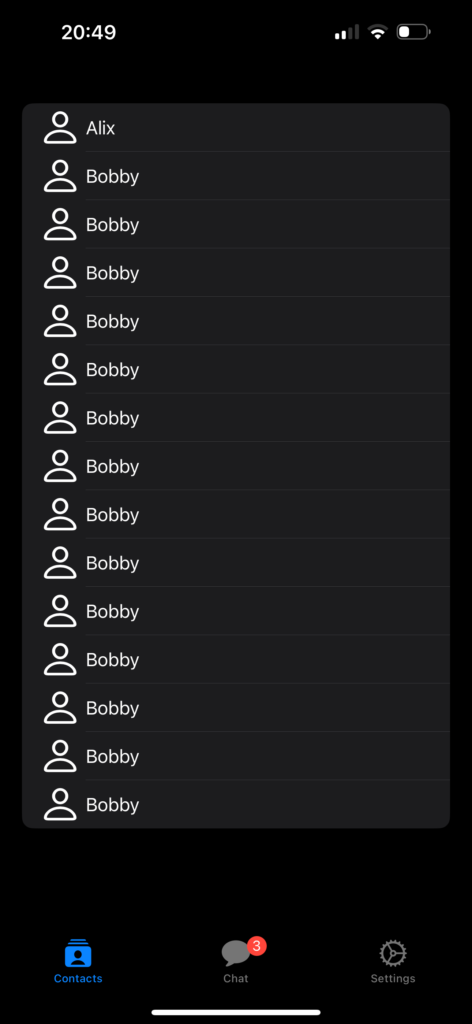
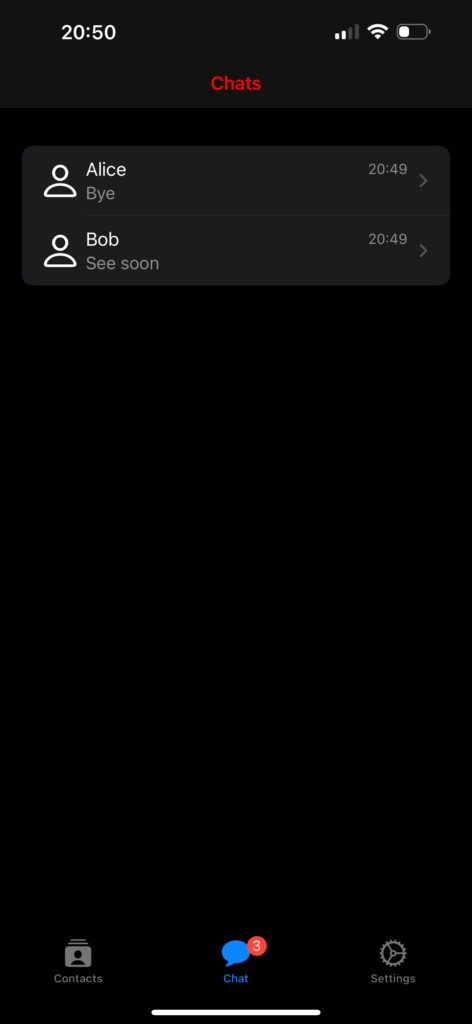
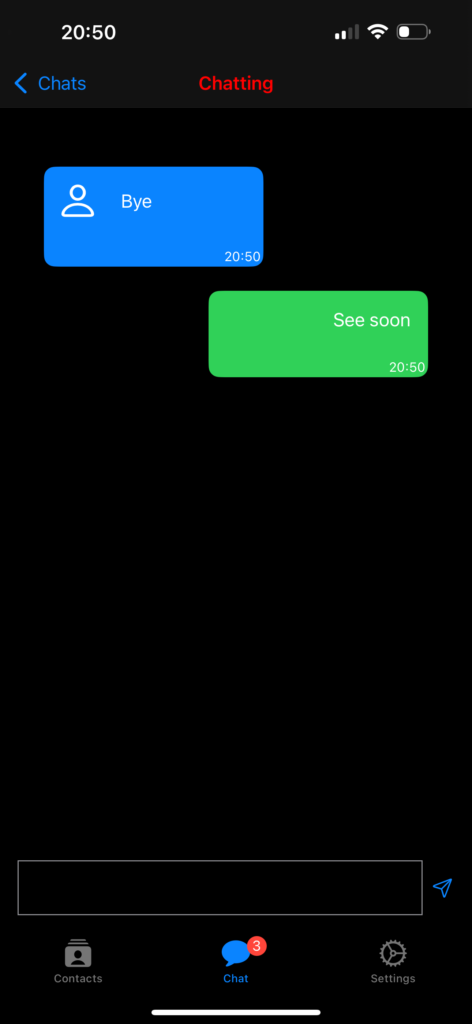
We are creating these screens: a list of contacts, a list of chats, and a chat screen. Note the red notification number on the chats tab.
The contacts
struct ContentView: View {
    init () {
        let navBarAppearance = UINavigationBarAppearance()
        navBarAppearance.titleTextAttributes = [.foregroundColor: UIColor.red]
        navBarAppearance.largeTitleTextAttributes = [.foregroundColor: UIColor.red]
        UINavigationBar.appearance().backgroundColor = .black
        UINavigationBar.appearance().standardAppearance = navBarAppearance
        UINavigationBar.appearance().compactAppearance = navBarAppearance
        UINavigationBar.appearance().scrollEdgeAppearance = navBarAppearance
        UINavigationBar.appearance().tintColor = UIColor.red
    }

    var body: some View {
        TabView {
            Tab("Contacts", systemImage: "rectangle.stack.person.crop.fill") {
                NavigationStack {
                    ContactsView()
                        .navigationBarTitle("Contacts", displayMode: .inline)
                }
            }
            Tab("Chat", systemImage: "message.fill") {
                NavigationStack {
                    ChatsView()
                }
            }.badge(3)
            Tab("Settings", systemImage: "gear") {
                SettingsView()
            }
        }
    }
}
In the init, we initialize the background and foreground colors for the tab bar and navigation.
The body contains a neat way to define the TabView (refer here for more details https://nicoladefilippo.com/tabview-in-ios-18-and-xcode-16/). The Chat tab uses the badge property to display the red number, as shown in the example.
Chats Vew
struct ChatsView: View {
    var chats: Array<Chat> = [Chat(name: "Alice", image: "person", lastMessage: "Bye", timestamp: Date(), chatId: "1"), Chat(name: "Bob", image: "person", lastMessage: "See soon", timestamp: Date(), chatId: "2")
    ]

    init () {
        let navBarAppearance = UINavigationBarAppearance()
        navBarAppearance.titleTextAttributes = [.foregroundColor: UIColor.red]
        navBarAppearance.largeTitleTextAttributes = [.foregroundColor: UIColor.red]
        UINavigationBar.appearance().backgroundColor = .black
        UINavigationBar.appearance().standardAppearance = navBarAppearance
        UINavigationBar.appearance().compactAppearance = navBarAppearance
        UINavigationBar.appearance().scrollEdgeAppearance = navBarAppearance
        UINavigationBar.appearance().tintColor = UIColor.red
    }

    var body: some View {
        VStack{
            NavigationStack {
                List {
                    ForEach(chats) { chat in
                        NavigationLink(destination: ChattingView()){
                            HStack {
                                Image(systemName: "person")
                                .resizable()
                                .frame(width: 30, height: 30)
                                VStack(alignment: .leading) {
                                    HStack {
                                        Text(chat.name)
                                        Spacer()
                                        Text(timeFormat(date: chat.timestamp))
                                        .foregroundStyle(.gray)
                                        .font(.footnote)
                                    }
                                    Text(chat.lastMessage)
                                    .foregroundStyle(.gray)
                                    .font(.callout)
                                }
                            }
                        }
                    }
                }.scrollContentBackground(.hidden).background(Color.black)
            }
        }.frame(maxWidth: .infinity, maxHeight: .infinity)
        .background(Color.black)
        .navigationBarTitle("Chats", displayMode: .inline)
    }
}
In this view, we define an array of contacts that we display using a List and ForEach, where each row contains an image, the contact’s name, and the last chat time.
With .scrollContentBackground(.hidden).background(Color.black), we set the List background to black.
The VStack that contains everything has the background also set to black, ensuring the entire screen is black, even when the list doesn’t fill the entire screen.
Chat View
struct ChattingView: View {
    @State var chats: Array<Chat> =
    [Chat(name: "Alice", image: "person", lastMessage: "Bye", timestamp: Date(), chatId: "1"),
     Chat(name: "Bob", image: "person", lastMessage: "See soon", timestamp: Date(), chatId: "2")
    ]

    @State var writing: String = ""
    init () {
        let navBarAppearance = UINavigationBarAppearance()
        navBarAppearance.titleTextAttributes = [.foregroundColor: UIColor.red]
        navBarAppearance.largeTitleTextAttributes = [.foregroundColor: UIColor.red]
        UINavigationBar.appearance().backgroundColor = .black
        UINavigationBar.appearance().standardAppearance = navBarAppearance
        UINavigationBar.appearance().compactAppearance = navBarAppearance
        UINavigationBar.appearance().scrollEdgeAppearance = navBarAppearance
        UINavigationBar.appearance().tintColor = UIColor.red
    }

    var body: some View {
        VStack(spacing: 0) {
            // Chat
            Spacer()
            List {
                ForEach(chats) { chat in
                    if chat.name == "Bob" {
                        UserRowView(chat: chat)

                    } else {
                        ChatRowView(chat: chat)
                    }
                }.listRowBackground(Color.clear)
                .listRowSeparator(.hidden)
            }.scrollContentBackground(.hidden)
            .navigationBarTitle("Chatting", displayMode: .inline)
            .onTapGesture {
                self.endEditing()
            }
            // Input
            HStack() {
                TextEditor(text: $writing)
                    .frame(minHeight: 0, maxHeight: 50)
                    .border(Color.gray)

                Button(action: {
                    chats.append(Chat(name: "Bob", image:"", lastMessage: writing, timestamp: Date(), chatId: ""))
                    writing = ""
                    self.endEditing()
                }) {
                    Image(systemName: "paperplane")
                }

            }.ignoresSafeArea(.keyboard, edges: .bottom)
            .padding()
        }.background(Color.black)
    }

    private func endEditing() {
    UIApplication.shared.sendAction(#selector(UIResponder.resignFirstResponder), to:nil, from:nil, for:nil)
    }
}
This view also contains the settings for the tab bar and navigation. For the list of chats, we hide the scroll indicator and the row separator. We have two types of rows: one for the user (Bob) and the other to show messages from other people. We’ll take a closer look at that below. Now, please pay attention to the endEditing function; it’s called to hide the keyboard when the message is sent or when we want to stop typing.
Take a look at the rows:
struct ChatRowView: View {
    var chat: Chat
    var body: some View {
        VStack (alignment: .trailing){
            HStack() {
                Image(systemName: chat.image)
                    .resizable()
                    .frame(width: 30, height: 30)
                    .padding()
                Text(chat.lastMessage)
                Spacer()
            }.frame(maxWidth: 200)
            Text(timeFormat(date: chat.timestamp))
                .padding(2)
                .font(.caption)
                .foregroundStyle(.white)
        }.background(Color.blue)
        .clipShape(RoundedRectangle(cornerRadius: 10))
    }
}

struct UserRowView: View {
    var chat: Chat
    var body: some View {
        HStack {
            Spacer()
            VStack (alignment: .trailing){
                HStack() {
                    Spacer()
                    HStack {
                        Spacer()
                        Text(chat.lastMessage)
                            .padding()
                    }
                }
                Text(timeFormat(date: chat.timestamp))
                    .padding(2)
                    .font(.caption)
                    .foregroundStyle(.white)
            }.background(Color.green)
            .frame(minWidth: 10, maxWidth: 200)
            .clipShape(RoundedRectangle(cornerRadius: 10))
        }
    }
}

func timeFormat(date: Date) -> String {
    let formatter = DateFormatter()
    formatter.dateFormat = "HH:mm"
    return formatter.string(from: date)
}
The rows don’t have anything special apart from the alignment, but they use a new API to create rounded corners. Instead of using the deprecated cornerRadius, we utilize clipShape with a RoundedRectangle that has a corner radius.
You can find the comple code here: https://github.com/niqt/EEnigma/tree/main


