SwiftUI and REST (Episode I)

With this post, I am starting a series of three episodes about the use of REST in SwiftUI. In this episode, we will see how to implement a GET request. In the next one, we’ll explore how to make a POST request, and in the last one, we’ll examine different solutions.

Suppose we want to search for books using the Google Books API: https://www.googleapis.com/books/v1/volumes?q=intitle:your-word. The idea is to write the search text in the search bar, press enter, and then search for a book with the word typed in the title.

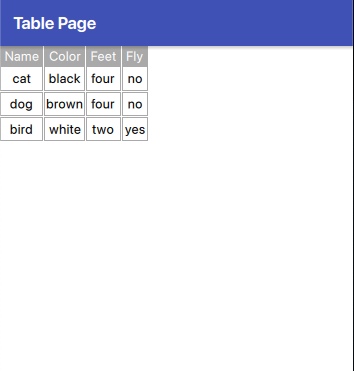
In the screenshot provided earlier, we see a part of the result for the search term ‘lean’. We use this to define the structure of the data that we want to retrieve and decode.

In a Swift file named ‘Book’, we create the following structure:

struct GoogleBooks: Codable {
    var kind: String
    var totalItems
    var items: Array<GoogleBook>
}

struct GoogleBook: Codable {
    var id: String
    var volumeInfo: VolumeInfo
}

struct VolumeInfo: Codable {
    var title: String
    var subtitle: String
    var authors: Array<String>
    var industryIdentifiers: Array<Identifier>
    var imageLinks: ImagesLink
}

struct ImagesLink: Codable {
    var smallThumbnail: String
}

We create structures that map only the information that we want use in our application. Each structure implement Codable, “A type that can convert itself into and out of an external representation”. It’s necessary to decode (or encode) information from a json.

What happen if some field is null? Using the structure above, we would encounter decode errors in the application. To avoid this problem, we can rewrite the structures in the following way:

struct GoogleBook: Codable {
    var id: String
    var volumeInfo: VolumeInfo?
    init(from decoder: Decoder) throws {
        let container = try decoder.container(keyedBy: CodingKeys.self)
        id = try container.decode(String.self, forKey: .id)
        volumeInfo = try container.decodeIfPresent(VolumeInfo.self, forKey: .volumeInfo)
    }
}

struct VolumeInfo: Codable {
    var title: String
    var subtitle: String?
    var authors: Array<String>?
    var industryIdentifiers: Array<Identifier>?
    var imageLinks: ImagesLink
    init(from decoder: Decoder) throws {
        let container = try decoder.container(keyedBy: CodingKeys.self)
        subtitle = try container.decodeIfPresent(String.self, forKey: .subtitle)
        title = try container.decode(String.self, forKey: .title)
        authors = try container.decodeIfPresent(Array<String>.self, forKey: .authors)
        industryIdentifiers = try container.decodeIfPresent(Array<Identifier>.self, forKey: .industryIdentifiers)
        imageLinks = try container.decode(ImagesLink.self, forKey: .imageLinks)
    }
}

struct ImagesLink: Codable {
    var smallThumbnail: String
}

Now, the fields that can be null are defined as Optional, and an initialization function is added.

In this function, we need to decode all the fields present in the structure that are not optional, in the following way:

id = try container.decode(String.self, forKey: .id)

This for the optionals:

authors = try container.decodeIfPresent(Array<String>.self, forKey: .authors)

In this manner, a field is decoded only if it is present.

Now, let’s jump into the UI part.

struct ContentView: View {
    @State var searchText: String = "lean"
    @State private var results: GoogleBooks = GoogleBooks()
    @State var books = [GoogleBook]()
    @State var loading = true
    let url = "https://www.googleapis.com/books/v1/volumes?q=intitle:"
    var body: some View {
        NavigationStack {
            if loading {
                ProgressView()
            } else {
                List {
                    ForEach(books, id: \.id) { item in
                        Text(item.volumeInfo!.title)
                    }
                }.searchable(text: $searchText)
                .onSubmit(of: .search) {
                    Task {
                        await loadData()
                    }
                }
                .navigationTitle("Books")
            }
        }.task {
            await loadData()
        }
        
    }
    func loadData() async {
    }

In the first part, we define the variables we will use. ‘searchText’ is initialized to ‘lean’ to load at the start. ‘GoogleBooks’ contains all the search results, ‘books’ holds the list of books, and ‘loading’ is a Boolean variable used to hide or show a ProgressView while loading the data. The last one is the URL.

In the view, we set a searchable text field. When the user taps enter, the submit action calls the async ‘loadData’ function within a Task. The same happens when the view loads for the first time. Honestly, I don’t like setting a default search, but I implemented it in this example just to show how to load data at the start.

Last but not least, and never has this phrase been truer than in this case, take a look at the ‘loadData’ function, the core of the application:

func loadData() async {
        
        guard let url = URL(string: url + searchText) else {
            print("Invalid URL")
            return
        }
        do {
            let (data, _) = try await URLSession.shared.data(from: url)
            let decoder = JSONDecoder()
            do {
                // process data
                let decodedResponse = try decoder.decode(GoogleBooks.self, from: data)
                results.items = decodedResponse.items
                results.totalItems = decodedResponse.totalItems
                books = results.items
            } catch let DecodingError.dataCorrupted(context) {
                print(context)
            } catch let DecodingError.keyNotFound(key, context) {
                print("Key '\(key)' not found:", context.debugDescription)
                print("codingPath:", context.codingPath)
            } catch let DecodingError.valueNotFound(value, context) {
                print("Value '\(value)' not found:", context.debugDescription)
                print("codingPath:", context.codingPath)
            } catch let DecodingError.typeMismatch(type, context)  {
                print("Type '\(type)' mismatch:", context.debugDescription)
                print("codingPath:", context.codingPath)
            } catch {
                print("error: ", error)
            }
        } catch {
            print("Invalid data")
        }
        self.loading = false
    }

It’s an async function, due we have to run in this way to avoid that the user interface is blocked waiting the result.

The first step i check that the url is valid, after that get the data with

await URLSession.shared.data(from: url)

Therefore, create a decoder and attempt to decode the data. If there is a problem with decoding, use the catch block to map every possible error (I recommend this, as logs are fundamental in the art of programming).

At the end, ‘loading’ is set to false, so the ProgressView disappears and the list is shown.

That’s all for this episode. Check the blog for the next one.

Barcode, OpenCV and QML (Qt 6)

In this post, I would like to share how to build a barcode scanner (for Android and iOS) in QML using OpenCV.

As a first step, we need to build the OpenCV library or download it from here: https://github.com/niqt/ocvdecoder (the readme discusses QR code scanning, but the library can also be used for barcode scanning).

To reach the goal we have to do:

  • Create the C++ class
  • Create the QML Item
  • Use the QML component

C++

The logic involves receiving frames from the camera and decoding them until the barcode is recognized. These frames are captured by videoSync, which is the object responsible for obtaining frames from the camera.

/*
 * This class implement a qml wrapper for the OpenCV bar code feature
 * */

class Bardecoder : public QObject
{
    Q_OBJECT
    QML_ELEMENT
    Q_PROPERTY(QObject* videoSink WRITE setVideoSink) // the video sync used to get the frames
    Q_PROPERTY(bool run READ run WRITE setRun) // start/top the decode
public:
    Bardecoder(QObject *parent = nullptr);
    void setVideoSink(QObject *videoSink);
    bool isDecoding() {return m_decoding; } // the status of the decoding - decondig in progress
    void setRun(bool run);
    bool run() {return m_run;}
public slots:
    void setFrame(const QVideoFrame &frame);


signals:
    void videoSyncChanged();
    void decoded(const QString &code);

private:
    QVideoSink *m_videoSink;
    cv::Ptr<cv::barcode::BarcodeDetector> m_bardet;
    QFuture<void> m_processThread;
    bool m_decoding;
    bool m_run;
};

The Bardecoder class is a QML_ELEMENT. It has two properties: videoSync (to set the videoSync) and run to initiate the decoding process.

The setFrame slot is invoked when videoSync captures a frame from the camera.

In the private section of the class, the key components are m_barded (the OpenCV barcode decoder) and m_processThread (the thread that executes the decoding action).

In the cpp part we have:

Bardecoder::Bardecoder(QObject *parent)
    : QObject{parent}
{
    m_bardet = makePtr<barcode::BarcodeDetector>("", ""); // create the bardetector
}

void Bardecoder::setVideoSink(QObject *videoSink)
{
    m_videoSink = qobject_cast<QVideoSink*>(videoSink);

    if (m_videoSink) {
        QObject::connect(m_videoSink, &QVideoSink::videoFrameChanged, // when a frame is received call setFrame
                         this, &Bardecoder::setFrame);
    }
}

void Bardecoder::setFrame(const QVideoFrame &frame)
{
    if(m_run && !isDecoding() && m_processThread.isFinished()) { // if start decode and is not decoding and the previous is finished => decode the frame
        m_decoding = true;
        QImage image = frame.toImage().convertToFormat(QImage::Format_RGB32).rgbSwapped(); // convert the frame to an imageso can be used from opecv

        m_processThread = QtConcurrent::run([=]() {
            if(image.isNull()) {
                m_decoding = false;
                return;
            }
            cv::Mat img(image.height(), image.width(), CV_8UC4, (void *) image.bits(), image.bytesPerLine());
            vector<Mat> points;

            vector<Point> corners;
            vector<cv::String> decode_info;
            vector<string> decode_type;
            m_bardet->detectMulti(img, corners);
            m_bardet->detectAndDecodeWithType(img, decode_info, decode_type, corners);
            if (decode_info.size() > 0) {
                auto code = QString(decode_info.at(0).c_str());
                if (code.length() > 0) // if the barcode is decoded emit the signal
                    emit decoded(QString(decode_info.at(0).c_str()));
            }
            m_decoding = false;
        });
    }
}

void Bardecoder::setRun(bool run)
{
    m_run = run;
}

The two main components are setVideoSync, which sets the slot, and setFrame. When a frame changes, setVideoSync triggers setFrame.

Within setFrame, the decoding action occurs. This process begins if run is true (where run functions as a start command). The decoding action starts only if there is no other frame currently being decoded and if the previous decoding thread has finished. Before using the OpenCV decoder functions, it’s necessary to transform the frame into an image in a specific format. Once this transformation is complete, the OpenCV functions are called as detailed in the OpenCV documentation. If the barcode is successfully decoded, a signal is emitted.

QML

Create the BarReader QML component:

import QtQuick
import Felgo
import QtQuick.Controls 2.0
import QtQuick.Layouts 1.1
import QtMultimedia
import bardecoder

/*
  This element contains the logic and the components for the Barcode reader.
  It use the camera, the CaputureSession to capture the video from the camera and it sent
  to VideoOutput to be shown. The decoder get the video frames using the videoSync from the VideoOutput.
  The signal barCaptured is emitted if the decoder found a barcode.
  */

Item {

    id: item

    // This property enable/disable the decoding action
    property alias run: decoder.run

    // This signal is emitted when the barcode is found
    signal barCaptured(string barcode)

    Camera // The camera
    {
        id:camera
        active: run
        focusMode: Camera.FocusModeAuto
    }

    CaptureSession {
        camera: camera
        videoOutput: videoOutput
    }

    VideoOutput
    {
        id: videoOutput
        anchors.fill: parent

        // The follow properties are used to scale the red capture area on the camera video
        property double captureRectStartFactorX: 0.25
        property double captureRectStartFactorY: 0.25
        property double captureRectFactorWidth: 0.5
        property double captureRectFactorHeight: 0.5

        MouseArea { // Clicking remove the autofocus
            anchors.fill: parent
            onClicked: {
                camera.customFocusPoint = Qt.point(mouseX / width,  mouseY / height);
                camera.focusMode = Camera.FocusModeManual;
            }
        }

        Rectangle { // The capture zone
            id: captureZone
            color: "red"
            opacity: 0.2
            width: parent.width * parent.captureRectFactorWidth
            height: parent.height * parent.captureRectFactorHeight
            x: parent.width * parent.captureRectStartFactorX
            y: parent.height * parent.captureRectStartFactorY

        }
    }

    Bardecoder { // The barcode decoder
        id: decoder
        videoSink: videoOutput.videoSink // in this way capture the video frames

        onDecoded: code => {
                       console.log("QR " + code)
                       run = false // stop to decode
                       barCaptured(code) // send the value
                   }
    }
}

The logic behind this process is detailed in the code comments. The only aspect not specified in these comments is that we use a pink (red with opacity)rectangle to define the area of the camera used for decoding.

Now, we can integrate it into our page in the following way:

BarReader {
        id: isbnReader
        visible: false
        run: false
        anchors.fill: parent
        onBarCaptured: barcode => {
            visible = false // hide itself
            run = false // stop to scanning
        }

    }

A working example of this project can be found here: https://github.com/niqt/felgobar. Although it uses Felgo, the same principles apply to pure Qt as well.

TableView in QML

Take a look at how the TableView works in Qt6 with QML. If we refer to the example from the official documentation, we find this code:

 import QtQuick 2.14
 import Qt.labs.qmlmodels 1.0

 TableView {
     anchors.fill: parent
     columnSpacing: 1
     rowSpacing: 1
     clip: true

     model: TableModel {
         TableModelColumn { display: "name" }
         TableModelColumn { display: "color" }

         rows: [
             {
                 "name": "cat",
                 "color": "black"
             },
             {
                 "name": "dog",
                 "color": "brown"
             },
             {
                 "name": "bird",
                 "color": "white"
             }
         ]
     }

     delegate: Rectangle {
         implicitWidth: 100
         implicitHeight: 50
         border.width: 1

         Text {
             text: display
             anchors.centerIn: parent
         }
     }
 }

It produces this:

If we add more columns to the model in the following manner:

model: TableModel {
                    TableModelColumn { display: "name" }
                    TableModelColumn { display: "color" }
                    TableModelColumn { display: "feet" }
                    TableModelColumn { display: "fly" }

                    rows: [
                        {
                            "name": "cat",
                            "color": "black",
                            "feet": "four",
                            "fly": "no"
                        },
                        {
                            "name": "dog",
                            "color": "brown",
                            "feet": "four",
                            "fly": "no"
                        },
                        {
                            "name": "bird",
                            "color": "white",
                            "feet": "two",
                            "fly": "yes"
                        }
                    ]
                }

we have:

In this approach, not all elements are visible because each cell is of the same size. While this uniformity can be visually appealing, it may not always be practical. Next, let’s see how we can add a custom header and adjust the cells to have widths based on the size of the elements within them.

Let’s start with the header:

           HorizontalHeaderView {
                id: horizontalHeader
                anchors.left: tableView.left
                anchors.top: parent.top
                syncView: tableView
                clip: true
                model: ["Name", "Color", "Feet", "Fly"]
                delegate:
                    Rectangle {
                        implicitWidth: txt.width + dp(5)
                        implicitHeight: txt.height + dp(5)
                        color: "darkgray"
                        AppText {
                            id: txt
                            text: modelData
                            anchors.centerIn: parent
                            color: "white"
                        }

                }

            }

First, we attach the header to the left side of the table and set the syncView to the tableView. This ensures synchronization between the table and the header, meaning each header column aligns with its corresponding column in the tableView. Next, we define the labels for the header. Finally, we see in the delegate how to display the header’s cells.

The tableView:

            TableView {
                id: tableView
                anchors.left: parent.left
                anchors.right: parent.right
                anchors.top: horizontalHeader.bottom
                anchors.bottom: parent.bottom
                columnSpacing: 1
                rowSpacing: 1
                clip: true
                contentWidth: parent.width
                columnWidthProvider: column => { return -1; }
                model: // is the same

                delegate: Rectangle {
                    implicitWidth: Math.max(horizontalHeader.columnWidth(column), txtRow.width) + dp(5)
                    implicitHeight: txtRow.height + dp(10)
                    border.color: "darkgray"
                    Text {
                        id: txtRow
                        text: display
                        anchors.centerIn: parent
                    }
                }
            }

The model remains the same as previously mentioned and is not included here. Regarding the positioning, the top of the table is anchored to the bottom of the header, as one would expect. The code enabling cell width to be based on the element’s width within the cell is as follows: columnWidthProvider: column => { return -1; }. The columnWidthProvider property expects a function that returns the width for a column. However, if it returns -1, the size is automatically calculated based on the size of the element in the cell.

Another important aspect to note is the use of the following code:

implicitWidth: Math.max(horizontalHeader.columnWidth(column), txtRow.width) + dp(5)

Why is this necessary? It ensures that if the text in the header of a column is wider than the text in the data cells, the size of the header remains readable. This code calculates the maximum width between the header and the row text, and then adds a small margin (dp(5)) for better visual spacing.

The final result is:

“Note: English is not my native language, so please excuse any errors. I would appreciate your assistance in correcting them.”

MongoDb, Go and Docker Compose

Go Docker Mongodb

In this brief post, I’ll share how to use MongoDB in a Golang application executed within a Docker container, using docker-compose. The challenge is ensuring that the Golang application waits for the MongoDB instance to be fully operational before starting, to avoid connection retries.

To achieve this, create a docker-compose.yml file.

version: '3.9'

services:
api:
build: .
ports:
- 8080:8080
links:
- mongodb
depends_on:
- mongodb
environment:
WAIT_HOSTS: mongodb:27017

mongodb:
image: mongo:7.0
ports:
- 27017:27017
volumes:
- ~/apps/mongo:/data/db

From the Docker Compose file, we see that we have a service in the build directory that listens on port 8080. The ‘links’ property set to MongoDB means that the application can refer to the MongoDB service using the hostname ‘mongodb’. It also ‘depends on’ MongoDB, indicating that it must wait for MongoDB to start listening on port 27017 before initiating. In short, our service can only start once the MongoDB port is open.

Docker

FROM golang:1.21.3-alpine as builder
WORKDIR /root/
RUN apk add --update --no-cache make

RUN mkdir -p /root/mongo-docker-compose
WORKDIR /root/mongo-docker-compose
COPY . .
RUN make build

FROM alpine:3.18
WORKDIR /root/

COPY --from=builder /root/mongo-docker-compose/bin/ .

ADD https://github.com/ufoscout/docker-compose-wait/releases/download/2.8.0/wait wait
RUN chmod +x wait

ENV TESTDB_MONGO=mongodb

EXPOSE 8080
CMD ./wait && ./mongo-docker-compose

In the first part of the Dockerfile, the Golang application is built. In the second part, we prepare for its execution. More specifically, we download the ‘wait’ command and assign execution permissions to it. It’s small command-line utility to wait for other docker images to be started while using docker-compose. It permits waiting for a fixed amount of seconds, until a TCP port is open on a target image (our case) or until a file or directory is present on the local filesystem.

Continuing our examination of the Dockerfile, we observe that the ‘TESTDB_MONGO’ variable is also defined. This variable, utilized in the Go code, holds the ‘name’ of the MongoDB service as specified in the docker-compose file. If the definition of this variable is omitted, or if it contains an incorrect value, the application will be unable to connect to MongoDB, thereby rendering the application non-functional.

Code

Let’s now turn our attention to the Go code above. Here, we will explore how it interacts with the setup we’ve discussed, particularly in relation to the Docker and MongoDB configuration.

const (
	hostKey        = key("hostKey")
	UserCollection = "users"
	DBName         = "test"
	mongoKey       = "TESTDB_MONGO"
)

// Initialize the database

func init() {
	mongoServer := os.Getenv(mongoKey)
	if mongoServer == "" {
		mongoServer = "localhost"
	}
	ctx = context.Background()
	ctx, cancel := context.WithCancel(ctx)
	defer cancel()
	ctx = context.WithValue(ctx, hostKey, mongoServer)

	var err error
	testDb, err = configDB(ctx)

	if err != nil {
		fmt.Printf("db configuration %s\n", err)
	}
	fmt.Printf("db connected ")
}

It’s important to focus primarily on the ‘mongoKey’, which contains the value ‘TESTDB_MONGO’. This is the name of the environment variable that holds the MongoDB server’s name. That’s all. Enjoy with Go and Mongodb

It’s possible found the simple project here:

https://github.com/niqt/mongo-docker-compose

“Note: English is not my native language, so please excuse any errors. I would appreciate your assistance in correcting them.”

Close Keyboard on IOS

In the last week-end, while I was working on my side project, I discovered a problem: on iOS the keyboard stay opened after it’s opened due to a click in an input text. The obvious solution that I thought is:

Page {
      MouseArea {
                anchors.fill: parent
                enabled: Qt.inputMethod.visible
                onClicked: Qt.inputMethod.hide()
      }
      //.... input fields
}

Thus in this way, clicking/tapping on the screen, the keyboard should disappear. In my case it doesn’t work because the input fields are in a ScrollView (and if you move the MouseArea in the ScrollView the view doesn’t scroll).

My solution:

Page {
      MouseArea {
                anchors.fill: parent
                enabled: Qt.inputMethod.visible
                onClicked: Qt.inputMethod.hide()
                propagateComposedEvents: true
                z: 10
      }
      ScrollView {
        id: scrollView
        anchors.fill: parent
        anchors.bottomMargin: dp(60)
        clip: true
        contentWidth: -1

        ColumnLayout {
            id: colView
            //.... input fields
}

The tips&trick is set a Z value to the MouseArea and propagates the mouse event to the object in the bottom layers.