Table in SwifUI (II° Episode, search and select).

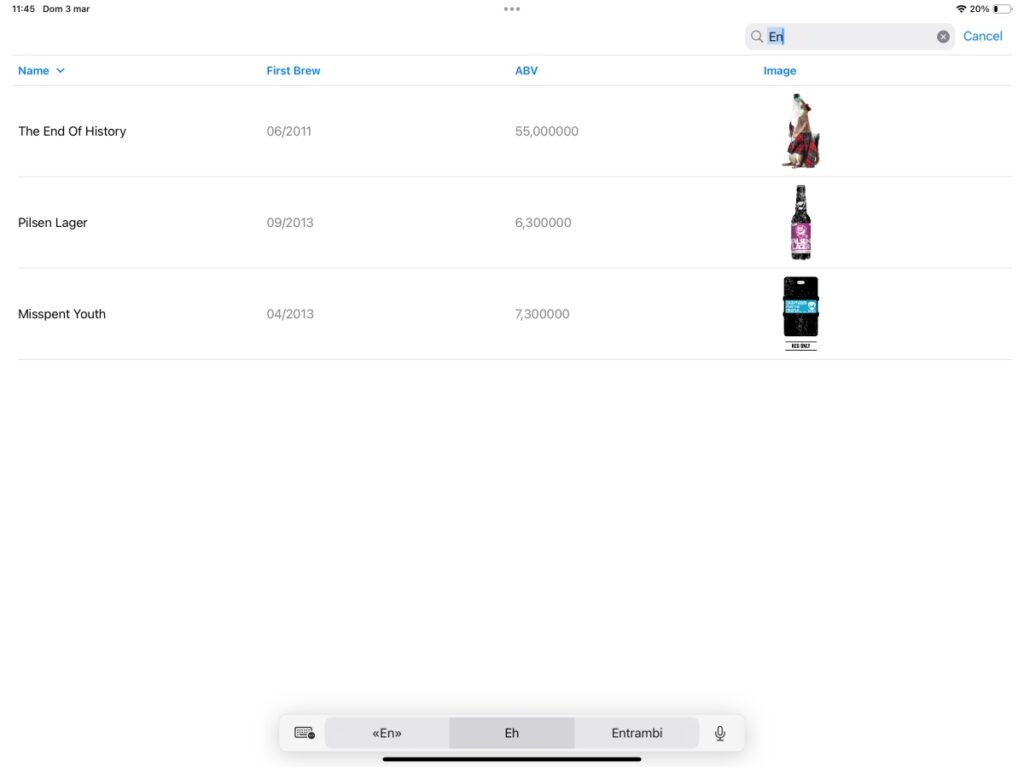
When using a table, you typically manage a lot of data, so some basic operations include searching and selecting. In this post, you’ll learn how to search for data in a table and how to select a row.

Search

Before we start, consider that our starting point is the code from Episode I, which you can obtain here .

The first step is to add the search functionality. To do this, we need to incorporate a NavigationStack into our code:

NavigationStack {
            Table(foundBeers, sortOrder: $sortOrder) {
                // the same code
            }.onAppear {
                Task {
                    await getBeers()
                }
            }.onChange(of: sortOrder) {
                beers.sort(using: sortOrder)
            }.searchable(text: $searchText, prompt: Text("Search by name"))
        }

Therefore, we added the searchable modifier (similar to how it’s done for a list). The searchText will contain the text entered by the user, and foundBeers will hold the results of the search.

var foundBeers: [Beer] {
        if searchText.count == 0 {
            return self.beers
        } else {
            return self.beers.filter({(beer: Beer) -> Bool in
                return beer.name.lowercased().contains(searchText.lowercased())
            })
        }
    }

If the search field is empty, this variable contains all the beers. Otherwise, it filters by name. The filter function retrieves all the beers that match the condition where the name contains the searchText – all in lowercase to avoid case sensitivity.

Combining the pieces:

struct ContentView: View {
    @State var beers: [Beer] = []
    @State var page = 0
    @State private var sortOrder = [KeyPathComparator(\Beer.name, order: .reverse)]
    @State private var searchText = ""

    var body: some View {
        NavigationStack {
            Table(foundBeers, sortOrder: $sortOrder) {
                TableColumn("Name", value: \.name)
                TableColumn("First Brew", value: \.first_brewed)
                TableColumn("ABV") { beer in
                    Text("\(beer.abv)")
                }
                TableColumn("Image") { beer in
                    AsyncImage(url: URL(string: beer.image_url)) { image in
                        image.resizable().scaledToFit()
                    } placeholder: {
                        ProgressView()
                    }
                    .frame(width: 100, height: 100)
                }
            }.onAppear {
                Task {
                    await getBeers()
                }
            }.onChange(of: sortOrder) {
                beers.sort(using: sortOrder)
            }.searchable(text: $searchText, prompt: Text("Search by name"))
        }
    }
    var foundBeers: [Beer] {
        if searchText.count == 0 {
            return self.beers
        } else {
            return self.beers.filter({(beer: Beer) -> Bool in
                return beer.name.lowercased().contains(searchText.lowercased())
            })
        }
    }
    
    func getBeers() async {
        // get from previous
    }
}
Select

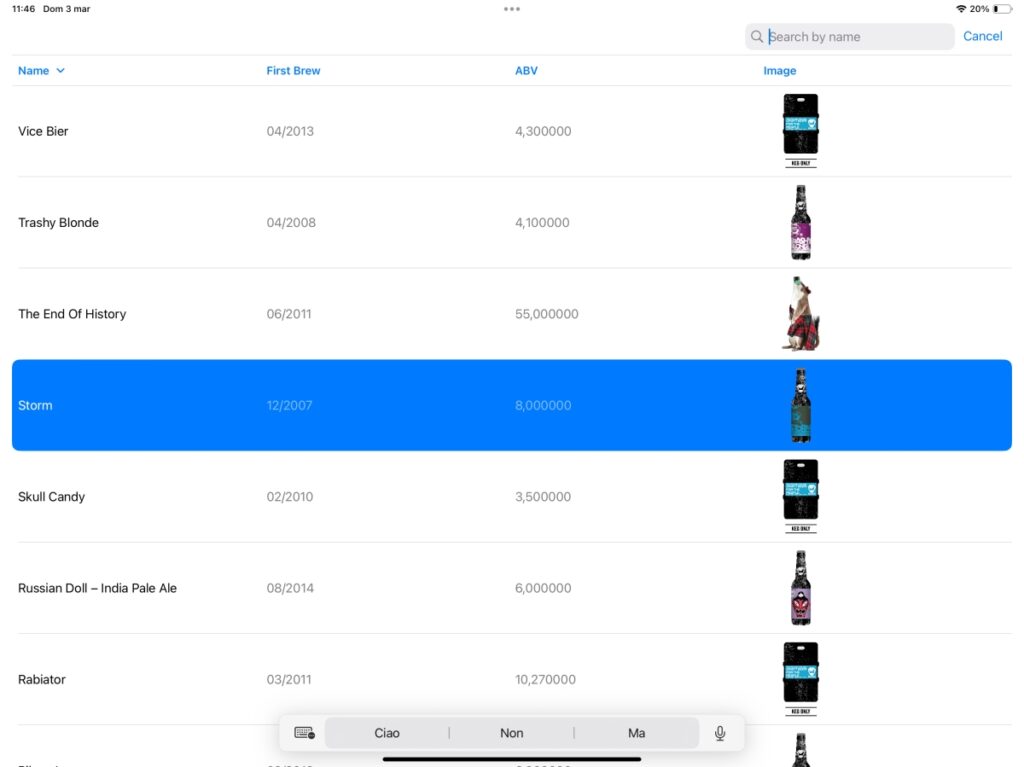
To select and highlight an item, we need to make some minor changes:

  1. Add a variable that will contain the selected item or items.
  2. Use a different initialization function for the table.

For the first point:

@State private var beerSelected: Beer.ID?

Considering that there might be a selection or not, the beerSelected variable is optional (based on the identifiable property). If you want to enable multiple selections, replace Beer.ID? with an empty Set<Beer.ID>.

@State private var beerSelected: Set<Beer.ID> = Set<Beer.ID>()

For the second point on the list:

Table(beersSearched, selection: $beerSelected, sortOrder: $sortOrder) {
Please select the right beer!

Note: English is not my native language, so I apologize for any errors. I use AI solely to generate the banner of the post; the content is human-generated.

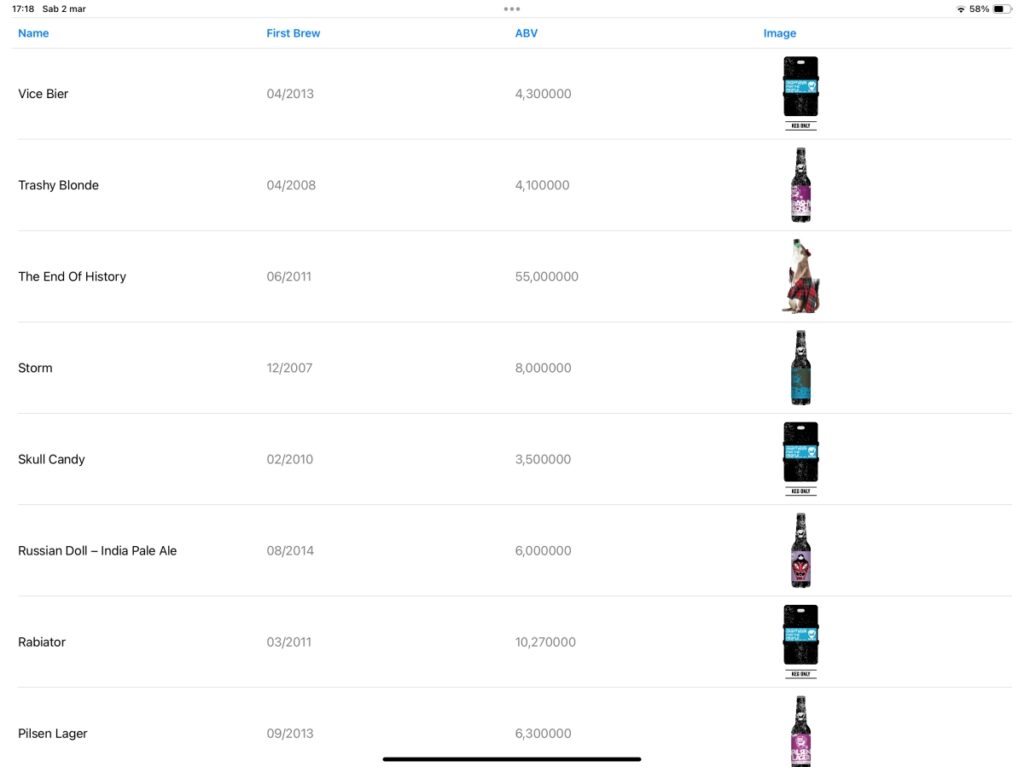
Table with SwiftUI (Episode I°)

If a list is a must-have for the iPhone, similarly, the Table can be essential for the iPad. Typically, when developing applications for larger screens, such as iPads or computers, it’s advantageous to be familiar with this component.

This post is the first in a series about Table.

For this post, I’d like to start with the code from this post https://nicoladefilippo.com/async-image-in-swiftui/, so we don’t reinvent the wheel and can focus solely on the relevant part.

Just to cover the basics, we retrieve a list of beers from here with this code:

struct ContentView: View {
    @State var beers: [Beer] = []
    @State var page = 0
    
    var body: some View {
        List(beers) { beer in
            HStack {
                AsyncImage(url: URL(string: beer.image_url)) { image in
                    image.resizable().scaledToFit()
                } placeholder: {
                    ProgressView()
                }.frame(width: 50, height: 50)
                Text(beer.name)
            }
        }.onAppear {
            Task {
                await getBeers()
            }
        }
    }
    
    func getBeers() async {
        do {
            page += 1
            let url = URL(string: "https://api.punkapi.com/v2/beers?page=\(page)&per_page=30")!
            let (data, _) = try await URLSession.shared.data(from: url)
            let beersLoaded = try JSONDecoder().decode([Beer].self, from: data)
            beers = beersLoaded + beers
        } catch {
            print("Some error")
        }
    }
}

Where, for the beer, we retrieve only the name and the image:

struct Beer: Codable, Identifiable {
    var id: Int
    var name: String
    var image_url: String
}

This is the starting point. Now, suppose we have an iPad and we want to show more information:

struct Beer: Codable, Identifiable {
    var id: Int
    var name: String
    var first_brewed: String
    var image_url: String
    var abv: Double
}

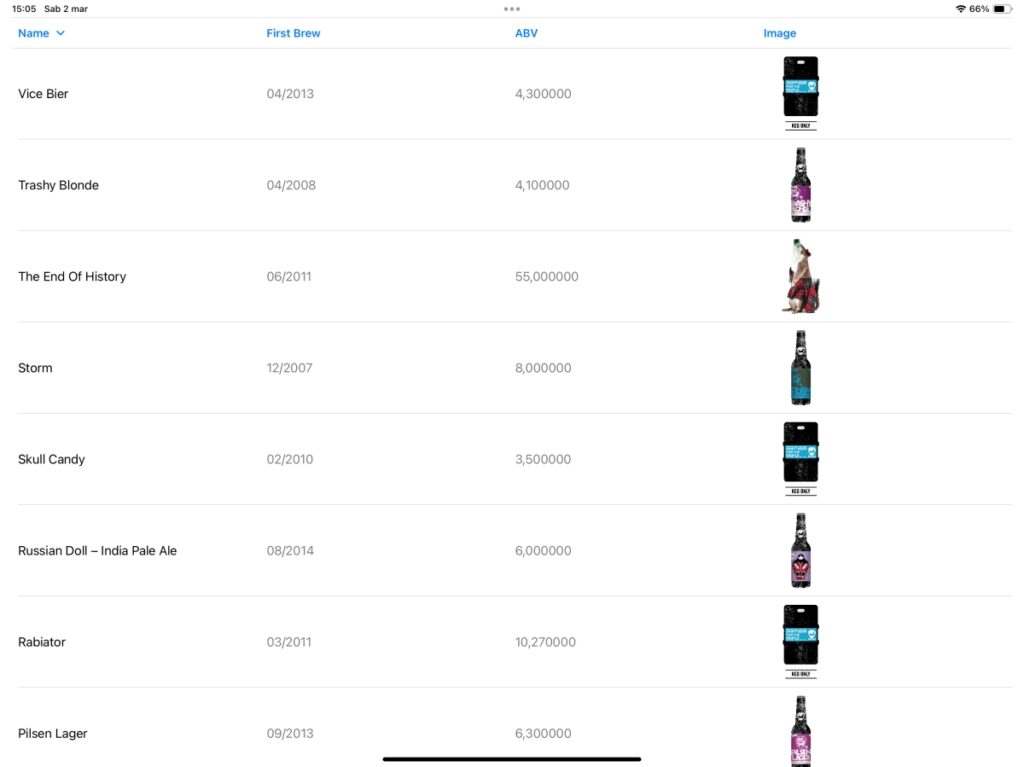
To have this:

he first step is to replace the List with a TableView:

Table(beers) {
            TableColumn("Name", value: \.name)
            TableColumn("First Brew", value: \.first_brewed)
            TableColumn("ABV") { beer in
                Text("\(beer.abv)")
            }
            TableColumn("Image") { beer in
                AsyncImage(url: URL(string: beer.image_url)) { image in
                    image.resizable().scaledToFit()
                } placeholder: {
                    ProgressView()
                }
                .frame(width: 100, height: 100)
            }
        }

The table operates on the array of beers. After that, we add the column, where we assign the title name and the value (at least for the strings). For the ABV, which is a double, we pass the beer to the content (in this case, simple text), the same goes for the column that displays the image.

Now, we want to add a sorting option, to sort by name:

@State private var sortOrder = [KeyPathComparator(\Beer.name, order: .reverse)]

Change the Table definition in this way:

Table(beers, sortOrder: $sortOrder)

It’s not sufficient if we want the order to change by tapping on the column header; we have to add this:

.onChange(of: sortOrder) {
            beers.sort(using: sortOrder)

To have the beers list ordered right after it’s downloaded, we add this to the getBeers function:

beers.sort(using: sortOrder)

Merging everything together:

struct ContentView: View {
    @State var beers: [Beer] = []
    @State var page = 0
    @State private var sortOrder = [KeyPathComparator(\Beer.name, order: .reverse)]
    var body: some View {
        Table(beers, sortOrder: $sortOrder) {
            TableColumn("Name", value: \.name)
            TableColumn("First Brew", value: \.first_brewed)
            TableColumn("ABV") { beer in
                Text("\(beer.abv)")
            }
            TableColumn("Image") { beer in
                AsyncImage(url: URL(string: beer.image_url)) { image in
                    image.resizable().scaledToFit()
                } placeholder: {
                    ProgressView()
                }
                .frame(width: 100, height: 100)
                
            }
        }.onAppear {
            Task {
                await getBeers()
            }
        }.onChange(of: sortOrder) {
            beers.sort(using: sortOrder)
       }
    }
    func getBeers() async {
        do {
            page += 1
            let url = URL(string: "https://api.punkapi.com/v2/beers?page=\(page)&per_page=30")!
            let (data, _) = try await URLSession.shared.data(from: url)
            let beersLoaded = try JSONDecoder().decode([Beer].self, from: data)
            beers = beersLoaded + beers
            beers.sort(using: sortOrder)
        } catch {
            print("Some error")
        }
    }
}

Now we are able to create a sorted table.

Note: English is not my native language, so I apologize for any errors. I use AI solely to generate the banner of the post; the content is human-generated.
Async Image in SwiftUI

If your app needs to display images that are hosted on a server, this post is for you. It’s a common scenario where images aren’t downloaded or are not present in the application’s assets. Another common issue is displaying a progress indicator until the image is fully displayed. AsyncImage is the solution to all these requests.

IIn this post, I use as a starting point the code discussed in a previous post (https://nicoladefilippo.com/pull-refresh-in-swiftui/), where we loaded a list of beer names. Now, we will also add images. Here is the code:

struct Beer: Codable, Identifiable {
    var id: Int
    var name: String
}

struct ContentView: View {
    @State var beers: [Beer] = []
    @State var page = 0
    var body: some View {
        NavigationStack {
            List(beers) { beer in
                Text(beer.name)
            }.refreshable {
                await getBeers()
            }
        }.onAppear {
            Task {
                await getBeers()
            }
        }
    }
    
    func getBeers() async {
        do {
            page += 1
            let url = URL(string: "https://api.punkapi.com/v2/beers?page=\(page)&per_page=30")!
            let (data, _) = try await URLSession.shared.data(from: url)
            let beersDownloaded = try JSONDecoder().decode([Beer].self, from: data)
            beers = beersDownloaded + beers
        } catch {
            print("Error")
        }
    }
}

To make improvements, first, add the image field to the Beer struct:

struct Beer: Codable, Identifiable {
    var id: Int
    var name: String
    var image_url: String
}

Now that we have the information, let’s take a look at how to display it:

AsyncImage(url: URL(string: beer.image_url)) { image in
         image.resizable().scaledToFit()
     } placeholder: {
         ProgressView()
     }.frame(width: 50, height: 50)

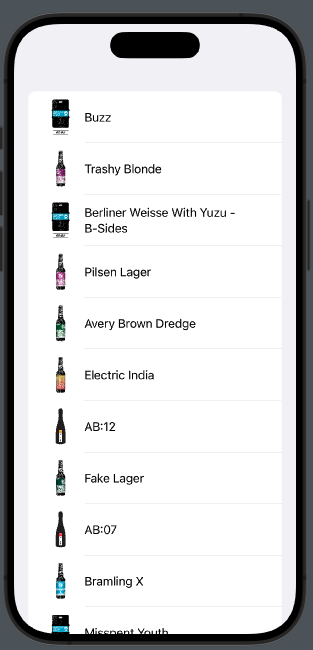
So, AsyncImage takes a URL, and until the image is displayed, a ProgressView is shown. Once the image becomes available, it’s resized proportionally to fit the size of the frame.

Now, let’s proceed with a list written in the following manner:

List(beers) { beer in
                HStack {
                    AsyncImage(url: URL(string: beer.image_url)) { image in
                        image.resizable().scaledToFit()
                    } placeholder: {
                        ProgressView()
                    }.frame(width: 50, height: 50)
                    Text(beer.name)
                }
            }

We have:

Pull refresh in SwiftUI

How many apps do you know that implement the pull-to-refresh feature? If you’re interested in learning how to create this helpful functionality in your app, you can read this post.

Let’s start with the basics:

struct ContentView: View {
    var body: some View {
        NavigationStack {
            List(1..<30) { n in
                Text("Beer \(n)")
            }
            .refreshable {
                print("Load other beer")
            }
        }
    }
}

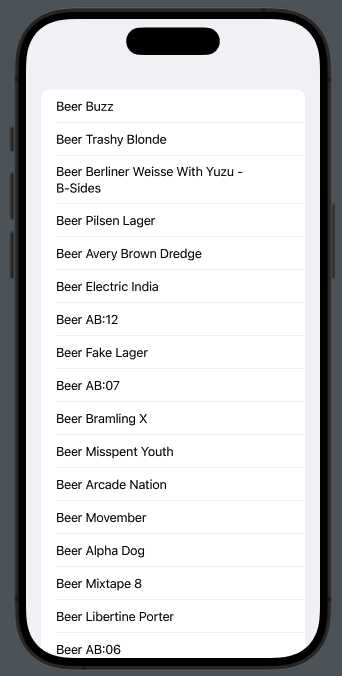
This code displays a simple list of beers identified by name, with the important part being the refreshable feature. It’s this last feature that creates the graphical effect for the pull action and executes the code within the parentheses asynchronously (where the print instruction is located).

Real Example

Starting from this point, let’s try to create something a bit more complex and realistic. We aim to load beers, 30 per page, and when we perform the pull action, we want to download and display another 30 beers. The beers are sourced from: https://api.punkapi.com/v2/beers

First, create the struct for the beer, as we only want to retrieve the name:

struct Beer: Codable, Identifiable {
    var id: Int
    var name: String
}

The Beer struct needs to conform to the Codable protocol because we want to decode the JSON information. Additionally, it should implement the Identifiable protocol since we intend to display the beers in a list, which requires a unique identifier for each item.

Now implement the pull action:

struct ContentView: View {
    @State var beers: [Beer] = []
    @State var page = 0
    
    var body: some View {
        NavigationStack {
            List(beers) { beer in
                Text("Beer \(beer.name)")
            }
            .refreshable {
                await getBeers()
            }
        }.onAppear {
            Task {
                await getBeers()
            }
        }
    }
    func getBeers() async {
        // get the beers
    }
}

Thus, we declare an empty array that is filled with the initial set of beers when the view is displayed, and additional beers are downloaded when we perform the pull-to-refresh action. We also declare a page variable, which will be incremented with each request. Note how we need to declare a Task in the onAppear modifier to execute an asynchronous action. However, in the .refreshable modifier, we do not need to explicitly create a Task because it is designed to handle such actions directly.

Take a look to the getBeer function:

func getBeers() async {
        do {
            page += 1
            let url = URL(string: "https://api.punkapi.com/v2/beers?page=\(page)&per_page=30")!
            let (data, _) = try await URLSession.shared.data(from: url)
            let beersLoaded = try JSONDecoder().decode([Beer].self, from: data)
            beers = beersLoaded + beers
        } catch {
            print("Some error")
        }
    }

In this function, we increase the page number and use this number as a parameter in the URL to fetch 30 beers at a time. If there are no errors, the new beers are appended to the front of the beer array.

Drink in moderation!

Note: English is not my native language, so I apologize for any errors. I use AI solely to generate the banner of the post; the content is human-generated.

Advanced DatePicker in SwiftUI

How can we allow the user to select a date within a defined range? If you’re seeking an answer, read this post.

In this post, you’ll learn how to define different ranges:

  • From a start date to the end of time.
  • From the distant past to a defined endpoint.
  • Within a well-defined range.

Let’s get started.

From a start date to the end of time

struct ContentView: View {
        var startDate = Date()
        @State private var dateSelected = Date()
        var body: some View {
            VStack {
                DatePicker(
                    "Select a date",
                    selection: $dateSelected,
                    in: startDate...,
                    displayedComponents: [.date])
                .padding()
            }
        }
    }

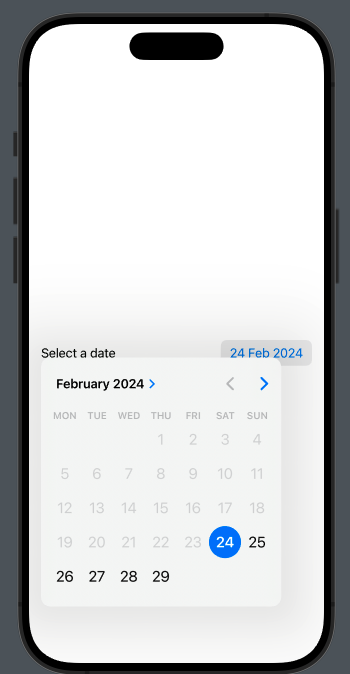
Therefore, we set the startDate to today, just to simplify things. In the DatePicker, we define the range with:

in: startDate...,

So, from today to end of the time.

From the distant past to a defined endpoint

This is the dual of the previous case; here, we invert the range:

in: ...endDate,

where endDate is

var endDate = Date()

To have

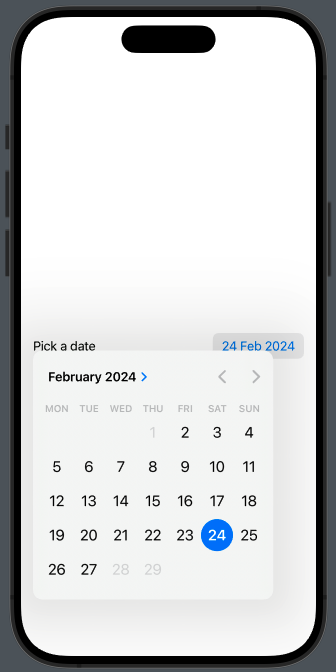
Within a well-defined range

As you can imagine, we need to define a range:

let dateRange: ClosedRange<Date> = {
        let calendar = Calendar.current
        let startComponents = DateComponents(year: 2024, month: 2, day: 2)
        let endComponents = DateComponents(year: 2024, month: 2, day: 27)
        return calendar.date(from:startComponents)!
        ...
        calendar.date(from:endComponents)!
    }()

ClosedRange is a structure that allows us to define an interval between an upper and a lower bound.

DateComponents allow us to specify a date using year, month, day, hour, and minutes.

In this example, we use only year, month, and day. Feel free to modify the example by also including hour and minutes in the range.

struct ContentView: View {
    let dateRange: ClosedRange<Date> = {
        let calendar = Calendar.current
        let startComponents = DateComponents(year: 2024, month: 2, day: 2)
        let endComponents = DateComponents(year: 2024, month: 2, day: 27)
        return calendar.date(from:startComponents)!
        ...
        calendar.date(from:endComponents)!
    }()
    @State private var dateSelected = Date()
    
    var body: some View {
        VStack {
            DatePicker(
            "Pick a date",
            selection: $dateSelected,
            in: dateRange,
            displayedComponents: [.date])
            .padding()
        }
    }
}

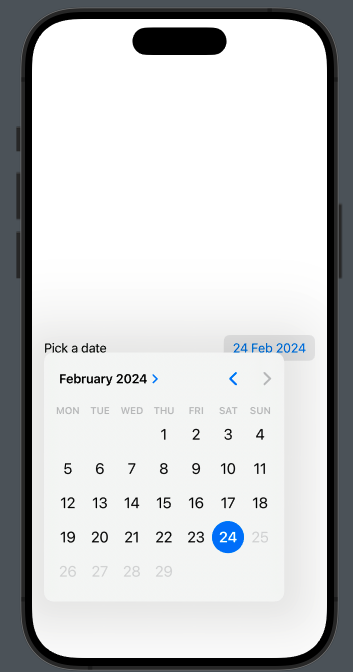
In this case we have:

Thanks for reading.

Note: English is not my native language, so I apologize for any errors. I use AI solely to generate the banner of the post; the content is human-generated.