Expand List Item

In this post, we see how to expand a list item of a list. To do this is not complicated, the principle is simple when the user taps the row, we insert the current Item in a Set. The view used to show the current item change the visualization type if the current item is in the set of selected items.

Before starting copy the images: https://nicoladefilippo.com/wp-content/uploads/2021/05/blogger-336371_1920-1536×1024.jpg and https://nicoladefilippo.com/wp-content/uploads/2021/05/desk-593327_1920-1536×1024.jpg in your assets directory, renaming them blogger and desktop (you can use also other images if you prefer).

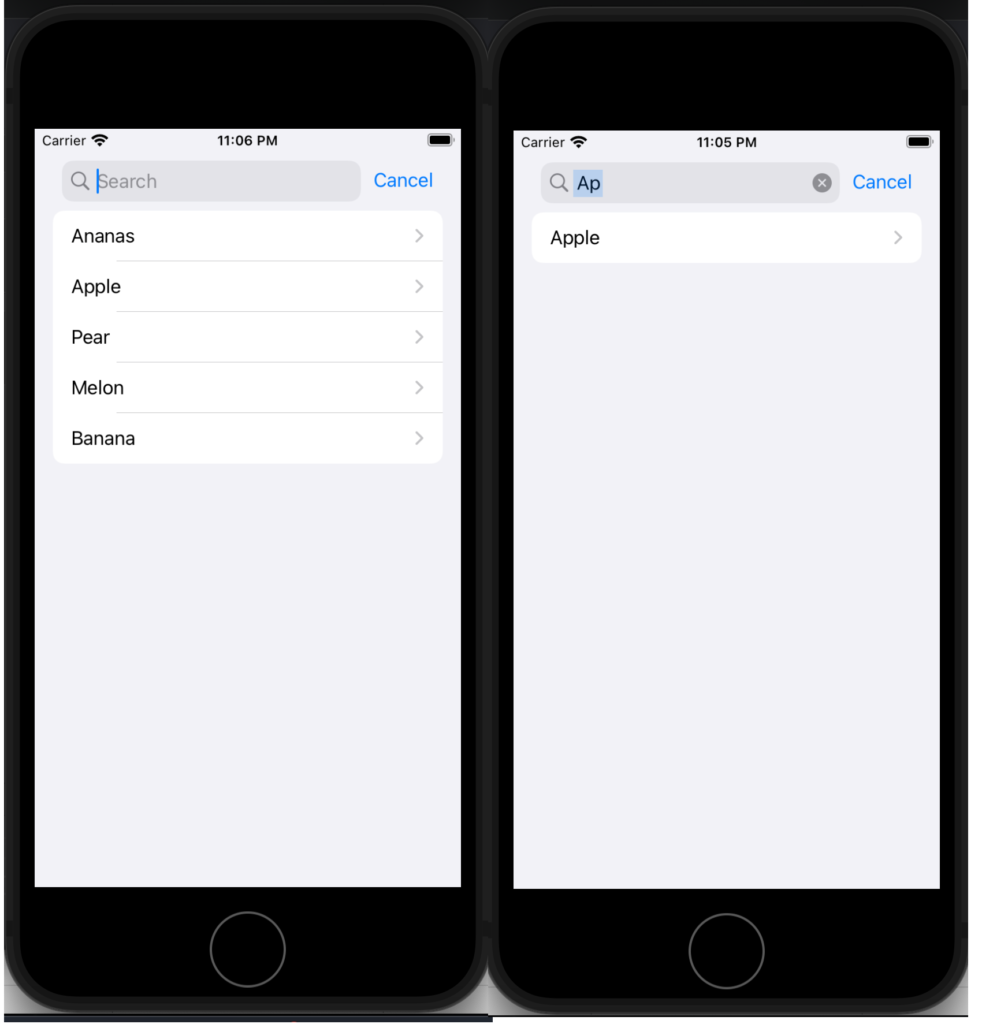
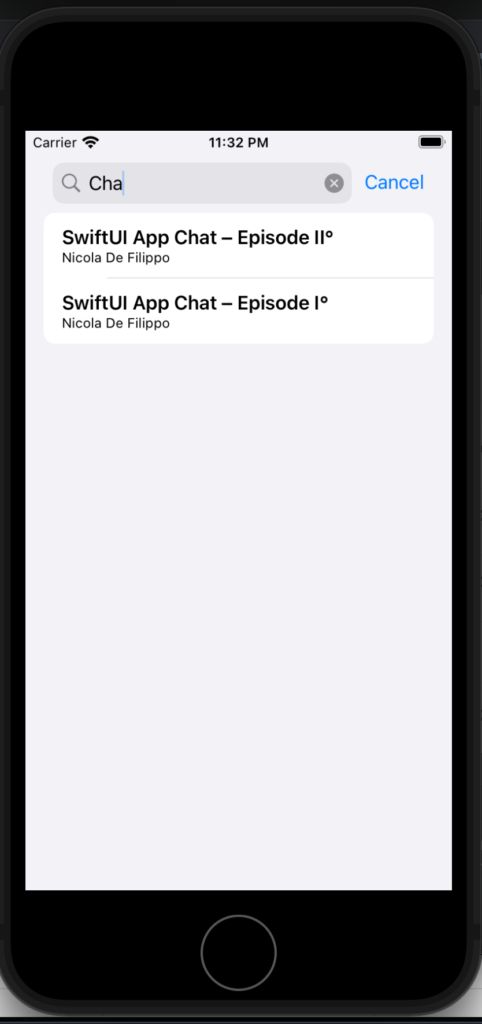
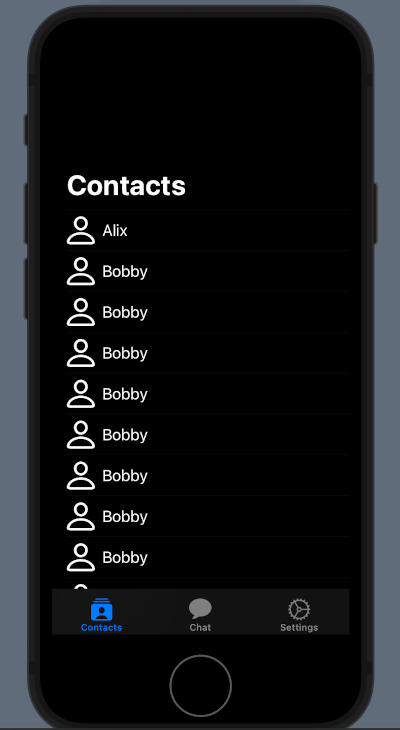
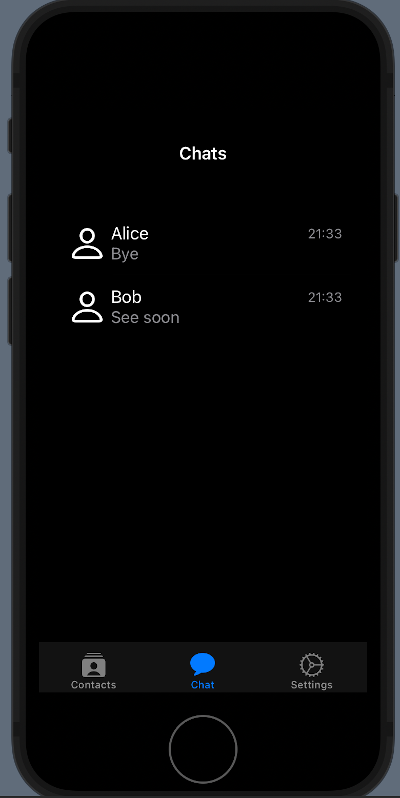
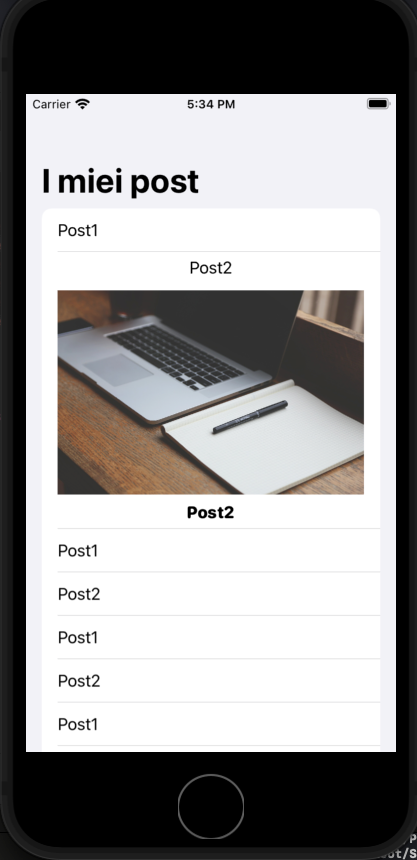
The final behaviour is:

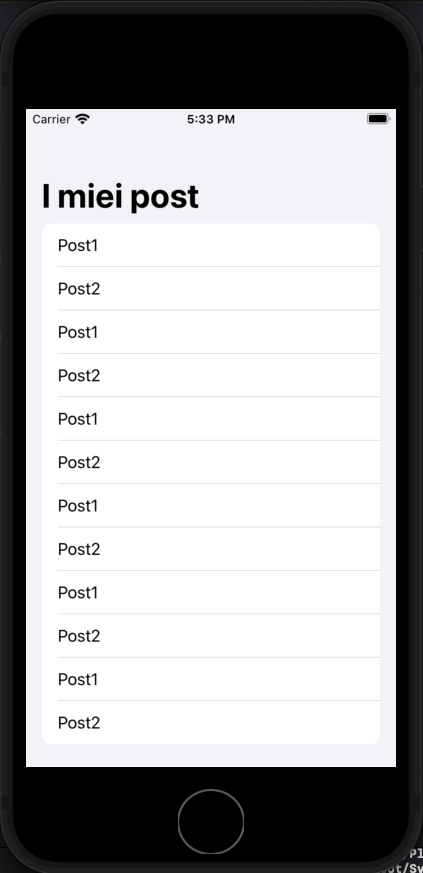
Define the data model for the list:

struct Post: Identifiable, Hashable {
    var id = UUID()
    var title: String
    var image: String
}

The view:

struct ExpandCardUIView: View {
    @State private var selection: Set<Post> = []
    
    var posts = [Post(title: "Post1", image: "blogger"), Post(title: "Post2", image: "desk"),
                 Post(title: "Post1", image: "blogger"), Post(title: "Post2", image: "desk"),
                 Post(title: "Post1", image: "blogger"), Post(title: "Post2", image: "desk"),
                 Post(title: "Post1", image: "blogger"), Post(title: "Post2", image: "desk"),
                 Post(title: "Post1", image: "blogger"), Post(title: "Post2", image: "desk"),
                 Post(title: "Post1", image: "blogger"), Post(title: "Post2", image: "desk"),
    ]
    var body: some View {
        NavigationView {
            List(posts) { post in
                RowView(post: post, isExpanded: self.selection.contains(post))
                .onTapGesture {
                    self.selectDeselect(post)
                }
                
            }
            .navigationBarTitle("I miei post")
        }
    }
    
    private func selectDeselect(_ post: Post) {
            if selection.contains(post) {
                selection.remove(post)
            } else {
                selection.insert(post)
            }
        }
}

Take a look at the logic, at beginning define:

@State private var selection: Set<Post>

In this Set are added the Post when the user Tap the row. If the user re-tap the row, the Post is removed from the Set. This is done by calling the function selectDeselect.

The row is shown with:

struct RowView: View {
    var post: Post
    let isExpanded: Bool
    var body: some View {
        VStack {
            HStack {
                Text(post.title)
            }
            if isExpanded {
                HStack {
                    BigRow(post:post)
                }
            }
        }
    }
    
}

The isEpanded is true when the selection (the Set) contains a post, in that case, the row shows also the BigRow, simply an image and another title in the body.

struct BigRow: View {
    var post: Post
    var body: some View {
        VStack {
            Image(post.image)
                .resizable()
                .aspectRatio(contentMode: .fit)
                
            Text(post.title)
                .fontWeight(.heavy)
                .font(.system(.headline, design: .rounded))
        }
    }
}

Note: English is not my native language, so I’m sorry for some errors. I appreciate it if your correct me.

SearchBar with SwiftUI

From September 2021 is finally available native SwiftUI SearchBar component, so is not anymore necessary to attach UIKit things to have the search bar in a SwiftUI application, but there is a condition, can be restrictive for someone, to use iOS 15.

First look at a simple example, use the searchbar to search a string in a list of fruit.

struct SimpleSearchUIView: View {
    let names = ["Ananas", "Apple", "Pear", "Melon", "Banana"]
    @State private var searchText = ""
    
    var body: some View {
        NavigationView {
            List {
                ForEach(searchResults, id: \.self) { name in
                    NavigationLink(destination: Text(name)) {
                        Text(name)
                    }
                }
            }
            .searchable(text: $searchText)
            .navigationTitle("Fruits")
        }
    }
    
    var searchResults: [String] {
        if searchText.isEmpty {
            return names
        } else {
            return names.filter {$0.lowercased().contains(searchText.lowercased())}
        }
    }
}

First thing, add a searchable to a List. The searchable is waiting for a text, and the written text is saved in a state variable, in this case, searchText.

The ForEach is not working on a list but with a variable that contains the fruits filtered using the search text. Simply it applies a filter on the names array.

Now see an example using an array of complex type, simply Post type, so defined:

struct Post: Identifiable, Hashable {
    var id = UUID()
    var title: String
    var image: String
}

Now the List and the searchbar working in this way:

struct SerarchUIView: View {
    @State private var searchText = ""
    var posts = [
        Post(title: "Toolbar and Customization", author: "Nicola De Filippo"),
        Post(title: "SwiftUI App Chat – Episode II°", author: "Nicola De Filippo"),
        Post(title: "SwiftUI App Chat – Episode I°", author: "Nicola De Filippo"),
        Post(title: "Navigation", author: "NDF"),
        Post(title: "SwiftUI App Chat – Episode II°", author: "Nicola De Filippo"),
        Post(title: "List in SwiftUI", author: "NDF"),
        Post(title: "State, Binding and Refactoring", author: "Nicola De Filippo")
        
    ]
    var body: some View {
        NavigationView {
            List(searchResults) { post in
                VStack(alignment: .leading) {
                    Text(post.title)
                        .font(.headline)
                    Text(post.author)
                        .font(.caption)
                }
            }.searchable(text: $searchText)
            .navigationBarTitle("My posts", displayMode: .automatic)
        }
    }
    
    var searchResults: [Post] {
        if searchText.isEmpty {
            return posts
        } else {
            return posts.filter { (post: Post) in
                return post.title.lowercased().contains(searchText.lowercased())
            }
        }
    }
}

Now the list iterates on a list of posts, the searchable works with a text, instead of the search result in this case filter the array using the title. If everything is ok, you should have:

Note: English is not my native language, so I’m sorry for some errors. I appreciate it if your correct me.

Qml – Copy And Paste

Sometimes in mobile applications is helpful can copy text between applications (i.e. wifi password or simply text). With a simple Text is impossible to do the copy action; it is possible using the QClipBoard, so we have to use a bit of C++.

In my example, we see how to copy the text from a ListItem and past where we want. Start looking at the Qml code:

App {
    NavigationStack {

        Page {
            title: qsTr("Main Page")

            AppToolTip {
                 id: copyTip
                 text: "Copied"
            }

            AppListView {
                id: listView
                anchors.fill: parent

                delegate: SimpleRow {
                    item: modelData
                    showDisclosure: false
                    onSelected: {
                        copyTip.target = listView.currentItem
                        clipboard.setText(detailText)
                        copyTip.open()
                    }
                }

                model: [
                    { text: "WIFI ID",
                        detailText: "MyWifi" },
                    { text: "WIFI PASSWORD",
                        detailText: "1234562"}
                ]
            }
        }
    }
}

First, in the example I used https://www.felgo.com but you can use also simple Qml. In the code, we define a ListView with a simple model that has two fields: text and detailText. The delegate is SimpleRow that show these two pieces of information (you can use your custom delegate if you prefer).

In the code you can find an AppTooltip that we use to show a “Copied” message after we copied the text.

How do we copy the text? Simple we call the function setText of the clipboard object.

What’s a clipboard?

#ifndef MOBILECLIPBOARD_H
#define MOBILECLIPBOARD_H

#include <QObject>

class MobileClipBoard : public QObject
{
    Q_OBJECT
public:
    explicit MobileClipBoard(QObject *parent = nullptr);
    Q_INVOKABLE void setText(const QString &from);
    Q_INVOKABLE QString text();
};

#endif // MOBILECLIPBOARD_H

In the class MobileClipBoard we have two methods invocable from the Qml side. Let’s see what those methods do:

#include <QClipboard>
#include <QApplication>
#include "mobileclipboard.h"

MobileClipBoard::MobileClipBoard(QObject *parent) : QObject(parent)
{

}

void MobileClipBoard::setText(const QString &from)
{
    QClipboard *clipboard = QApplication::clipboard();
    clipboard->setText(from);
}

QString MobileClipBoard::text()
{
    QClipboard *clipboard = QApplication::clipboard();
    return clipboard->text();
}

In the setText get the reference to the system clipboard and set the text in the clipboard.

The text() method simple return the text within the system clipboard.

The last point, bind the C++ world with the Qml side:

 MobileClipBoard clipboard;

felgo.qmlEngine()->rootContext()->setContextProperty("clipboard", &clipboard);

We declare a MobileClipboard and pass it to the root QQmlContext, so it can be used in the Qml side.

You can find the code here https://github.com/niqt/mobileclipboard

Note: English is not my native language, so I’m sorry for some errors. I appreciate it if your correct me.

SSH and AWS LightSail

For a side project I need a simple server, so i choosed an AWS LightSail Linux Server. I installed the Amazon Linux distribution, then using the web ssh console, I installed MongoDB, Golang and other tools that I need. The problem is started when I have to move data on this server, using the command:

ssh -i mykey.pem ec2-usr@ipaddress

Give me this error:

Permission denied (publickey,gssapi-keyex,gssapi-with-mic).

In the end, I resolved to copy my local public ssh key in the .ssh/authorized_keys file on the server.

I wrote the key making a copy and paste using the web ssh console from the AWS LightSail console.

Honestly, I like the AWS product but in this case, I’m a bit disappointed because making what is wrote in the documentation don’t resolve the problem.

SwiftUI App Chat – Episode II°

In the previous episode, we created the structure of the app but with not pretty look&feel, in this post, we see how to improve a bit.

First, I remember that the code of the project is here: https://github.com/niqt/EEnigma

Contacts list

To change the NavigationBar we ha to define a init function in the ContentView:

 init() {
        let coloredAppearance = UINavigationBarAppearance()
        coloredAppearance.configureWithTransparentBackground()
        coloredAppearance.backgroundColor = .clear
        coloredAppearance.titleTextAttributes = [.foregroundColor: UIColor.white]
        coloredAppearance.largeTitleTextAttributes = [.foregroundColor: UIColor.white]
        
        UINavigationBar.appearance().standardAppearance = coloredAppearance
        UINavigationBar.appearance().compactAppearance = coloredAppearance
        UINavigationBar.appearance().scrollEdgeAppearance = coloredAppearance
        UINavigationBar.appearance().tintColor = UIColor.white
        
        UITabBar.appearance().tintColor = UIColor.white
        UITabBar.appearance().barTintColor = UIColor.black
    }

First thing, create a UINavigationBarAppearance and clear any default options, then we set the background colour and the text colour. Note that for the text colour we need to specify the colour for when the title is little or large.

We set the appearance to the navigation bar for any possible case.

The last two lines are about the settings of the TabBar.

You can read the post https://nicoladefilippo.com/toolbar-and-customization/ to read more about the customizations.

To complete the customization of the contacts list we need to do some changes in the ContactsView:

 init() {
        UITableView.appearance().backgroundColor = .none
        UITableViewCell.appearance().backgroundColor = .none
    }
    
    var body: some View {
        List {
            ForEach(contacts) { contact in
                ZStack(alignment: .leading) {
                    RowView(contact: contact)
                    NavigationLink(destination: ChattingView()) {
                        EmptyView()
                    }.buttonStyle(PlainButtonStyle()).frame(width:0).opacity(0)
                }
            }.listRowBackground(Color.clear)
        }.background(Color.black)
        .ignoresSafeArea()
    }
}

struct RowView: View {
    var contact: Contact
    var body: some View {
        HStack {
            Image(systemName: "person")
                .resizable()
                .frame(width: 30, height: 30)
                .foregroundColor(.white)
            Text(contact.aliasName)
                .foregroundColor(.white)
        }
    }
}

In the init function we remove the background to the tableview and to the cells present in the view.

Note how with the .listRowBackground(Color.clear) remove the background to the rows and how we set the list background to the list with .background(Color.black).

The strange thing is in this piece of code:

ZStack(alignment: .leading) {
                    RowView(contact: contact)
                    NavigationLink(destination: ChattingView()) {
                        EmptyView()
                    }.buttonStyle(PlainButtonStyle()).frame(width:0).opacity(0)
                }

Why do we need a ZStack to show the rows of the list?

In SwuiftUI we don’t have a simple method to remove the Disclosure indicator (> at the end of the row). To hide this indicator, we overlap the Row with a NavigationLink that have EmptyView (so we can see the RowView) and a buttonStyle with zero width.

Chats List

We want:

First, remove the background in the init function:

init() {
        UITableView.appearance().backgroundColor = .none
        UITableViewCell.appearance().backgroundColor = .none
    }

We have to change also the list to add the background and remove the disclosure indicator:

var body: some View {
        NavigationView {
            VStack {
                List {
                    ForEach(chats) { chat in
                        ZStack(alignment: .leading) {
                            RowLastChat(chat: chat)
                            NavigationLink(
                                destination: ChattingView())
                                {}.buttonStyle(PlainButtonStyle()).frame(width:0).opacity(0)
                        }
                    }.listRowBackground(Color.clear)
                }.background(Color.black)
            }.navigationBarTitle("Chats", displayMode: .inline)
            .foregroundColor(.white)
            .background(Color.black)
            .ignoresSafeArea()
        }
    }

In this code, we have the same written for the previous view. In future, we’ll see a bit of refactoring to avoid “repeat yourself”.

Chat

For this View, we have the same code (or very similar). In the init:

init() {
        UITableView.appearance().backgroundColor = .none
        UITableViewCell.appearance().backgroundColor = .none
    }

In the body:

var body: some View {
        VStack(spacing: 0) {
            // Chat
            List {
                ForEach(chats) { chat in
                    if chat.name == "Bob" {
                        UserRowView(chat: chat)
                        
                    } else {
                        ChatRowView(chat: chat)
                    }
                }.listRowBackground(Color.clear)
            }.background(Color.black)
            .listStyle(SidebarListStyle())
            .ignoresSafeArea()
            .navigationBarTitle("Chatting", displayMode: .inline)
            .onTapGesture {
                self.endEditing()
                
            }
            // Input
            HStack() {
                TextEditor(text: $writing)
                    .frame(minHeight: 0, maxHeight: 50)
                    .border(Color.gray)
                
                Button(action: {
                    chats.append(Chat(name: "Bob", image:"", lastMessage: writing, timestamp: Date(), chatId: ""))
                    writing = ""
                    self.endEditing()
                }, label: {
                    Image(systemName: "paperplane")
                })
                
            }.ignoresSafeArea(.keyboard, edges: .bottom)
            .padding()
            .background(Color.black)
        }
    }

Next

In the next post we’ll start to integrate the core of the chart application. Stay tuned!

Note: English is not my native language, so I’m sorry for some errors. I appreciate it if your correct me.