
In the previous episode, we created the structure of the app but with not pretty look&feel, in this post, we see how to improve a bit.
First, I remember that the code of the project is here: https://github.com/niqt/EEnigma
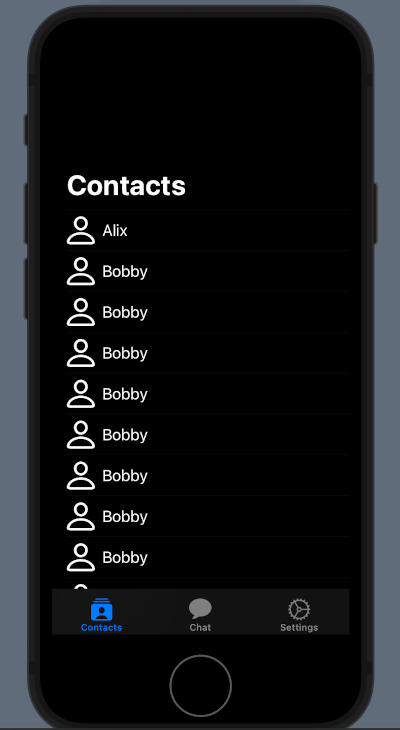
Contacts list
To change the NavigationBar we ha to define a init function in the ContentView:
 init() {
        let coloredAppearance = UINavigationBarAppearance()
        coloredAppearance.configureWithTransparentBackground()
        coloredAppearance.backgroundColor = .clear
        coloredAppearance.titleTextAttributes = [.foregroundColor: UIColor.white]
        coloredAppearance.largeTitleTextAttributes = [.foregroundColor: UIColor.white]

        UINavigationBar.appearance().standardAppearance = coloredAppearance
        UINavigationBar.appearance().compactAppearance = coloredAppearance
        UINavigationBar.appearance().scrollEdgeAppearance = coloredAppearance
        UINavigationBar.appearance().tintColor = UIColor.white

        UITabBar.appearance().tintColor = UIColor.white
        UITabBar.appearance().barTintColor = UIColor.black
    }
First thing, create a UINavigationBarAppearance and clear any default options, then we set the background colour and the text colour. Note that for the text colour we need to specify the colour for when the title is little or large.
We set the appearance to the navigation bar for any possible case.
The last two lines are about the settings of the TabBar.
You can read the post https://nicoladefilippo.com/toolbar-and-customization/ to read more about the customizations.
To complete the customization of the contacts list we need to do some changes in the ContactsView:
 init() {
        UITableView.appearance().backgroundColor = .none
        UITableViewCell.appearance().backgroundColor = .none
    }

    var body: some View {
        List {
            ForEach(contacts) { contact in
                ZStack(alignment: .leading) {
                    RowView(contact: contact)
                    NavigationLink(destination: ChattingView()) {
                        EmptyView()
                    }.buttonStyle(PlainButtonStyle()).frame(width:0).opacity(0)
                }
            }.listRowBackground(Color.clear)
        }.background(Color.black)
        .ignoresSafeArea()
    }
}

struct RowView: View {
    var contact: Contact
    var body: some View {
        HStack {
            Image(systemName: "person")
                .resizable()
                .frame(width: 30, height: 30)
                .foregroundColor(.white)
            Text(contact.aliasName)
                .foregroundColor(.white)
        }
    }
}
In the init function we remove the background to the tableview and to the cells present in the view.
Note how with the .listRowBackground(Color.clear) remove the background to the rows and how we set the list background to the list with .background(Color.black).
The strange thing is in this piece of code:
ZStack(alignment: .leading) {
                    RowView(contact: contact)
                    NavigationLink(destination: ChattingView()) {
                        EmptyView()
                    }.buttonStyle(PlainButtonStyle()).frame(width:0).opacity(0)
                }
Why do we need a ZStack to show the rows of the list?
In SwuiftUI we don’t have a simple method to remove the Disclosure indicator (> at the end of the row). To hide this indicator, we overlap the Row with a NavigationLink that have EmptyView (so we can see the RowView) and a buttonStyle with zero width.
Chats List
We want:
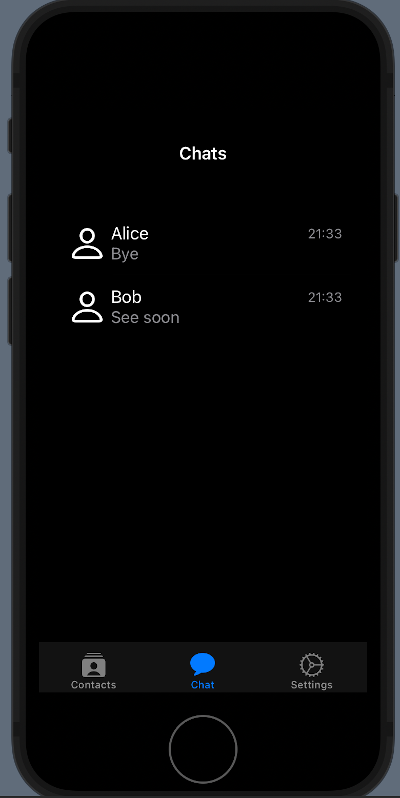
First, remove the background in the init function:
init() {
        UITableView.appearance().backgroundColor = .none
        UITableViewCell.appearance().backgroundColor = .none
    }
We have to change also the list to add the background and remove the disclosure indicator:
var body: some View {
        NavigationView {
            VStack {
                List {
                    ForEach(chats) { chat in
                        ZStack(alignment: .leading) {
                            RowLastChat(chat: chat)
                            NavigationLink(
                                destination: ChattingView())
                                {}.buttonStyle(PlainButtonStyle()).frame(width:0).opacity(0)
                        }
                    }.listRowBackground(Color.clear)
                }.background(Color.black)
            }.navigationBarTitle("Chats", displayMode: .inline)
            .foregroundColor(.white)
            .background(Color.black)
            .ignoresSafeArea()
        }
    }
In this code, we have the same written for the previous view. In future, we’ll see a bit of refactoring to avoid “repeat yourself”.
Chat
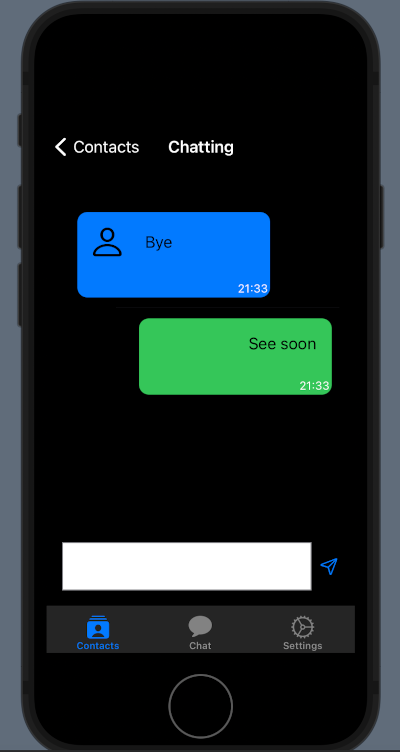
For this View, we have the same code (or very similar). In the init:
init() {
        UITableView.appearance().backgroundColor = .none
        UITableViewCell.appearance().backgroundColor = .none
    }
In the body:
var body: some View {
        VStack(spacing: 0) {
            // Chat
            List {
                ForEach(chats) { chat in
                    if chat.name == "Bob" {
                        UserRowView(chat: chat)

                    } else {
                        ChatRowView(chat: chat)
                    }
                }.listRowBackground(Color.clear)
            }.background(Color.black)
            .listStyle(SidebarListStyle())
            .ignoresSafeArea()
            .navigationBarTitle("Chatting", displayMode: .inline)
            .onTapGesture {
                self.endEditing()

            }
            // Input
            HStack() {
                TextEditor(text: $writing)
                    .frame(minHeight: 0, maxHeight: 50)
                    .border(Color.gray)

                Button(action: {
                    chats.append(Chat(name: "Bob", image:"", lastMessage: writing, timestamp: Date(), chatId: ""))
                    writing = ""
                    self.endEditing()
                }, label: {
                    Image(systemName: "paperplane")
                })

            }.ignoresSafeArea(.keyboard, edges: .bottom)
            .padding()
            .background(Color.black)
        }
    }
Next
In the next post we’ll start to integrate the core of the chart application. Stay tuned!
Note: English is not my native language, so I’m sorry for some errors. I appreciate it if your correct me.