State, Binding and Refactoring

State

In every software or application we need to share information from the different components, in this post we’ll see how to do it in SwiftUI.

In the first example, we want to make a simple application that tapping on a button, the app shows the number of times that the button is tapped, more simple to show that to explain:
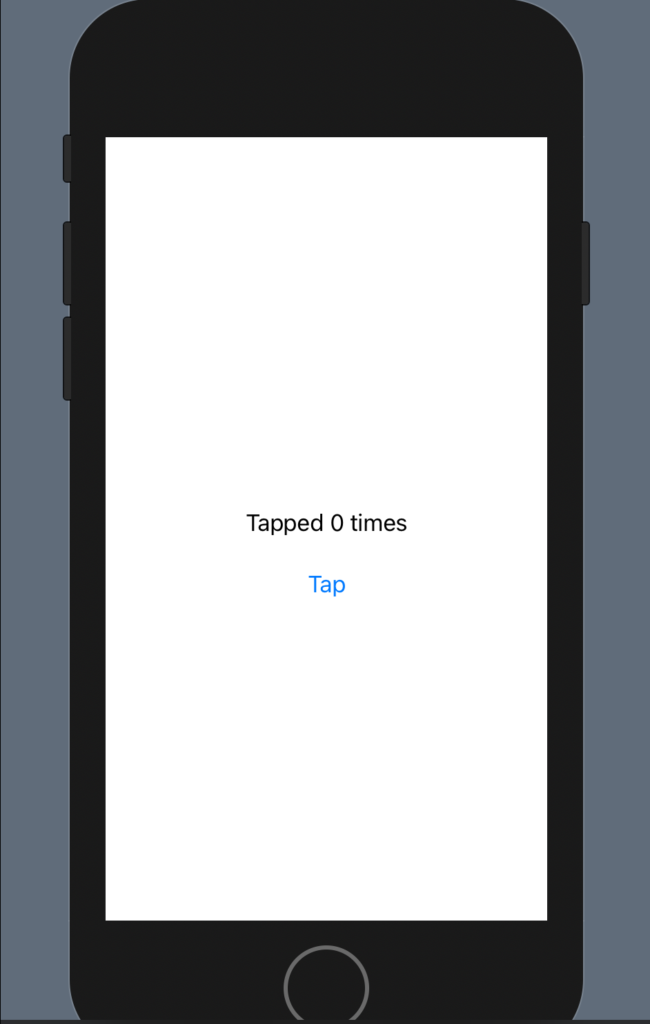
Let’s see the code:

struct ContentView: View {
    @State var counter: Int = 0
    
    var body: some View {
        VStack {
            Text(("Tapped \(counter) times"))
                .padding()
            Button(action: {counter = counter + 1}, label: {
                Text("Tap")
            })
        }
    }
}

The counter variable is defined as @State, this means that every change to the counter is propagated in the application.

Thus, every time that we tap the button, the counter is increased by one.

Note: the code counter is initialized to 0, if you remove this, to change in

@State var counter: Int

You’ll have an error in the ContentView_Previews, to fix it, change the code in this way:

struct ContentView_Previews: PreviewProvider {
    static var previews: some View {
        ContentView(counter: 0)
    }
}

In this way, the counter is initialized in the preview. We have to initialize the counter in every place where the ContentView is called.

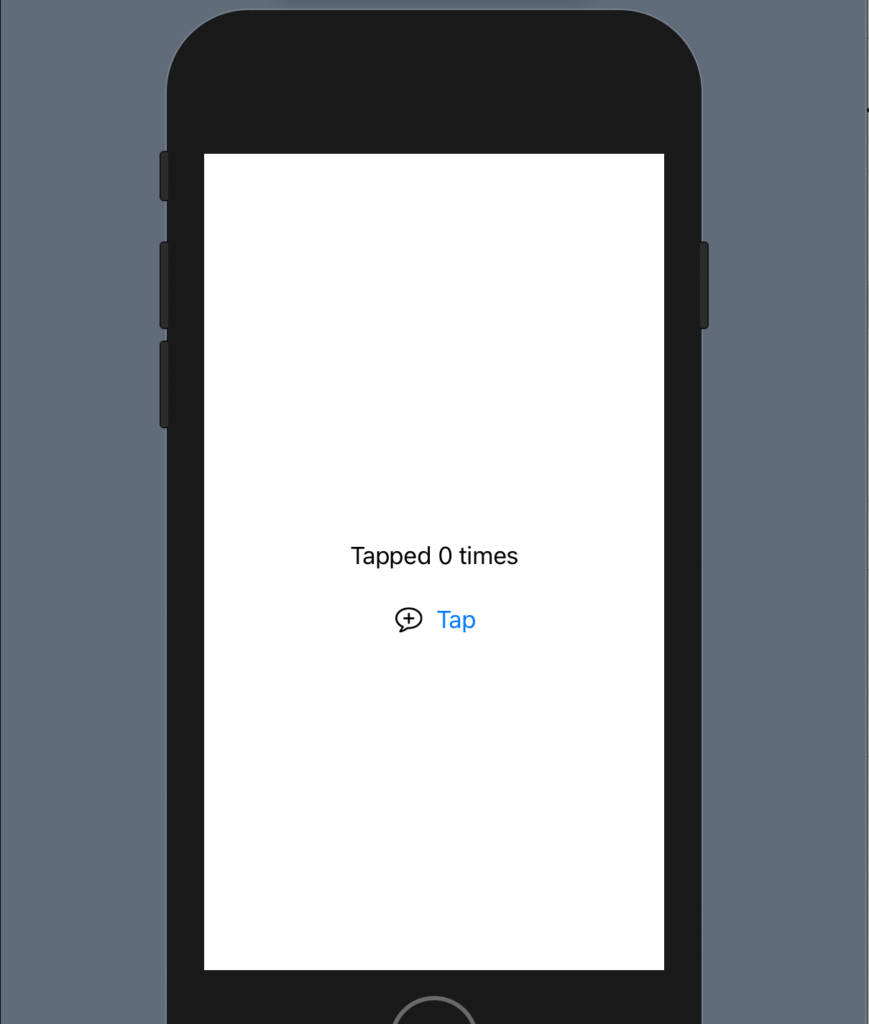
To see as refactoring the code adding some code:

struct ContentView: View {
    @State var counter: Int = 0
    
    var body: some View {
        VStack() {
            Text(("Tapped \(counter) times"))
                .padding()
            HStack {
                Image(systemName: "plus.message")
                Button(action: {counter = counter + 1}, label: {
                    Text("Tap")
                })
            }
        }
    }
}

We have a HStack with an Image and the Button:

Now, go on the code, press control and click on the HStack, will appear a menu:

Select “Show Code Action”, will appear:

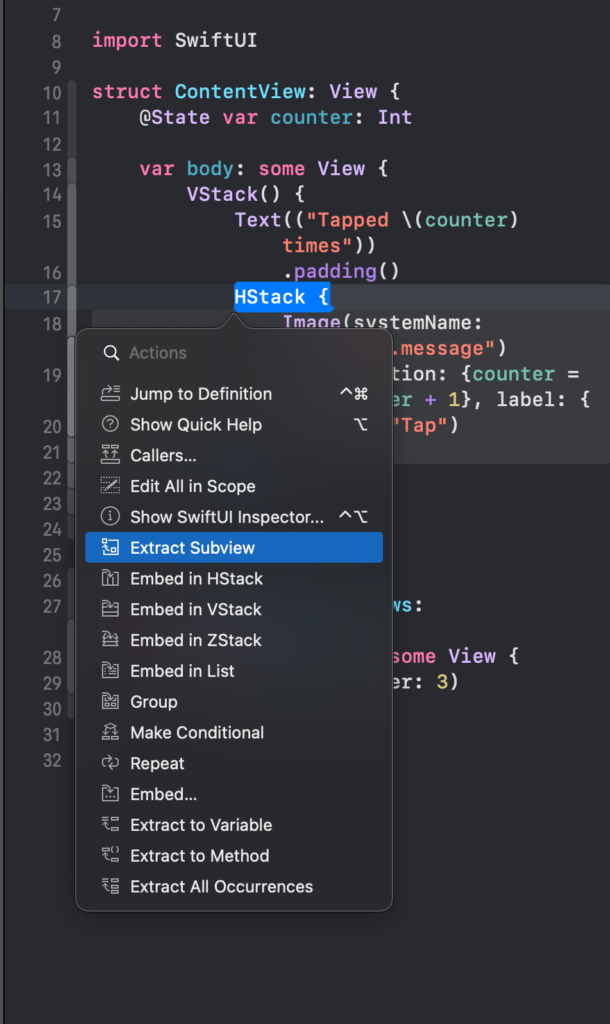
Now rename the ExtractView (default name for the extracted view) to PlusButton:

struct PlusButton: View {
    var body: some View {
        HStack {
            Image(systemName: "plus.message")
            Button(action: {counter = counter + 1}, label: {
                Text("Tap")
            })
        }
    }
}

Binding

We have an error: cannot find counter in the scope. It’s correct, we don’t have the definition of the counter in the PlusButtonView. We have to do a special declaration, using the keyword @Binding.

struct ContentView: View {
    @State var counter: Int = 0
    
    var body: some View {
        VStack() {
            Text(("Tapped \(counter) times"))
                .padding()
            PlusButton(counter: $counter)
        }
    }
}

struct PlusButton: View {
    @Binding var counter: Int
    var body: some View {
        HStack {
            Image(systemName: "plus.message")
            Button(action: {counter = counter + 1}, label: {
                Text("Tap")
            })
        }
    }
}

With the @Binding we can share and propagate the counter access in a different view. Simplify, we can say that with State, we say to monitor the change, with Binding get the change.

Note as is changed the way to pass counter in:

PlusButton(counter: $counter)

It’s necessary to use the $ near the counter variable, with the dollar symbol we specify the binding.

We can also use more PlusButton:

struct ContentView: View {
    @State var counter: Int = 0
    
    var body: some View {
        VStack() {
            Text(("Tapped \(counter) times"))
                .padding()
            PlusButton(counter: $counter)
            PlusButton(counter: $counter)
            PlusButton(counter: $counter)
        }
    }
}

Running the code you can verify that tapping every single button change the single common value (counter).

Note: English is not my native language, so I’m sorry for some errors. I appreciate it if your correct me.

Images And Assets

In this post, we see how to use the images with SwiftUI and how to create some beautiful effect.

In beginning, we have to add an image to the assets of the XCode project. Click on the assets:

Drag your image under the AppIcon (you can use the image in the header of this post https://nicoladefilippo.com/wp-content/uploads/2021/04/sanfrancisco-1-1536×1152.jpg).

Upload sanfrancisco image

To use the image in the code:

import SwiftUI

struct ContentView: View {
    var body: some View {
        Image("sanfrancisco")
    }
}

In this way we see the image in bad way:

To resize the image we have to add the resizable:

Image("sanfrancisco")
            .resizable()

To remove the white on the top we choose to ignore the safe area in this way:

struct ContentView: View {
    var body: some View {
        Image("sanfrancisco")
            .resizable()
            .aspectRatio(contentMode: .fill)
            .edgesIgnoringSafeArea(.all)
            
    }
}

Try this code and see what happen.

Aspect ratio

To default the aspect ratio is fill (fill the space but not preserve the aspect ratio), to preserve the aspect ratio:

struct ContentView: View {
    var body: some View {
        Image("sanfrancisco")
            .resizable()
            .aspectRatio(contentMode: .fit)
    }
}

It’s not very nice, we can add rounded corner and padding:

struct ContentView: View {
    var body: some View {
        Image("sanfrancisco")
            .resizable()
            .aspectRatio(contentMode: .fit)
            .cornerRadius(40)
            .padding()
    }
}

To have:

Note: add the padding after the corner radius otherwise you will have the rounded corner.

Effects

There is also another effect, for example, rotation, I show how to have a photo with a cut edges.

struct ContentView: View {
    var body: some View {
        Image("sanfrancisco")
            .resizable()
            .aspectRatio(contentMode: .fit)
            .cornerRadius(40)
            .padding()
            .rotationEffect(.init(degrees: 30))
            .cornerRadius(40)
            .padding()
    }
}

Shape

It’s possible also to give a shape and size to the image:

struct ContentView: View {
    var body: some View {
        Image("sanfrancisco")
            .resizable()
            .aspectRatio(contentMode: .fit)
            .clipShape(Circle())
            .frame(width: 200)
    }
}

Overlay

Now see how to overlay an object with another not using the ZStack. First, we push the image on the topo using a VStack and a spacer; change the size using a frame and change the opacity:

struct ContentView: View {
    var body: some View {
        VStack {
            Image("sanfrancisco")
            .resizable()
            .aspectRatio(contentMode: .fit)
            .frame(width: 300)
            .opacity(0.5)
            Spacer()
        }
            
    }
}

Now we want to add a title on the top of the photo:

The code:

struct ContentView: View {
    var body: some View {
        VStack {
            Image("sanfrancisco")
            .resizable()
            .aspectRatio(contentMode: .fit)
            .frame(width: 300)
            .opacity(0.5)
            .overlay(
                Text("San Francisco bay ")
                    .fontWeight(.heavy)
                    .font(.system(.headline, design: .rounded))
                    .foregroundColor(.yellow)
                    .padding()
                    .background(Color.gray)
                    .cornerRadius(20)
                    .opacity(0.8)
                    .padding(),
                    alignment: .top
                
                )
            Spacer()
        }
            
    }
}

We added an overlay with a Text with properties that we already know (from previous post https://nicoladefilippo.com/text-and-button-with-swuiftui/), note instead of the alignment, with this we say where to set the text. Alignment is a property of the overlay (note the comma after the last padding).

Note: English is not my native language, so I’m sorry for some errors. I appreciate it if your correct me.

Layout in SwiftUI

Vertical Stack

In the previous post we saw a single object in the view, but to build a nice and helpful interface we need to combine more objects. We start with a simple example, we want a text and a button.

VStack() {
            Button(action: {
                
            }) {
                Text("Press")
                    .padding()
                    .foregroundColor(.white)
                    .background(LinearGradient(gradient: Gradient(colors: [Color.black, Color.green]), startPoint: .trailing, endPoint: .leading
                    ))
                    .clipShape(Ellipse())
            }
            Text("Me")
                .foregroundColor(Color.red)
        }

In the code, I used a vertical stack (VStack) the object is showed as in the column. See the picture:

It’s possible to also align the element in the stack, to leading (left), to right (trailing) or center (the default). To add the spacing between the elements it used the spacing property.

VStack(alignment: .leading, spacing: 20) {
            Button(action: {
                
            }) {
                Text("Press")
                    .padding()
                    .foregroundColor(.white)
                    .background(LinearGradient(gradient: Gradient(colors: [Color.black, Color.green]), startPoint: .trailing, endPoint: .leading
                    ))
                    .clipShape(Ellipse())
            }
            Text("Me")
                .foregroundColor(Color.red)
        }

To have:

How we can push the button and the text on the top of the view? We have to use the Spacer object:

struct ContentView: View {
    var body: some View {
        VStack(alignment: .center, spacing: 20) {
            Button(action: {
                
            }) {
                Text("Press")
                    .padding()
                    .foregroundColor(.white)
                    .background(LinearGradient(gradient: Gradient(colors: [Color.black, Color.green]), startPoint: .trailing, endPoint: .leading
                    ))
                    .clipShape(Ellipse())
            }
            Text("Me")
                .foregroundColor(Color.red)
            Spacer()
        }
    }
}

We added the Spacer object after the Text, so we fill the space and the other objects are pushed up.

If we push the Spacer before the button, the objects are pushed down.

Horizontal Stack

Dual of the Vertical Stack is the horizontal stack (HStack):

struct ContentView: View {
    var body: some View {
        HStack(alignment: .center, spacing: 20) {
            Button(action: {
                
            }) {
                Text("Press")
                    .padding()
                    .foregroundColor(.white)
                    .background(LinearGradient(gradient: Gradient(colors: [Color.black, Color.green]), startPoint: .trailing, endPoint: .leading
                    ))
                    .clipShape(Ellipse())
            }
            Text("Me")
                .foregroundColor(Color.red)

        }
    }
}

To have:

The alignment, in this case, is center, top and bottom. See top as an example:

struct ContentView: View {
    var body: some View {
        HStack(alignment: .top, spacing: 20) {
            Button(action: {
                
            }) {
                Text("Press")
                    .padding()
                    .foregroundColor(.white)
                    .background(LinearGradient(gradient: Gradient(colors: [Color.black, Color.green]), startPoint: .trailing, endPoint: .leading
                    ))
                    .clipShape(Ellipse())
            }
            Text("Me")
                .foregroundColor(Color.red)

        }
    }
}

It looks as:

With the HStack we using the Spacer to push the objects on the left or the right. For example, if we write the Spacer after the Text:

struct ContentView: View {
    var body: some View {
        HStack(alignment: .center, spacing: 20) {
            Button(action: {
                
            }) {
                Text("Press")
                    .padding()
                    .foregroundColor(.white)
                    .background(LinearGradient(gradient: Gradient(colors: [Color.black, Color.green]), startPoint: .trailing, endPoint: .leading
                    ))
                    .clipShape(Ellipse())
            }
            Text("Me")
                .foregroundColor(Color.red)
            Spacer()

        }
    }
}

To have:

ZStack

SwiftUI has also a ZStack, it’s as a pile. See the code:

struct ContentView: View {
    var body: some View {
        ZStack() {
            Text("I'm level 0")
                .foregroundColor(Color.white)
                .padding(100)
                .background(Color.gray)
            Text("I'm level 1")
                .foregroundColor(Color.blue)
        }
    }
}

If we run this code we see that the second label (“I’m level 1”), override the first one:

In this way it’s not helpful, to move the second label we can use the offset(x, y) where the X is relative to the beginning of the first element, the same for the Y.

struct ContentView: View {
    var body: some View {
        ZStack() {
            Text("I'm level 0")
                .foregroundColor(Color.white)
                .padding(100)
                .background(Color.gray)
            Text("I'm level 1")
                .foregroundColor(Color.blue)
                .offset(x: 0, y: 100)
        }
    }
}

To have:

It does not seem very cool example, but we’ll see nice things in the next post when I’ll show how to use the image.

Note: English is not my native language, so I’m sorry for some errors. I appreciate it if your correct me.

Button 2nd episode

Button Shape

In the previous post https://nicoladefilippo.com/text-and-button-with-swuiftui/, we saw how to create simple buttons, in this post we see also it’s possible also create a button with a particular shape, for example, a circle or ellipse.

struct ContentView: View {
    var body: some View {
        Button(action: {
            
        }) {
            Text("Press")
                .padding()
                .background(Color.red)
                .clipShape(Ellipse())
        }
    }
}

In this case, we have a Button with a text a red background and clipped has Ellipse. The result is:

You can try to use Circle() to see the different shape button.

Gradients

It’s possible also to use a gradient as a background instead of a simple color:

struct ContentView: View {
    var body: some View {
        Button(action: {
            
        }) {
            Text("Press")
                .padding()
                .foregroundColor(.white)
                .background(LinearGradient(gradient: Gradient(colors: [Color.yellow, Color.green]), startPoint: .trailing, endPoint: .leading))
                .clipShape(Ellipse())
        }
    }
}

In this case, we have a linear gradient that starts from the yellow colour to finish in green, note as the gradient start on the right (trailing), if you invert trailing and leading you to invert also the effect.

The code produces:

What happens if the start point is equal to the end point?

The code is:

struct ContentView: View {
    var body: some View {
        Button(action: {
            
        }) {
            Text("Press")
                .padding()
                .foregroundColor(.white)
                .background(LinearGradient(gradient: Gradient(colors: [Color.yellow, Color.green]), startPoint: .leading, endPoint: .leading))
                .clipShape(Ellipse())
        }
    }
}

Another nice example:

struct ContentView: View {
    var body: some View {
        Button(action: {
            
        }) {
            Text("Press")
                .padding()
                .foregroundColor(.white)
                .background(LinearGradient(gradient: Gradient(colors: [Color.black, Color.green]), startPoint: .trailing, endPoint: .leading
                ))
                .clipShape(Ellipse())
        }
    }
}

Note: English is not my native language, so I’m sorry for some errors. I appreciate it if your correct me.

QML vs SwiftUI (Part 3)

In this article we’ll see the different use of the lists that is a very most used components in the mobile apps. We starting with SwiftUI, code the example show how create a simple list and the right swipe action to delete a row.

struct ContentView: View {
    @State var names = ["Albert", "Tom", "Jeff", "Jennifer", "Steve", "Bob"]
    var body: some View {
        List {
            ForEach(names.indices, id: \.self) { index in
                Text(self.names[index]) // Delegate
            }
            .onDelete { (indexSet) in
                self.names.remove(atOffsets: indexSet)
            }
        }
    }
}


The list is created with the keyword List, with For each for every elements of the array names is created an object Text that show the single name. If the model is more complex that a simple list of name and we have to show also an image we can add in the For each block the Image object.

The instruction “id: .self” is necessary to identify every single row in unique way, in this case this identifier is the index of the array. Other important keyword is “@State” with this we say to SwiftUi to monitoring the variable names and update the ui when it changes.

In the on Delete function we do the action the we want doing the right swipe, in this case delete the element. Before to switch to QML, we see an example a bit more complex:

struct People: Identifiable {
    var id = UUID()
    var name: String
    var image: String
}struct ContentView: View {
    @State var peoples = [People(name:"Albert", image: "albert.png"), People(name: "Tom", image: "tom.png"),People(name: "Jeff", image:"jeff.png"),People(name: "Jennifer",image: "jennifer.png"), People(name: "Steve", image: "steve.png"), People(name: "Bob", image: "bob.png")]
    var body: some View {
        List {
            ForEach(peoples, id: \.id) { people in
                HStack {
                    Text(people.name)
                    Image(people.image)
                }
            }
            .onDelete { (indexSet) in
                self.peoples.remove(atOffsets: indexSet)
            }
        }
    }
}


In this case we have the struct People that implements the protocol Identifiable, so we have am unique identifier for any instance of the struct. In the ForEach we now use it do identify the row also added a horizonthal stack to create a row with text and image. Now see that same example in QML:

ListView {
    id: listView
    anchors.fill: parent
    model: ListModel {
        ListElement { img: "bob.png"; name: "Bob" }
        ListElement { img: "jennifer.png"; name: "Jennifer" }
        ListElement { img: "tom.png"; name: "Tom" }
        ListElement { img: "denise.png"; name: "Denise" }
    }
    delegate: SwipeDelegate {
        id: swipeDelegate
        text: model.name
        width: parent.width
        
        ListView.onRemove: SequentialAnimation {
            PropertyAction {
                target: swipeDelegate
                property: "ListView.delayRemove"
                value: true
            }
            NumberAnimation {
                target: swipeDelegate
                property: "height"
                to: 0
                easing.type: Easing.InOutQuad
            }
            PropertyAction {
                target: swipeDelegate
                property: "ListView.delayRemove"
                value: false
            }
        }
        
        contentItem: Item {
            RowLayout {
                Text {
                    text: swipeDelegate.text
                    font: swipeDelegate.font
                    elide: Text.ElideRight
                    visible: swipeDelegate.text
                    horizontalAlignment: Text.AlignLeft
                    verticalAlignment: Text.AlignVCenter
                }
                Image {
                    source: model.img
                    visible: swipeDelegate.text
                    horizontalAlignment: Text.AlignLeft
                    verticalAlignment: Text.AlignVCenter
                }
            }
        }
        
        swipe.right: Label {
            id: deleteLabel
            text: qsTr("Delete")
            color: "white"
            verticalAlignment: Label.AlignVCenter
            padding: 12
            height: parent.height
            anchors.right: parent.right
            
            SwipeDelegate.onClicked: listView.model.remove(index)
            
            background: Rectangle {
                color: deleteLabel.SwipeDelegate.pressed ? Qt.darker("tomato", 1.1) : "tomato"
            }
        }
    }
}


In this case the QML is a bit more complex because we have to customize the label to have the same look & feel of iOS but in QML we don’t need to use any “@State” keyword to force the gui update.

At the end I think that it’s simple for QML developer to use SwiftUI, a lot of things are similar and both the languages ​​are declaratives. Instead I think that for iOS developer is not simple to use both, is necessary more experience in the declarative world.