
In this post we’ll learn:
- How to create a segment control.
- How to customize the look and feel of a segment control.
Create the segment control
Let’s start by creating a segment control that allows choosing from the days of the week:
struct SegUIView: View {
    @State private var daySelected = 0
    var body: some View {
        VStack {
            Picker("Choose a day", selection: $daySelected) {
                Text("Mo").tag(0)
                Text("Tu").tag(1)
                Text("We").tag(2)
                Text("Th").tag(3)
                Text("Fr").tag(4)
                Text("Sa").tag(5)
                Text("Su").tag(6)
            }
            .pickerStyle(.segmented)
            Text("Selected the day \(daySelected)")
            Spacer()
        }.padding()
    }
}
So, the Segment Control is created by using a Picker and setting its style to segmented. If you remove this style, the default Picker appears as a contextual menu.
The state variable daySelected stores the tag value of the selected item. We then simply display this value in a Text.
Thus we have:
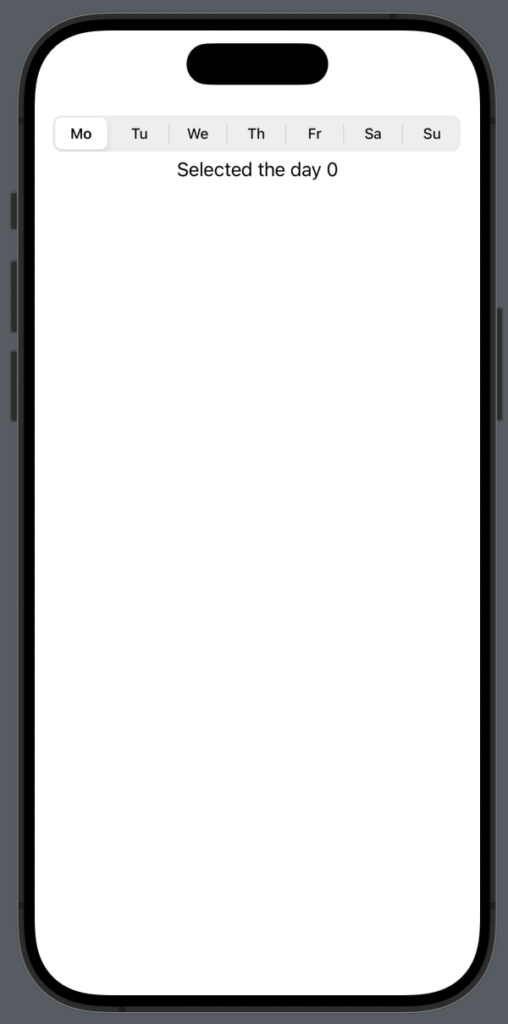
Thus, upon selecting a day, we see the number corresponding to daySelected (the tag number).
To create something more realistic, we can create a function that returns a view for the different daySelected:
@ViewBuilder
func DayView(day: Int) -> some View {
    switch (day) {
    case 0:
        Text("Monday")
    case 1:
        Text("Tuesday")
    case 2:
        Text("Wednesday")
    case 3:
        Text("Thursday")
    case 4:
        Text("Friday")
    case 5:
        Text("Saturday")
    case 6:
        Text("Sunday")
    default:
        Text("")
    }

}
By replacing the code in the body, we can update the view dynamically based on the daySelected. Here’s how it’s done:
var body: some View {
        VStack {
            Picker("Choose a day", selection: $daySelected) {
                Text("Mo").tag(0)
                Text("Tu").tag(1)
                Text("We").tag(2)
                Text("Th").tag(3)
                Text("Fr").tag(4)
                Text("Sa").tag(5)
                Text("Su").tag(6)
            }
            .pickerStyle(.segmented)
            DayView(day: daySelected)
            Spacer()
        }.padding()
    }
Customize the Segment Control
The background of the Picker can be changed by using its background property:
var body: some View {
        VStack {
            Picker("Choose a day", selection: $daySelected) {
                Text("Mo").tag(0)
                Text("Tu").tag(1)
                Text("We").tag(2)
                Text("Th").tag(3)
                Text("Fr").tag(4)
                Text("Sa").tag(5)
                Text("Su").tag(6)
            }
            .pickerStyle(.segmented)
            .background(.yellow)
            DayView(day: daySelected)
            Spacer()
        }.padding()
    }
Instead, to change the properties of the text and the background color of the selected element, we need to use code from UIKit. Therefore, we define an init function in this way:
init() {
    // Color for the selected item
    UISegmentedControl.appearance().selectedSegmentTintColor = UIColor.orange

    // The text color for the selected item
UISegmentedControl.appearance().setTitleTextAttributes([.foregroundColor: UIColor.white], for: .selected)
}
So we have:
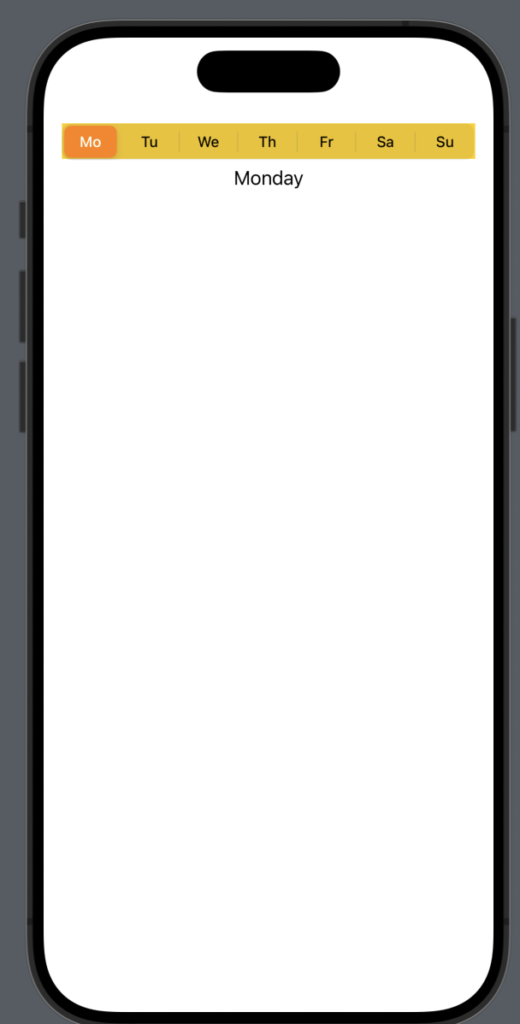
If we want to remove the separator between the days, we can add this code to the init function:
UISegmentedControl.appearance().setDividerImage(UIImage(), forLeftSegmentState: .normal, rightSegmentState: .normal, barMetrics: .default)
To change the text color of the unselected items, add the following code:
UISegmentedControl.appearance().setTitleTextAttributes([.foregroundColor: UIColor.magenta], for: .normal)
The code https://github.com/niqt/swift/tree/master/SegmentController