
With this post starts a series where the topic is building a chat app using the Smoke protocol, as in every my post I want to share knowledge about SwiftUI, so in this series also who doesn’t have an interest in a chat app can read/learn things helpful also for other types of project.
In memory
Before to start, i want to say that: “This Chat App EEnigma stands for Electronic Enigma. It is a project based on the Echo protocol as e.g. deployed in the Smoke mobile Messenger Application for Android, which is known as as worldwide the first mobile McEliece Messenger. I started this project in memory of my friend Bernd H. Stramm, who passed away two years ago and was also a friend of the inventor of the Echo Protocol, e.g. for secure chat. The aim is to provide students a step by step guide and open source code basis to develop an own chat application with the Swift programming language.”
Premise
You can found here https://github.com/niqt/EEnigma the code of this post and the others of the series.
I start creating a skeleton of the app, with no nice GUI, after that the logic will be complete, I’ll review the graphic to do it very pretty.
Contacts
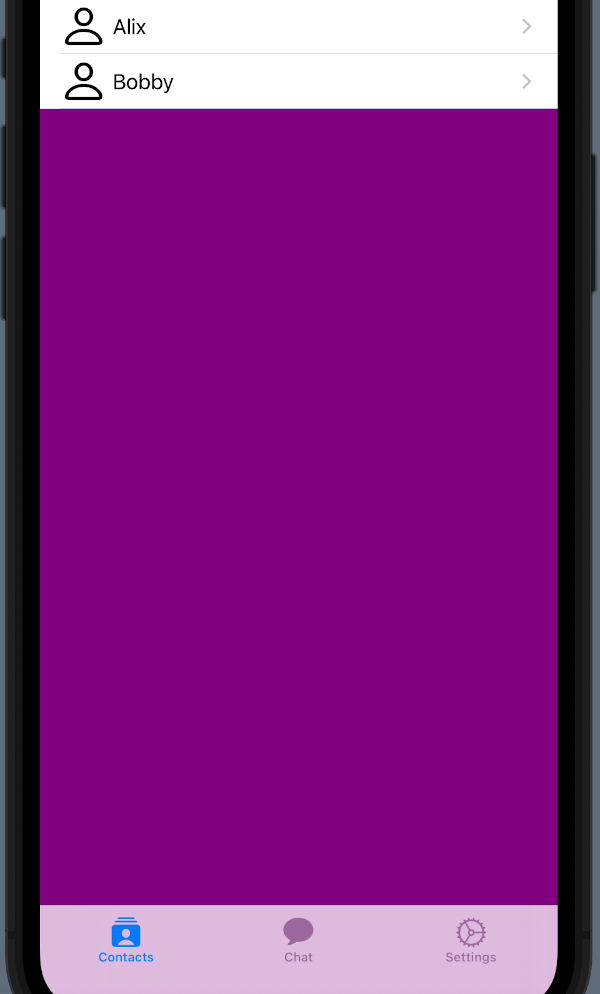
First, we want to create an app with three tabs: Contacts, Chat and Settings.
To create the tabs (see https://nicoladefilippo.com/navigation-in-swiftui/) we write:
struct ContentView: View {
    var body: some View {
        TabView {
            NavigationView {
                ContactsView()
                    .navigationBarTitle("", displayMode: .inline)
            }
            .tabItem {  Label("Contacts", systemImage: "rectangle.stack.person.crop.fill")}
            ChatView()
                .tabItem {  Label("Chat", systemImage: "message.fill")}
            SettingView()
                .tabItem {  Label("Settings", systemImage: "gear")}
        }
    }
}
The three views ContactsView, ChatView and SettingsView don’t exist yet. Note the NavigationView in the first tab, the ContactsVIew is within a NavigationView (with no title), I do it because I want ( when I tap a contact) to open a view to chat.
See the ContactView:
struct ContactsView: View {
    var contacts: Array<Contact> = [Contact(name: "Alice", lastName: "Fish", aliasName: "Alix"),
        Contact(name: "Bob", lastName: "Bird", aliasName: "Bobby")
    ]

    var body: some View {
        List {
            ForEach(contacts) { contact in
                NavigationLink(destination: ChattingView(), label: {
                    RowView(contact: contact)
                })
            }
        }
    }
}

struct RowView: View {
    var contact: Contact
    var body: some View {
        HStack {
            Image(systemName: "person")
                .resizable()
                .frame(width: 30, height: 30)
            Text(contact.aliasName)
        }
    }
}
I defined a Contact in this way:
struct Contact: Identifiable {
    var id = UUID()
    var name: String
    var lastName: String
    var aliasName: String
}
Chatting
The ContactsView is defined as an array of fake contacts and in the List, we iterate this array and show (using the RowView) the default image “person” and the alias of the contact. Note as there is a NavigationLink that contains the RowView. If we tab the row the view change in the destination ChattingView.
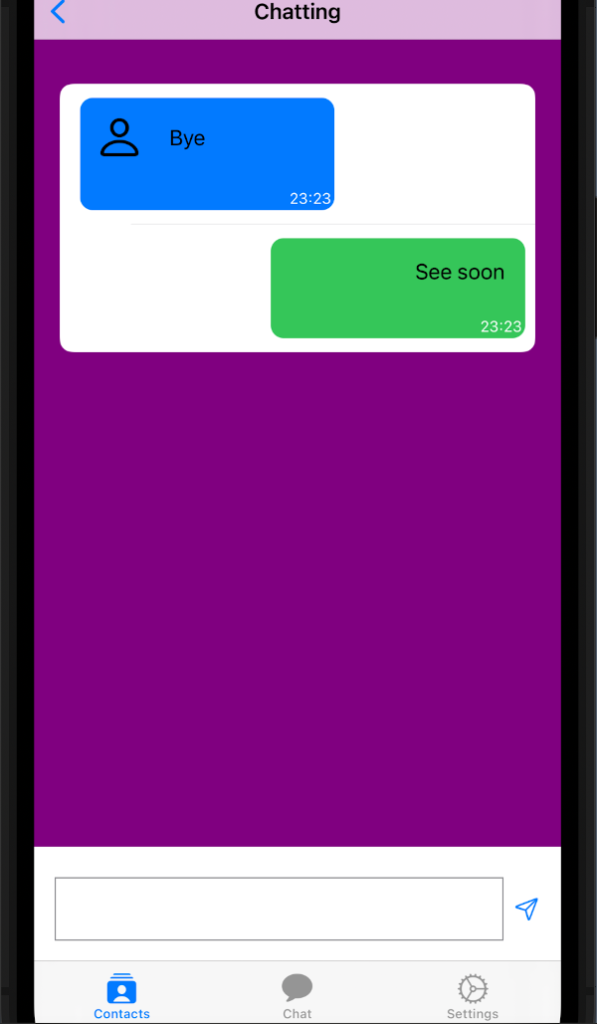
How in all the chat app, on the left we have the messages received and on the right the messages sent.
At the bottom, there are TextEdit and a button to write and send a message. We want to close the keyboard when tapping the send button or tap in any place on the view. See all piece by piece.
Start with the blue rectangle:
struct ChatRowView: View {
    var chat: Chat
    var body: some View {
        VStack (alignment: .trailing){
            HStack() {
                Image(systemName: chat.image)
                    .resizable()
                    .frame(width: 30, height: 30)
                    .padding()
                Text(chat.lastMessage)
                Spacer()
            }.frame(maxWidth: 200)
            Text(timeFormat(date: chat.timestamp))
                .padding(2)
                .font(.caption)
                .foregroundColor(.white)

        }.background(Color.blue)
        .cornerRadius(10)
    }
}
What is a Chat?
struct Chat: Identifiable {
    var id = UUID()
    var name: String
    var image: String
    var lastMessage: String
    var timestamp: Date
    var chatId: String
}
The chat has the name of the sender, an image (we’ll remove when we’ll do refactoring), the last message sent from the “name”, and the Id of the chat and when the message has arrived.
This row so has a VStack aligned on the left, within an HStack with a fixed maximum width, we don’t want a rectangle that fills all the width. In this stack, we add at the end a Spacer to force the alignment on the left. Note instead of the alignment of the stack on the right, it’s necessary to have the time on the right.
Let’s see the green rectangle:
struct UserRowView: View {
    var chat: Chat
    var body: some View {
        HStack {
            Spacer()
            VStack (alignment: .trailing){
                HStack() {
                    Spacer()
                    HStack {
                        Spacer()
                        Text(chat.lastMessage)
                            .padding()
                    }
                }
                Text(timeFormat(date: chat.timestamp))
                    .padding(2)
                    .font(.caption)
                    .foregroundColor(.white)
            }.background(Color.green)
            .frame(minWidth: 10, maxWidth: 200)
            .cornerRadius(10)
        }
    }
}
It’s very similar to the “blue”. In this case, there is no image, because this message is of the user and in the HStack the Spacer is at the beginning because we want to align the text on the right.
To format the time:
func timeFormat(date: Date) -> String {
    let formatter = DateFormatter()
    formatter.dateFormat = "HH:mm"
    return formatter.string(from: date)
}
Using the DateFormatter you can specify how to format the date and time.
Let’s put the pieces together
struct ChattingView: View {
    @State var chats: Array<Chat> = [Chat(name: "Alice", image: "person", lastMessage: "Bye", timestamp: Date(), chatId: "1"),
                                     Chat(name: "Bob", image: "person", lastMessage: "See soon", timestamp: Date(), chatId: "2")
    ]

    @State var writing: String = ""

    init() {
        UITableView.appearance().backgroundColor = .purple
    }

    var body: some View {
        VStack {
            // Chat
            List {
                ForEach(chats) { chat in
                    if chat.name == "Bob" {
                        UserRowView(chat: chat)
                    } else {
                        ChatRowView(chat: chat)
                    }
                }
            }.background(Color.purple)
            .listStyle(SidebarListStyle())
            .navigationBarTitle("Chatting", displayMode: .inline)
            .onTapGesture {
                self.endEditing()
            }
            // Input
            HStack() {
                TextEditor(text: $writing)
                    .frame(minHeight: 0, maxHeight: 50)
                    .border(Color.gray)

                Button(action: {
                    chats.append(Chat(name: "Bob", image:"", lastMessage: writing, timestamp: Date(), chatId: ""))
                    writing = ""
                    self.endEditing()
                }, label: {
                    Image(systemName: "paperplane")
                })

            }.ignoresSafeArea(.keyboard, edges: .bottom)
            .padding()
        }
    }
    private func endEditing() {
        UIApplication.shared.sendAction(#selector(UIResponder.resignFirstResponder), to:nil, from:nil, for:nil)
    }
}
In beginning, we define chats and writing (that store the text that we type) with the @State keyword (look https://nicoladefilippo.com/state-binding-and-refactoring/) because we want to monitor the changes.
In the init, I set the background colour to purple.
With the function endEditing, we dismiss the keyboard, this function is called when the user taps the send button or when taps anywhere on the view.
The Chat part contains a list of the messages, in the foreach, we verify if the message is of the sender or the user. To simplify in this example, I assumed that the user is Bob (in future we’ll remove any embedded value). With .listStyle(SidebarListStyle()) we remove the line separator, instead with onTapGesture we catch this gesture and close the keyboard (is open).
In the input part, we set a TextEdit in the bar on the bottom calling the .ignoresSafeArea(.keyboard, edges: .bottom), in this way the HStack is on the bottom but when appears the keyboard the Hstack is moved on top of the keyboard, so the user can see what he writes.
To default (for now) when simulating the send of the message, the owner is Bob, so we see the message in the green rectangle.
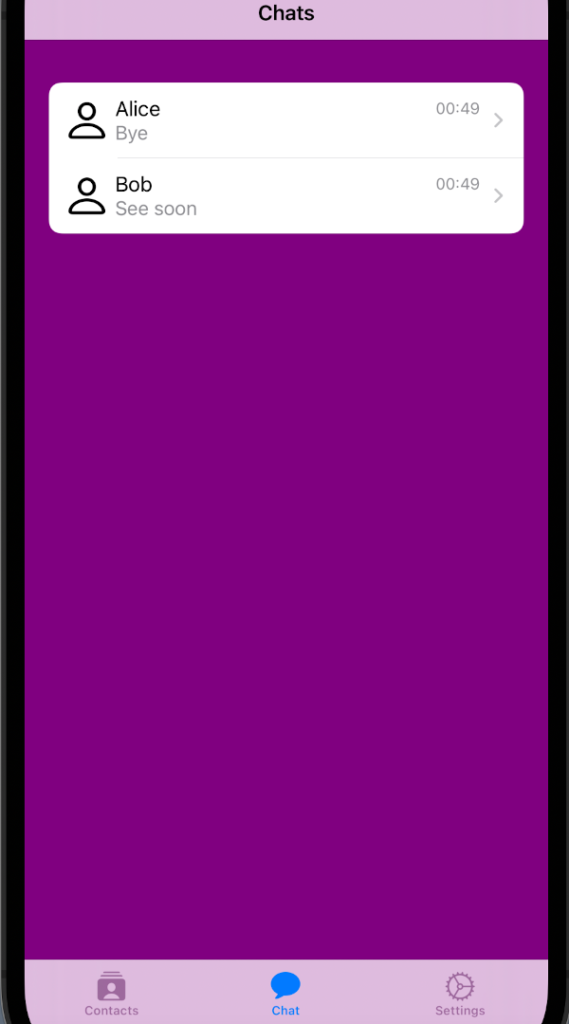
In the end, we see the ChatView
struct ChatView: View {
    var chats: Array<Chat> = [Chat(name: "Alice", image: "person", lastMessage: "Bye", timestamp: Date(), chatId: "1"),
                              Chat(name: "Bob", image: "person", lastMessage: "See soon", timestamp: Date(), chatId: "2")
    ]

    init() {
        UITableView.appearance().backgroundColor = .purple
    }

    var body: some View {
        NavigationView {
            VStack {
                List {
                    ForEach(chats) { chat in
                        NavigationLink(
                            destination: ChattingView(),
                            label: {
                                HStack {
                                    Image(systemName: "person")
                                        .resizable()
                                        .frame(width: 30, height: 30)
                                    VStack(alignment: .leading) {
                                        HStack {
                                            Text(chat.name)
                                            Spacer()
                                            Text(timeFormat(date: chat.timestamp))
                                                .foregroundColor(.gray)
                                                .font(.footnote)
                                        }
                                        Text(chat.lastMessage)
                                            .foregroundColor(.gray)
                                            .font(.callout)
                                    }
                                }
                            })
                    }
                }.background(Color.purple)
            }.navigationBarTitle("Chats", displayMode: .inline)
        }
    }
}
This piece of code has things already seen in the previous: a NavigationLink on the row and when it’s tapped the view skip to destination ChattingView.
I suggest playing with HStack, VStack, Spacer and fonts to have better effects.
How said at the beginning it’s only the first episode, in the next week, we’ll create a nice real chat app.
Note: English is not my native language, so I’m sorry for some errors. I appreciate it if your correct me.