SwiftData Tutorial (Episode I°)

With this post, a short series about SwiftData begins. The goal of this tutorial is to learn SwiftData by building a Pomodoro app (we’ll be using code from another one of my tutorials). SwiftData replaces CoreData, and I can say that CoreData is a pain for any iOS developer. With SwiftData, things are much simpler. Enough with the introduction, let’s start.

In this post, we’ll cover:

  • How to create a project with SwiftData
  • How to create entities
  • How to create relations between entities
  • How to display data
  • How to insert data

How do you create a project that needs SwiftData? Simply take a look at the screenshot:

So, in the storage section, choose SwiftData. This will automatically add the necessary code to your …App file. You should have something like this:

import SwiftUI
import SwiftData

@main
struct SavePomodoroAppApp: App {
    var sharedModelContainer: ModelContainer = {
        let schema = Schema([
            Item.self,
        ])
        let modelConfiguration = ModelConfiguration(schema: schema, isStoredInMemoryOnly: false)

        do {
            return try ModelContainer(for: schema, configurations: [modelConfiguration])
        } catch {
            fatalError("Could not create ModelContainer: \(error)")
        }
    }()

    var body: some Scene {
        WindowGroup {
            ContentView()
        }
        .modelContainer(sharedModelContainer)
    }
}

The sharedModelContainer is the ModelContainer that is created considering the schema and the configuration. Note that in the configuration, it is possible to define whether we want to store the data only in memory or not.

How do you create an entity? Use the keyword model:

import Foundation
import SwiftData

@Model
final class ProjectItem: Identifiable {
    var name: String
    var id = UUID().uuidString
    init(name: String) {
        self.name = name
    }
}

In this case, we want to create an entity Project that has a name and a UUID identifier (for this reason, we specify the protocol Identifiable).

Now, how do we create relations between entities? Suppose we want an entity Pomodoro where every pomodoro has a project:

import Foundation
import SwiftData

@Model
final class PomodoroItem {
    var start: Date
    var end: Date
    var project: ProjectItem
    var name: String
    
    init(start: Date, end: Date, project: ProjectItem, name: String) {
        self.start = start
        self.end = end
        self.project = project
        self.name = name
    }
}

Simply, we add a variable project of type ProjectItem.

Now we can change the schema in the …App file:

@main
struct SavePomodoroAppApp: App {
    var sharedModelContainer: ModelContainer = {
        let schema = Schema([
            PomodoroItem.self,
            ProjectItem.self,
        ])
        . . . 
}

How to display data?

First, create the main view for our application:

struct ContentView: View {
    var body: some View {
        TabView {
            PomodoriView()
            .tabItem {
                Label("Pomodori", systemImage: "calendar.day.timeline.left")
            }
            ProjectsView()
            .tabItem {
                Label("Projects", systemImage: "list.bullet")
            }
        }
    }
}

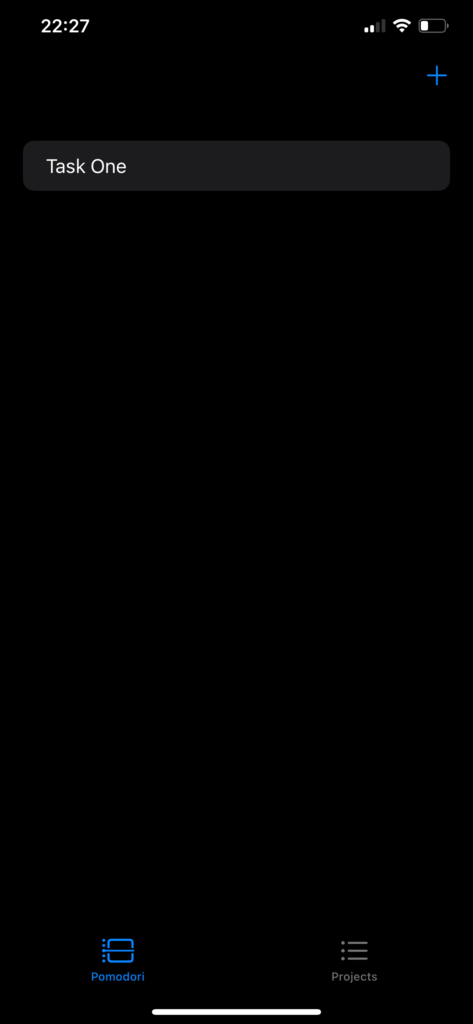
So, two tabs: one for Pomodoro and another for Projects.

Take a look at the PomodoriView to see how to display data:

import SwiftUI
import SwiftData

struct PomodoriView: View {
    @Query private var pomodori: [PomodoroItem]
    @State var isPresented = false
    
    var body: some View {
        NavigationStack {
            List {
                ForEach(pomodori) { pomodoro in
                    Text(pomodoro.name)
                }
            }
            .toolbar {
                ToolbarItem {
                    Button(action: {isPresented = true}) {
                        Label("Add Pomodoro", systemImage: "plus")
                    }
                }
            }.sheet(isPresented: $isPresented, content: {
                PomodoroView()
            })
        }
    }
}

So, with the Query, we load all the PomodoroItem and display them in a list.

The view for the projects is similar:

struct ProjectsView: View {
    @Query private var projects: [ProjectItem]
    @State var isPresented = false
    
    var body: some View {
        NavigationStack {
            List {
                ForEach(projects) { project in
                    Text(project.name)
                    
                }
            }
            .toolbar {
                ToolbarItem {
                    Button(action: {isPresented = true}) {
                        Label("Add Project", systemImage: "plus")
                    }
                }
            }.sheet(isPresented: $isPresented, content: {
                ProjectView()
            })
        }
    }
}

Both of these views have an add button. By tapping on it, we can insert a project or a pomodoro. Take a look at the project:

import SwiftUI
import SwiftData

struct ProjectView: View {
    @Environment(\.modelContext) private var modelContext
    @Environment(\.dismiss) private var dismiss
    @State var projectName = ""
    
    var body: some View {
        VStack {
            TextField("Project name", text: $projectName)
            Button("Save") {
                let newProject = ProjectItem(name: projectName);
                modelContext.insert(newProject)
                dismiss()
            }

        }.padding()
    }
}

In this view, we declare an environment to call the modelContext to operate on the data and the dismiss to close the sheet.

In the action of the save button, we create a ProjectItem with a name and save it.

The process to create a pomodoro is a bit different:

import SwiftUI
import SwiftData

struct PomodoroView: View {
    @Environment(\.modelContext) private var modelContext
    @Environment(\.dismiss) private var dismiss
    @Query private var projects: [ProjectItem]
    @State var selectedProject: ProjectItem?
    @State var pomodoroName: String = ""
    
    var body: some View {
        VStack {
            Picker("Please choose a project", selection: $selectedProject) {
                            ForEach(projects) { project in
                                Text(project.name)
                                    .tag(Optional(project))
                            }
                        }
            TextField("Pomodoro name", text: $pomodoroName)
            Button("Start") {
                let pomodoro = PomodoroItem(start: Date(), end: Date(), project: selectedProject!, name: pomodoroName)
                modelContext.insert(pomodoro)
                dismiss()
            }
        }
    }
}

In this case, considering that every pomodoro has a project, we load all the projects and display the project names using a picker. Please note that in the picker, we use the tag with Optional (because we can select nothing). If we omit this, we get an error: “Picker: the selection ‘nil’ is invalid and does not have an associated tag, this will give undefined results.” If you tap on the picker, nothing happens.

For now, the start button doesn’t start anything, but we simply save the pomodoro by assigning a project name and the current date.

The code https://github.com/niqt/SavePomodoroApp

Note: English is not my native language, so I apologize for any errors. I use AI solely to generate the banner of the post; the content is human-generated.

Special Purpose Buttons in SwiftUI

In Swiftui we have three special purpose buttons:

  • EditButton
  • RenameButton
  • PasteButton

EditButton

Clicking on the EditButton, the items of the list are displayed with the delete (if onDelete is defined) and move (if onMove is defined) actions. Take a look at the code:

struct ContentView: View {
    var names = ["nicola", "tom"]
    @State private var pastedText: String = ""
    
    var body: some View {
        NavigationStack {
            List {
                ForEach (names, id:\.self) { name in
                    Text(name)
                    
                }
                .onDelete(perform: {_ in
                    
                })
                .onMove(perform: { indices, newOffset in
                    
                }) 
            }
            .toolbar {
                ToolbarItem(placement: .navigationBarTrailing) {
                    EditButton()
                }
            }
        }
    }
}

Very simple and powerful button.

RenameButton

The RenameButton is displayed as a pencil icon and triggers the rename action.

The code:

struct ContentView: View {
    var names = ["nicola", "tom"]
    @State private var pastedText: String = ""
    
    var body: some View {
        NavigationStack {
            List {
                ForEach (names, id:\.self) { name in
                    Text(name)
                }
            }
            .toolbar {
                ToolbarItem(placement: .navigationBarTrailing) {
                    RenameButton()
                }
            }.renameAction {
                // Your code
            }
        }
    }
}

PasteButton

Clicking on the PasteButton pastes the code that we copied earlier from another place (in this case, it was copied by X).

Take a look at the code:

struct ContentView: View {
    @State private var pastedText: String = "

    var body: some View {
        VStack {
            PasteButton(payloadType: String.self) { strings in
                pastedText = strings[0]
            }
            Divider()
            Text(pastedText)
            Spacer()
        }
    }
}

Thus, tapping the button pastes the item (in this case, a string, which is copied into a string variable).

If you want to copy and paste an image, the code is this:

import SwiftUI
import UniformTypeIdentifiers

struct ContentView: View {
    @State private var image: UIImage?

    var body: some View {
        VStack {
            PasteButton(supportedContentTypes: [UTType.image]) { info in
                for item in info {
                    item.loadObject(ofClass: UIImage.self) { item, error in
                        if let img = item as? UIImage {
                            image = img
                        }
                    }
                }
            }
            Divider()
            Image(uiImage: image ?? .init())
        }
        .padding()
    }
}

Happy buttons.

Note: English is not my native language, so I apologize for any errors. I use AI solely to generate the banner of the post; the content is human-generated.

User Notification in SwiftUI (A Simple Pomodoro Timer)

In this post, we will learn how to create a simple Pomodoro timer using user notifications. The goal is to start a 25-minute timer, and when it expires, we will see a notification on the home screen.

We follow these steps:

  • Define the user permission for local notifications.
  • Take a look at the user notification properties.
  • Implement the app.

Privacy and Permissions

First of all, we have to add the “Privacy – User Notifications Usage Description” to the Info.plist to define the reason for the user notification.

UserNotification

Second, how to declare a UserNotification:

UNUserNotificationCenter.current().requestAuthorization(options: [.alert, .badge, .sound]) { success, error in
        if success {
            let content = UNMutableNotificationContent()
            content.title = "Pomodoro elapsed"
            content.subtitle = "Take a break"
            content.sound = UNNotificationSound.default
            
            let trigger = UNTimeIntervalNotificationTrigger(timeInterval: Double(25 * 60), repeats: false)
            
            let request = UNNotificationRequest(identifier: UUID().uuidString, content: content, trigger: trigger)
            
            UNUserNotificationCenter.current().add(request)
        } else if let error {
            print(error.localizedDescription)
        }
    }

The first step is to request authorization. This will display a message asking for the user’s approval (only the first time, if the user accepts). If we get authorization, we create the content of the notification with a title, subtitle, and default sound. Next, we create a timer for the notification, create the request for the notification, and add it to the notification center. Note that we create a unique identifier for the notification using UUID().uuidString.

The pomodoro App

The last step is to add a timer to count the elapsed time (for the Pomodoro) and put everything together.

import SwiftUI
import UserNotifications

struct ContentView: View {
    @State var timer: Timer.TimerPublisher = Timer.publish(every: 1, on: .main, in: .common)
    let pomodoroLength = 25 * 60
    @State var counter = 0
    @State var timeString = "25:00"
    @State var hasPermission = false
    
    var body: some View {
        VStack(spacing: 10) {
            Button("Start pomodoro") {
                if hasPermission {
                    counter = 0
                    timeString = "25:00"
                    setTimer()
                    timer.connect()
                    
                    let content = UNMutableNotificationContent()
                    content.title = "Pomodoro elapsed"
                    content.subtitle = "Take a break"
                    content.sound = UNNotificationSound.default
                    
                    let trigger = UNTimeIntervalNotificationTrigger(timeInterval: Double(pomodoroLength), repeats: false)
                    
                    let request = UNNotificationRequest(identifier: UUID().uuidString, content: content, trigger: trigger)
                    
                    UNUserNotificationCenter.current().add(request)
                }
            }
            Text("\(timeString)").onReceive(timer, perform: { _ in
                counter += 1
                
                let remaining = pomodoroLength - counter
                let minutes = remaining / 60
                let secs = remaining % 60
                timeString = "\(minutes):\(secs)"
                if counter == pomodoroLength {
                    timer.connect().cancel()
                }
            })
        }.onAppear {
            UNUserNotificationCenter.current().requestAuthorization(options: [.alert, .badge, .sound]) { success, error in
                if success {
                    hasPermission = true
                } else if let error {
                    print(error.localizedDescription)
                }
            }
        }
    }
    func setTimer() {
        self.timer = Timer.publish(every: 1, on: .main, in: .common)
    }
}

We need to import UserNotifications, then define a timer, the Pomodoro length in seconds, the initial string minutes:seconds value, and a counter to count the elapsed time. We also introduce a hasPermission variable that is set when the application starts, so we don’t need to check the authorization every time.

When we tap on “Start Pomodoro”, the notification is created with its timer, and the counter is initialized. Every second, we calculate the remaining time and display it until it equals zero, then the timer is stopped. If everything is set up correctly, we should see a notification.

For testing, I suggest setting the Pomodoro time to a few seconds, but at least enough to lock the screen or switch applications (otherwise you won’t see the notification).

The code https://github.com/niqt/PomodoroApp

Note: English is not my native language, so I apologize for any errors. I use AI solely to generate the banner of the post; the content is human-generated.

Adding Events to the Calendar in SwiftUI Using Default UI (Calendar Series Part III)

In this post, we learn how to use the default view to add an event to the calendar without creating a new one, if we don’t need a customized view. I mean this (sorry, today I’m lazy and don’t want to change my phone’s language to English).

I advise you to take a look at the first post of this series to understand the fundamentals (I won’t repeat them here).

The first step is to create a controller for the view:

class EventUIController: UIViewController, EKEventEditViewDelegate {
    let eventStore = EKEventStore()
    
    func eventEditViewController(_ controller: EKEventEditViewController, didCompleteWith action: EKEventEditViewAction) {
        controller.dismiss(animated: true, completion: nil)
        parent?.dismiss(animated: true, completion: nil)
    }
    
    override func viewDidLoad() {
        super.viewDidLoad()
        Task {
            let response = try await self.eventStore.requestFullAccessToEvents()
            if response {
                let eventController = EKEventEditViewController()
                eventController.eventStore = self.eventStore
                eventController.editViewDelegate = self
                eventController.modalPresentationStyle = .overCurrentContext
                eventController.modalTransitionStyle = .crossDissolve
                self.present(eventController, animated: true, completion: nil)
            }
        }
    }
}

In the viewDidLoad method, we check for authorizations, and if everything is okay, we create the controller, assign the eventStore, set the delegate to itself, and finally, the view is displayed. Note that in this function, we use Task to allow the call of an async action. In another function, eventEditViewController, the dismiss action is managed.

To allow this controller to be used in SwiftUI, we need to have a UIViewControllerRepresentable:

struct EventRepresentable: UIViewControllerRepresentable {
    func makeUIViewController(context: Context) -> EventUIController {
        return EventUIController()
    }
    
    func updateUIViewController(_ uiViewController: EventUIController, context: Context) {
        // Only to be conform to the protocol
    }
}

Now we can call it from SwiftUI.

struct ContentView: View {
    @State var eventsManager = EventStoreManager()
    @State var isPresented = false
    
    var body: some View {
        NavigationStack {
            VStack {
                List(eventsManager.events, id:\.self) { event in
                    Text(event.title)
                }
            }
            .padding()
            .toolbar(content: {
                ToolbarItem(placement: .confirmationAction) {
                    Button("+") {
                        isPresented = true
                    }.font(.largeTitle)
                }
            })
            .sheet(isPresented: $isPresented, content: {
                EventRepresentable()
            })
        }.onAppear {
            Task {
                await loadEvents()
            }
        }.onChange(of: isPresented) {
            if !isPresented {
                Task {
                    await loadEvents()
                }
            }
        }
    }
    
    func loadEvents() async {
        do {
            try await eventsManager.setEventDate(date: Date())
        } catch {
            print("Error")
        }
    }
}

The code is 99% similar to that of the previous post; the only thing that changes is that now the sheet presents the default view instead of our custom view.

With this post, this series is complete (at least for now). Always remember to add permissions in the info.plist. Lastly, if you want to get the list of calendars in the calendar application, simply call the calendars function of the eventStore (this is necessary if you want to add an event to a particular calendar).

The code https://github.com/niqt/CalendarAppExample/tree/defaultEventView

To subscribe to my newsletter [https://nicoladefilippo.com/#mailinglist]

Note: English is not my native language, so I apologize for any errors. I use AI solely to generate the banner of the post; the content is human-generated.

Adding Events to the Calendar in SwiftUI (Calendar Series Part II)

We’ve learned (read-events-from-the-calendar-in-swiftui/ ) how to read calendar events. In this post, we’ll learn how to add an event to the calendar.

We’ll follow these steps:

  1. Add the logic to the events manager.
  2. Create a new view in the app to create an event with a title for the current date.

Let’s start by adding a new function, addEvent, in the EventStoreManager:

func addEvent(date: Date, title: String) {
        let event = EKEvent(eventStore: self.eventStore)
        event.calendar = eventStore.defaultCalendarForNewEvents
        event.title = title
        event.startDate = date
        event.endDate =  Calendar.current.date(byAdding: .hour, value: 1, to: date)
        
        do {
            try self.eventStore.save(event, span: .thisEvent, commit: true)
        } catch {
            print("Saving error \(error)")
        }
    }

(please get the code of the EventStoreManager from the previous post).

In this tutorial, we’ll create an event on a specified date. To simplify, we set the endDate by adding one hour to the startDate and set the title. However, pay special attention to the save function. We pass .thisEvent, which means it’s a single occurrence event and not recurring. The commit parameter is set to true, meaning the event is immediately saved, and we do not need to call the commit function later.

Now, let’s take a look at the ContentView:

struct ContentView: View {
    @State var eventsManager = EventStoreManager()
    @State var isPresented = false
    
    var body: some View {
        NavigationStack {
            VStack {
                List(eventsManager.events, id:\.self) { event in
                    Text(event.title)
                }
            }
            .padding()
            .toolbar(content: {
                ToolbarItem(placement: .confirmationAction) {
                    Button("+") {
                        isPresented = true
                    }.font(.largeTitle)
                }
            })
            .sheet(isPresented: $isPresented, content: {
                EventView()
            })
        }.onAppear {
            Task {
                await loadEvents()
            }
        }.onChange(of: isPresented) {
            if !isPresented {
                Task {
                    await loadEvents()
                }
            }
        }
    }
    
    func loadEvents() async {
        do {
            try await eventsManager.setEventDate(date: Date())
        } catch {
            print("Error")
        }
    }
}

Starting from the end, we see a loadEvent function that sets the date for which we want to load the events. This function is triggered when the view first appears and every time the sheet is closed.

The sheet contains the view to create the new event:

struct EventView: View {
    @State var title = ""
    @State var eventsManager = EventStoreManager()
    @Environment(\.dismiss) private var dismiss
    
    var body: some View {
        VStack {
            TextField("Event title", text: $title)
            Button("Save") {
                eventsManager.addEvent(date: Date(), title: title)
                dismiss()
            }
        }.padding()
    }
}

This view contains only a text field to add the event’s title and a button to call the addEvent function and close the sheet. If you have never used a sheet in SwiftUI, please take a look here https://nicoladefilippo.com/swiftui-sheets-demystified-episode-i/ .

The code can be improved with other best practices, but the purpose of this post is solely to demonstrate how to add an event to the calendar.

The code.

To subscribe to my newsletter [https://nicoladefilippo.com/#mailinglist]

Note: English is not my native language, so I apologize for any errors. I use AI solely to generate the banner of the post; the content is human-generated.