
Creating a Dynamic Christmas Tree with Decorations and Light Effects
In this blog, we’ll learn:
- how create geometric triangle.
- How create a tree using triangles.
- How use a timer to change the color of the Christmas tree decorations.
Shortly, we’ll create this (tree.mov):

Create the triangle
struct Triangle: Shape {
    func path(in rect: CGRect) -> Path {
        var path = Path()

        path.move(to: CGPoint(x: rect.midX, y: rect.minY)) // A
        path.addLine(to: CGPoint(x: rect.minX, y: rect.maxY)) // AB
        path.addLine(to: CGPoint(x: rect.maxX, y: rect.maxY)) // BC
        path.addLine(to: CGPoint(x: rect.midX, y: rect.minY)) // CA

        return path
    }
}
First, the triangle implements the Shape protocol and creates a triangular shape by drawing in this way (considering that we pass a rectangle/frame):
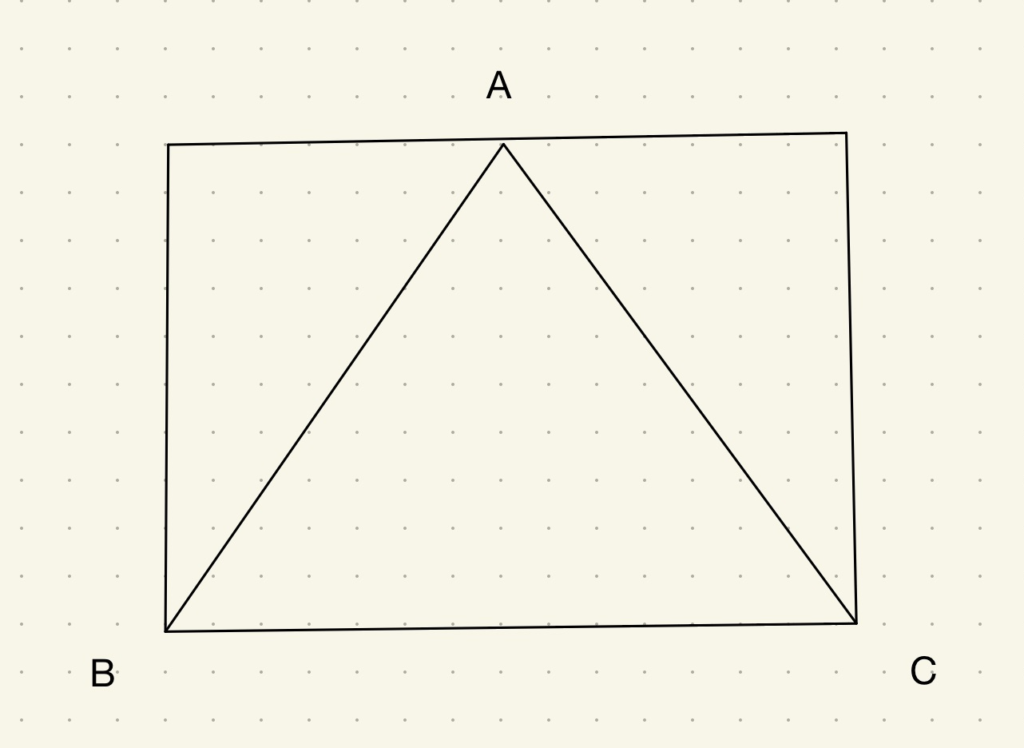
Remember that the coordinates start from the top of the screen.
Create the tree
We want to create a tree by overlapping triangles, similar to this Christmas tree
struct ContentView: View {
    var body: some View {
        ZStack {
            VStack(spacing: 0) {
                Image(systemName: "star")
                    .resizable()
                    .frame(width: 100, height: 100)
                    .foregroundStyle(.yellow)
                    .offset(y: 20)
                HStack(alignment: .bottom) {
                 Circle().background().foregroundStyle(.yellow).frame(width: 20, height: 20)
                    .offset(x: 10)
                    Triangle()
                        .frame(width: 260, height: 300)
                        .foregroundStyle(.green)
                    Circle().background().foregroundStyle(.yellow).frame(width: 20, height: 20)
                        .offset(x: -10)
                }
            }.offset(y: -50)
            HStack(alignment: .bottom) {
                Circle().background().foregroundStyle(.yellow).frame(width: 20, height: 20)
                    .offset(x: 10)
                Triangle()
                    .frame(width: 280, height: 300)
                    .foregroundStyle(.green)

                Circle().background().foregroundStyle(.yellow).frame(width: 20, height: 20)
                    .offset(x: -10)
            }.offset(y: 60)

            HStack(alignment: .bottom) {
                Circle().background().foregroundStyle(.yellow).frame(width: 20, height: 20)
                    .offset(x: 10)
                Triangle()
                    .frame(width: 300, height: 300)
                    .foregroundStyle(.green)

                Circle().background().foregroundStyle(.yellow).frame(width: 20, height: 20)
                    .offset(x: -10)
            }.offset(y: 120)
            HStack(alignment: .bottom) {
                Circle().background().foregroundStyle(.yellow).frame(width: 20, height: 20)
                    .offset(x: 10)
                Triangle()
                    .frame(width: 320, height: 300)
                    .foregroundStyle(.green)

                Circle().background().foregroundStyle(.yellow).frame(width: 20, height: 20)
                    .offset(x: -10)
            }.offset(y: 180)
            Rectangle()
                .frame(width: 20, height: 60)
                .foregroundStyle(.brown)
                .offset(y: 360)
        }
    }
}
(Don’t worry, I’ll provide the GitHub link at the end.)
Let’s explore how this code works:
- We use a ZStack to overlap the triangles.
- We start from the bottom by adding the trunk.
- Begin with the first triangle within an HStack, accompanied by two yellow circles representing the decorations. Everything is aligned at the bottom because we want to move the circles near the base of the triangle. We use the offset to position the circles, as well as to position the triangle.
- The other triangles are added by changing the offset and the size of each triangle.
- At the end (actually at the beginning of the code), we have a VStack that contains the first triangle with a star on top.
Now we have this:
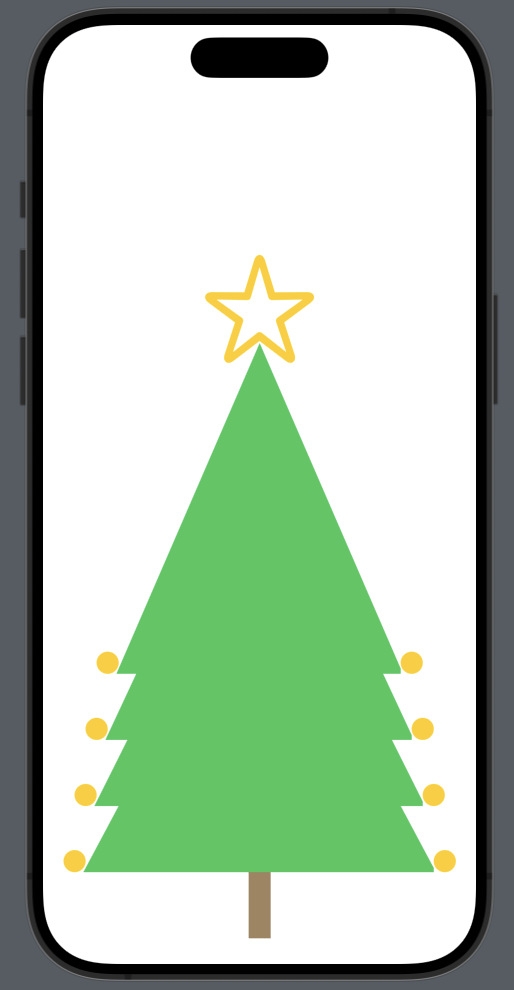
It’s not quite what we want yet, and the code could be improved. Let’s do some refactoring.
Use the timer
First, we create a view that contains a triangle with two decorations:
struct TriangleWidthDecoration: View {
    var triangleWidth: Double = 300
    var leftColorDecoration: Color = .yellow
    var rightColorDecoration: Color = .yellow
    let triangleHeight: Double = 300

    var body: some View {
        HStack(alignment: .bottom) {
            Image(systemName: "snowflake")
                .foregroundStyle(leftColorDecoration)
            .frame(width: 20, height: 20)
                .offset(x: 10)
            Triangle()
                .frame(width: triangleWidth, height: triangleHeight)
                .foregroundStyle(.green)
            Image(systemName: "snowflake")
                .foregroundStyle(rightColorDecoration)
                .frame(width: 20, height: 20)
                .offset(x: -10)
        }
    }
}
So, we define four properties:
- triangleWidth: the lenght of the base
- triangleHeight: the constant height of the triangle
- leftColorDecoration: the color of the decorarion on the left side
- rightColorDecoration: the color of the decoration on the right side
Note that now the decoration is a snowflake.
Now the main code is:
var body: some View {
        ZStack {
            VStack(spacing: 0) {
                Image(systemName: "star")
                    .resizable()
                    .frame(width: 100, height: 100)
                    .foregroundStyle(.yellow)
                    .offset(y: 20)
                TriangleWidthDecoration(triangleWidth: 260, leftColorDecoration: .yellow, rightColorDecoration: .yellow)

            }.offset(y: -50)
            ForEach(Array(widths.enumerated()), id: \.offset) { index, leaf in
                TriangleWidthDecoration(triangleWidth: Double(leaf), leftColorDecoration: .yellow, rightColorDecoration: .yellow)
                    .offset(y: 60 * Double( index + 1))
            }

            Rectangle()
                .frame(width: 20, height: 60)
                .foregroundStyle(.brown)
                .offset(y: 360)
        }
    }
Apart from the triangle on the top, the others are drawn using a ForEach loop, where for each triangle, the offset is calculated using the index (pay close attention to the ForEach definition). The width is obtained from this array:
var widths = [280, 300, 320]
The work is not yet complete because we want to achieve the effect of real Christmas lights, with random colors. Therefore, we add:
var widths = [280, 300, 320]
    let timer = Timer.publish(every: 1, on: .main, in: .common).autoconnect()
    var colors = [Color.red, Color.purple, Color.blue, Color.orange, Color.gray, Color.yellow, Color.cyan, Color.mint, Color.pink]
    var stars = ["star", "star.fill"]
    @State var indexStar = 0
    @State var currentColors = [Color]( repeating: .gray, count: 8 )
The timer is used to change the color every second.
- The colors: a list of colors that can be used for the decorations.
- The stars: contains the possible images for the star.
- The indexStar: contains the index of the current image used for the star.
- The currentColors: contains the current colors (note that there are eight, four per side).
The timer run in the main thread because work in the GUI side and with the .common option because work alongside with common events.
The code now is:
var body: some View {
        ZStack {
            Color.black.frame(maxWidth: .infinity, maxHeight: .infinity).opacity(0.9).edgesIgnoringSafeArea(.all)
            VStack(spacing: 0) {
                Image(systemName: stars[indexStar])
                    .resizable()
                    .frame(width: 100, height: 100)
                    .foregroundStyle(.yellow)
                    .offset(y: 20)
                TriangleWidthDecoration(triangleWidth: 260, leftColorDecoration: currentColors[3], rightColorDecoration: currentColors[7])

            }.offset(y: -50)
            ForEach(Array(widths.enumerated()), id: \.offset) { index, leaf in
                TriangleWidthDecoration(triangleWidth: Double(leaf), leftColorDecoration: currentColors[index], rightColorDecoration: currentColors[index * 2])
                    .offset(y: 60 * Double( index + 1))
            }

            Rectangle()
                .frame(width: 20, height: 60)
                .foregroundStyle(.brown)
                .offset(y: 360)
        }.onReceive(timer) { _ in
            shuffleColor()
            self.indexStar = (self.indexStar + 1) % 2
        }
    }
The color for the decorations is taken from the currentColors array, using the index. Every second, the colors are remixed using the shuffleColor function, and the image of the star is changed because the indexStar is updated (there are only two possible values: 0 or 1).
The timer event is captured using the onReceive with the timer (we use the underscore because we don’t need the timer’s value).
The shuffle functions is:
func shuffleColor() {
        for i in 0..<currentColors.count {
            currentColors[i] = colors[Int.random(in: 0..<9)]
        }
    }
Finally, at the beginning of the ZStack, a dark background is set.
https://github.com/niqt/swift/tree/master/ChristmasTree
That’s all.
Note: English is not my native language, so I’m sorry for some errors. I appreciate if your correct me.
1 thought on “Timer and Shape in SwiftUI”