Customize buttons in SwiftUI

In iOS, the size of buttons is typically proportional to the text or icon they contain. However, in some cases, we need buttons of uniform size. How can we achieve this? In this post, we’ll learn how to:

  • Create button with the same size
  • Create custom buttons

Buttons with the same size

The first thing we can try is this:

Button("Button") {
                // your action
            }
            .frame(maxWidth: 300, maxHeight: 60)
            .background(.purple)
            .cornerRadius(10)
            .overlay {
                RoundedRectangle(cornerRadius: 10)
                    .stroke(.red, lineWidth: 2)
            }

Therefore, create buttons with the same maxWidth and maxHeight to achieve something like this:

It can look good (apart from the colors), but there is a problem. If you click on the ‘Button’ label, you see the tapped effect and the action is executed. However, if you tap outside of the text, nothing happens. This is not ideal.

Let’s take a look at a possible solution:

Button(action: {}) {
                Text("Button")
                    .frame(maxWidth: 300, maxHeight: 60)
                    .background(.purple)
                    .cornerRadius(10)
                    .overlay {
                        RoundedRectangle(cornerRadius: 10)
                            .stroke(.red, lineWidth: 2)
                    }
            }

So, we now assign the action as a parameter of the Button, and the component is created within the button’s body.

Create custom buttons

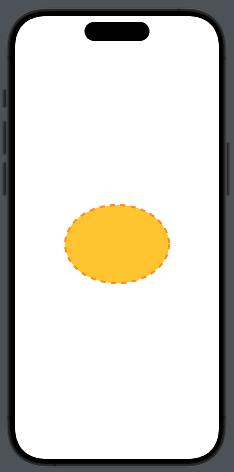
Using the code we discussed earlier, we can create buttons in a multitude of ways; the only limit is our imagination (more or less):

Button(action: {}) {
                Text("Button")
                    .frame(maxWidth: 200)
                    .fontWeight(.bold)
                    .font(.title)
                    .padding()
                    .background(LinearGradient(gradient: Gradient(colors: [Color.red, Color.blue]), startPoint: .leading, endPoint: .trailing))
                    .cornerRadius(40)
                    .foregroundStyle(.white)
                    .padding(10)
                    .overlay(
                        RoundedRectangle(cornerRadius: 40)
                            .stroke(Color.red, lineWidth: 5)
                )
            }

In this case, we set a width, choose the font, select the text color, apply a gradient background, and add a border with a gap.

Now, feel free to create your custom buttons, but remember not to ruin the user experience with strange designs.

Shape, Stroke and Dash in SwiftUI

In this post we’ll learn how to:

  • Create a shape with stroke
  • Create a dashed stroke
  • Create a dashed line

Create a shape with stroke

Begin by creating a yellow ellipse with an orange border:

struct ContentView: View {
    var body: some View {
        VStack {
            Ellipse()
                .stroke(style: StrokeStyle(lineWidth: 4))
                .foregroundStyle(.orange)
                .background(Ellipse().fill(.yellow))
                .frame(width: 200, height: 150)
        }
    }
}

We start by creating an ellipse, then add a border with a lineWidth of four. Next, set the color for the stroke, followed by adding a yellow ellipse as the background. Finally, set the dimensions for the entire shape.

We can have the same result with this code:

VStack {
            Ellipse()
                .strokeBorder(.orange, lineWidth: 4)
                .background(Ellipse().fill(.yellow))
                .frame(width: 200, height: 150)
        }

Create a stroke dashed

So, why do we need the StrokeStyle? It’s used to create a dashed stroke:

The code:

Ellipse()
                .stroke(style: StrokeStyle(lineWidth: 4, dash: [10]))
                .foregroundStyle(.orange)
                .background(Ellipse().fill(.yellow))
                .frame(width: 200, height: 150)

We can observe a new parameter, dash. It’s an array that contains the sizes of the dashes and spaces. For example, with dash[10, 2], we get:

We can achieve the same result as in the first example by overlapping the ellipse using a ZStack:

ZStack {
                Ellipse()
                    .strokeBorder(.red, lineWidth: 2)
                    .frame(width: 200, height: 150)
                Ellipse()
                    .foregroundStyle(.yellow)
                    .padding(2)
                    .frame(width: 200, height: 150)
            }

In this case, the second ellipse has padding equal to the lineWidth of the first one.

Create a line (dashed)

In SwiftUI, a Line shape doesn’t exist natively, so we have to create it using the Shape protocol:

struct Line: Shape {
    var y2: CGFloat = 0.0
    func path(in rect: CGRect) -> Path {
        var path = Path()
        path.move(to: CGPoint(x: 0, y: 0))
        path.addLine(to: CGPoint(x: rect.width, y: y2))
        return path
    }
}

The line is drawn inside a virtual rectangle; by default, it is horizontal. However, if we pass a value for y2, we get an inclined line.

struct ContentView: View {
    var body: some View {
        HStack {
            Spacer(minLength: 20)
            Line()
                   .stroke(style: StrokeStyle(lineWidth: 1, dash: [5]))
                   .foregroundStyle(.orange)
                   .frame(height: 1)
            Spacer(minLength: 10)
        }
    }
}

That’all for this post.

Map in SwiftUI (Episode V)

In this fifth and final episode of our series on Maps in SwiftUI, we’ll learn how to:

  1. Draw the route
  2. Calculate the travel time
  3. Change the transport type

As usual, let’s start from the beginning.

In the code, we set the starting point at Infinite Loop and the ending point at Apple Park. By clicking on the car icon, we change the transport type to walking.

Now, let’s begin analyzing the declarations in the view:

struct RouteView: View {
    @State private var route: MKRoute?
    @State private var formattedTravelTime: String = ""
    @State private var transportType: MKDirectionsTransportType = .automobile
    private let infiniteLoop = CLLocationCoordinate2D(latitude: 37.33218745278164, longitude: -122.03010316931332)
    private let applePark = CLLocationCoordinate2D(latitude: 37.33536036460403, longitude: -122.00901491534331)
    private let images = [MKDirectionsTransportType.automobile.rawValue: "car", MKDirectionsTransportType.walking.rawValue: "figure.walk"]
.
.
.

The route will contain the polyline of the route, while formattedTravelTime holds the time needed to complete the journey. transportType contains the mode of transportation used for the journey (in this example, we use only automobile and walking). infiniteLoop and applePark are the two points of interest that we want to connect. The images variable contains a dictionary with two elements, each representing the image name used for the transport type.

var body: some View {
        Map {
            if let route {
                MapPolyline(route.polyline)
                    .stroke(.blue, lineWidth: 8)
            }
        }
        .overlay(alignment: .bottom, content: {
            HStack {
                Text("Travel time: \(formattedTravelTime)")
                    .font(.headline)
                    .foregroundStyle(.black)
                    .fontWeight(.bold)
                    
                Button(action: {
                    if transportType == .automobile {
                        transportType = .walking
                    } else {
                        transportType = .automobile
                    }
                    fetchRouteFrom(infiniteLoop, to: applePark)
                }, label: {
                    Image(systemName: images[transportType.rawValue] ?? "questionmark.app")
                })
            }.padding()
            .background(.ultraThinMaterial)
            .cornerRadius(15)
        })
        .onAppear(perform: {
            fetchRouteFrom(infiniteLoop, to: applePark)
        })
    }

With this code, we display a map and, if not nil, the route as a polyline. The route is calculated by the fetchRouteFrom function. This function is called when the view is displayed and every time we tap on the transport type button. Next to the button, the required travel time is also displayed.

Now, let’s take a look at the functions used:

private func fetchRouteFrom(_ source: CLLocationCoordinate2D, to destination: CLLocationCoordinate2D) {
        let request = MKDirections.Request()
        request.source = MKMapItem(placemark: MKPlacemark(coordinate: source))
        request.destination = MKMapItem(placemark: MKPlacemark(coordinate: destination))
        request.transportType = transportType
        
        Task {
            let result = try? await MKDirections(request: request).calculate()
            route = result?.routes.first
            if let time = travelTime() {
                formattedTravelTime = time
            } else {
                formattedTravelTime = "unknown"
            }
            
        }
    }

These functions receive the coordinates of the two points as parameters. A request to MKDirections is created, setting the placemarks for the source and destination, as well as the transport type.

Following this, we calculate the route, retrieve the first available route, and then calculate the travel time with:

private func travelTime() -> String? {
        guard let route else { return nil}
        let formatter = DateComponentsFormatter()
        formatter.unitsStyle = .abbreviated
        formatter.allowedUnits = [.hour, .minute]
        return formatter.string(from: route.expectedTravelTime)
    }

In this function, we obtain the travel time using route.expectedTravelTime and format it with a formatter.

Now, let’s put everything together:

import SwiftUI
import MapKit

struct ContentView: View {
    @State private var route: MKRoute?
    @State private var formattedTravelTime: String = ""
    @State private var transportType: MKDirectionsTransportType = .automobile
    private let infiniteLoop = CLLocationCoordinate2D(latitude: 37.33218745278164, longitude: -122.03010316931332)
    private let applePark = CLLocationCoordinate2D(latitude: 37.33536036460403, longitude: -122.00901491534331)
    private let images = [MKDirectionsTransportType.automobile.rawValue: "car", MKDirectionsTransportType.walking.rawValue: "figure.walk"]
    
    var body: some View {
        Map {
            if let route {
                MapPolyline(route.polyline)
                    .stroke(.blue, lineWidth: 8)
            }
        }
        .overlay(alignment: .bottom, content: {
            HStack {
                Text("Travel time: \(formattedTravelTime)")
                    .font(.headline)
                    .foregroundStyle(.black)
                    .fontWeight(.bold)
                    
                Button(action: {
                    if transportType == .automobile {
                        transportType = .walking
                    } else {
                        transportType = .automobile
                    }
                    fetchRouteFrom(infiniteLoop, to: applePark)
                }, label: {
                    Image(systemName: images[transportType.rawValue] ?? "questionmark.app")
                })
            }.padding()
            .background(.ultraThinMaterial)
            .cornerRadius(15)
        })
        .onAppear(perform: {
            fetchRouteFrom(infiniteLoop, to: applePark)
        })
    }
    private func fetchRouteFrom(_ source: CLLocationCoordinate2D, to destination: CLLocationCoordinate2D) {
        let request = MKDirections.Request()
        request.source = MKMapItem(placemark: MKPlacemark(coordinate: source))
        request.destination = MKMapItem(placemark: MKPlacemark(coordinate: destination))
        request.transportType = transportType
        
        Task {
            let result = try? await MKDirections(request: request).calculate()
            route = result?.routes.first
            if let time = travelTime() {
                formattedTravelTime = time
            } else {
                formattedTravelTime = "unknown"
            }
            
        }
    }
        
    private func travelTime() -> String? {
        guard let route else { return nil}
        let formatter = DateComponentsFormatter()
        formatter.unitsStyle = .abbreviated
        formatter.allowedUnits = [.hour, .minute]
        return formatter.string(from: route.expectedTravelTime)
       
    }
}

With this episode, our series on maps is now complete.

Stay tuned and follow me for upcoming topics.

Map in SwiftUI (episode IV – Search Around)

In this episode, we’ll learn how to conduct a search on the map. Our objective is to achieve something like this:

Therefore, by typing in a text field what we want to search for, the points of interest found will be displayed on the map. In the example, I typed Shop, but you can type anything else.

The Map

Let’s start by looking at the view that contains the map:

import SwiftUI
import MapKit

struct ContentView: View {
    @State var position: MapCameraPosition = .userLocation(fallback: .automatic)
    @State private var searchResults = [SearchResult]()
    @State private var selectedLocation: SearchResult?
    @State private var searchText: String = ""
    
    var body: some View {
        VStack {
            TextField("Search", text: $searchText)
            .onSubmit {
                Task {
                    // searchResults = 
                }
            }.padding()
            Map(position: $position, selection: $selectedLocation) {
                ForEach(searchResults) { result in
                    Marker(coordinate: result.location) {
                        Image(systemName: "mappin")
                        Text(result.name)
                    }
                    .tag(result)
                }
            }
        }
    }
}
  • The position variable contains the user’s current location.
  • searchResults holds the results of the search.
  • selectedLocation stores the marker that has been selected (the item chosen from the search results).
  • searchText is the text input used for the query.

When the user submits the search string, the search function is called. The map centers on position (which, in this case, is the user’s location), and selectedLocation is updated when a marker is tapped.

Using ForEach, we add all the searched points of interest to the map.

The Search

Now, let’s take a look at the search logic.

First, let’s define the structure used in the search:

struct SearchResult: Identifiable, Hashable {
    let id = UUID()
    let location: CLLocationCoordinate2D
    let name: String
    
    static func == (lhs: SearchResult, rhs: SearchResult) -> Bool {
        lhs.id == rhs.id
    }

    func hash(into hasher: inout Hasher) {
        hasher.combine(id)
    }
}

So, we implement the Identifiable protocol to have a unique identifier and the Hashable protocol to enable the use of this type of item as a selection on the Map.

Now, let’s focus on the core of the logic:

func search(with query: String, coordinate: CLLocationCoordinate2D? = nil) async throws -> [SearchResult] {
        let mapKitRequest = MKLocalSearch.Request()
        mapKitRequest.naturalLanguageQuery = query
        mapKitRequest.resultTypes = .pointOfInterest
        if let coordinate {
            mapKitRequest.region = .init(.init(origin: .init(coordinate), size: .init(width: 1, height: 1)))
        }
        let search = MKLocalSearch(request: mapKitRequest)

        let response = try await search.start()

        return response.mapItems.compactMap { mapItem in
            guard let location = mapItem.placemark.location?.coordinate else { return nil }

            return .init(location: location, name: mapItem.placemark.name ?? "")
        }
    }

This function receives the search string and coordinates for the search location as input (if ‘nil’, the current location is used), and it returns an array of SearchResult.

In the function, we create a request specifying that we use natural language and that our aim is to search for points of interest.

After that, we remove any points of interest with ‘nil’ coordinates and instead create SearchResult entity by adding coordinate and name.

That’s all.

Map in SwiftUI (episode III – Look Around)

In this episode, we’ll learn how to use the LookAround feature in our applications. To summarize, we will cover:

  1. How to select a marker on the map
  2. How to display the 3D landscape of the selected marker

Starting from the end, we aim for this:

And by tapping on Look Around:

We’ll use the same points as in the previous example [https://nicoladefilippo.com/map-in-swiftui-episode-ii/], and we’ll also incorporate a Sheet for detailed explanations [https://nicoladefilippo.com/swiftui-sheets-demystified-episode-i/].

Select a Marker

struct ContentView: View {
    @State var position: MapCameraPosition = .region(MKCoordinateRegion(
        center: .init(latitude: 37.554169, longitude: -122.313057),
        span: .init(latitudeDelta: 0.7, longitudeDelta: 0.7)
    ))
    
    @State var placeSelected: Int?
    
    var places = [Place(name: "Berkeley", coordinates: CLLocationCoordinate2D(latitude: 37.8715, longitude: -122.2730)), Place(name: "Stanford", coordinates: CLLocationCoordinate2D(latitude: 37.4280, longitude: -122.1697))]
    
    var body: some View {
        VStack{
            Map(position: $position, selection: $placeSelected) {
                ForEach(Array(places.enumerated()), id: \.offset) { index, place in
                    Marker(place.name, coordinate: place.coordinates)
                        .tint(.orange)              
                }
            }
        }
    }

Let’s begin by setting the position (the initial center of the map) in San Mateo, CA. We’ll declare a variable placeSelected that will contain the index of the selected marker, and an array of places, where each place is defined as follows:

struct Place: Identifiable {
    let id = UUID()
    var name: String
    var coordinates: CLLocationCoordinate2D = .init(latitude: 0.0, longitude: 0.0)
}

The placeSelected variable is optional because it can assume a nil value, not only at the beginning but also when tapping on different places on the map apart from the markers.

Therefore, the map is declared by passing the initial position and the selectedPlace.

If you noticed, in the second image the selected balloon is larger. If we also want to change its color, we can use a function like this:

func getColor(_ index: Int, _ selected: Int?) -> Color {
   if selected != nil && selected! == index{
       return .blue
   }
   return .orange
}

…and use it in the tint setting:

Marker(place.name, coordinate: place.coordinates)
.tint(getColor(index, placeSelected))

Show the 3D landscape of the selected marker

First, let’s create the sheet that contains a preview of the LookAround feature:

struct SheetUIView: View {
    @State private var lookAroundScene: MKLookAroundScene?
    var selectedPlace: Place
    var body: some View {
        LookAroundPreview(initialScene: lookAroundScene)
        .onAppear {
            lookAroundScene = nil
            Task {
                let request = MKLookAroundSceneRequest(coordinate: selectedPlace.coordinates)
                lookAroundScene = try? await request.scene
            }
        }
    }
}

This view declares a lookAroundScene that contains the scene. This variable is set by calling a request to MKLookAroundSceneRequest. This operation is executed in a Task to avoid freezing the application.

Now, let’s see how to use this view:

@State var isPresented: Bool = false
    var body: some View {
        VStack{
            Map(position: $position, selection: $placeSelected) {
                ForEach(Array(places.enumerated()), id: \.offset) { index, place in
                        Marker(place.name, coordinate: place.coordinates)
                        .tint(.orange)
                }
            }
        }.sheet(isPresented: $isPresented, content: {
            SheetUIView(selectedPlace: places[placeSelected!])
                .presentationDetents([.fraction(0.4)])
        })
        .onChange(of: placeSelected) {
            guard placeSelected != nil else { return }
                isPresented = true
        }
    }

First, we added an isPresented variable; when it’s true, the sheet is displayed. Using .presentationDetents([.fraction(0.4)]), we set the height of the sheet to 40% of the screen height. This view receives the selected place as a parameter.

The event of placeSelected being changed is captured by onChange. Here, we verify that the variable is not nil, and only in this case isPresented becomes true, causing the sheet to appear.

Another method to present the LookAround feature could be as follows

var body: some View {
        VStack{
            Map(position: $position, selection: $placeSelected) {
                ForEach(Array(places.enumerated()), id: \.offset) { index, place in
                        Marker(place.name, coordinate: place.coordinates)
                        .tint(.orange)
                }
            }
        }.safeAreaInset(edge: .bottom) {
            HStack {
                Spacer()
                VStack(spacing: 0) {
                    if isPresented {
                        SheetUIView(selectedPlace: places[placeSelected!])
                        .frame(height: 128)
                        .clipShape(RoundedRectangle(cornerRadius: 10))
                        .padding([.top, .horizontal])
                        }
                    }
            }
            Spacer()
        }
        .onChange(of: placeSelected) {
            guard placeSelected != nil else { return }
                isPresented = true
        }
    }

This time, we display the preview of the LookAround feature at the bottom of the screen, not using a sheet dialog, but by inserting the SheetView into the safe area. Here, the view has rounded corners and a fixed height, as shown in the screen:

That’s all for this episode.